
Asus ROG ZX50VW-BH17N10 CD Drive Replacement
Introducción
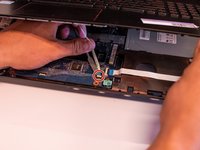
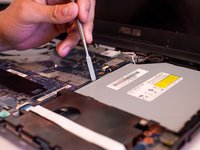
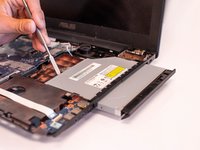
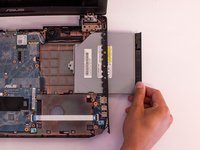
Ir al paso 1The CD drive is a component that is susceptible to fail overtime. Generally, a failing CD drive makes clicking sounds, and the disks inserted cannot be read by the computer. If your CD drive is no longer reading the CD disk or making clicking sounds, it might be time to replace the CD drive. This guide will walk you through the steps needed to remove the CD drive from your device.
Qué necesitas


-
-
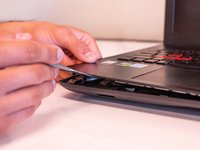
Remove the 9 mm and 16 mm screws on the back panel using the Philips #1 screw driver.
-
-


To reassemble your device, follow these instructions in reverse order.
To reassemble your device, follow these instructions in reverse order.
Equipo

Embry-Riddle Aeronautical University, Team S15-G3, Lamothe Fall 2019 Miembro de Embry-Riddle Aeronautical University, Team S15-G3, Lamothe Fall 2019
ERAU-LAMOTHE-F19S15G3
4 Miembros
6 Guías creadas