
Asus G74SX-BBK7 Optical Drive Replacement
Introducción
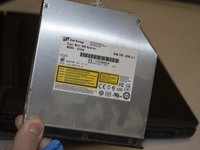
Ir al paso 1This guide will teach you how to replace the optical drive in your Asus. An optical drive is responsible for reading media discs like CDs and DVDs, so knowing how to replace it is important. If your computer won't properly read discs or is not functioning, you may need to replace the optical drive. This guide will give you the tools to do so.
Qué necesitas
Partes

Herramientas


Ver más…
-
-
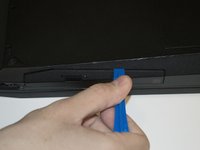
Using a flathead screwdriver, spudger, or large coin such as a quarter, remove the 13mm screw on the bottom of the laptop.
-
Take off the back panel.
-
-


To reassemble your device, follow these instructions in reverse order.
To reassemble your device, follow these instructions in reverse order.
Cancelar: No complete esta guía.
4 personas más completaron esta guía.
Equipo

Cal Poly, Team 5-10, Maness Spring 2015 Miembro de Cal Poly, Team 5-10, Maness Spring 2015
CPSU-MANESS-S15S5G10
4 Miembros
6 Guías creadas