
Asus Chromebook C300MA-DB01 Keyboard Replacement
2 minuto
Muy fácil
Introducción
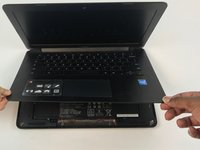
Ir al paso 1If your keyboard is not working this guide will be very useful. There is not much that can go wrong with this but as always be wary when unplugging wires as to avoid tearing.
Qué necesitas
Partes
Herramientas


Ver más…
iFixit gana una comisión si finalizas una compra usando estos enlaces.
-
-
-
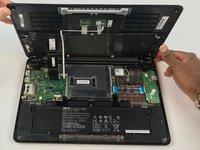
Use plastic opening tool to pry open clip holding keyboard wires to the circuitboard.
-


Casi Terminas!
To reassemble your device, follow these instructions in reverse order.
Conclusión
To reassemble your device, follow these instructions in reverse order.
Equipo

USF Tampa, Team S4-G3, Eyestone Fall 2017 Miembro de USF Tampa, Team S4-G3, Eyestone Fall 2017
USFT-EYESTONE-F17S4G3
3 Miembros
12 Guías creadas