
Asus Chromebook C202 Battery Replacement
Introducción
Ir al paso 1The following guide supplies information to replace a faulty battery in your ASUS Chromebook C202.
The battery supplies power to the Chromebook and allows usage without a power cord. The Chromebook has the capability to work off of the battery life for a period of time. While typically a battery source can lose power at a fast rate, if you notice the battery life span to be quickly fading, it probably needs replacement.
Before using the guide, troubleshoot the charging capacity of the battery to determine if in fact the battery is defaulted.
A battery does have the capability of fire so take appropriate steps and precautions. Before starting the process of replacing the battery power down the Chromebook.
As a note, in step 3, be gentle when handling the ribbon connected to the motherboard.
Qué necesitas


-
-
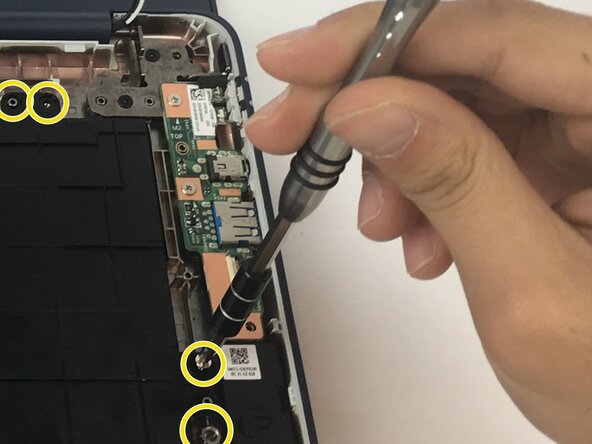
Remove Phillips #1 screws from the bottom of the Chromebook using a Phillips #1 screwdriver.
-
Ten 8 mm screws
-
Two of the screws are hidden by rubber caps along the rubber rest of the device. Use tweezers to get them out.
-
-
Herramienta utilizada en este paso:iFixit Opening Tool$1.99
-
Place the plastic opening tool into the edges between the front of the Chromebook and the back of it with the upper scoop of the opening tool facing upward.
-
Push down on the plastic opening tool to unhinge the top portion of the Chromebook from its lower portion. Opening the Chromebook all the way where the display touches the ground helps in opening up the top edge.
-
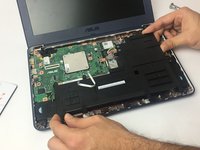
Use your hand to gently lift the top portion of the Chromebook from the bottom portion of it to avoid damaging the ribbon cables.
-
-
-
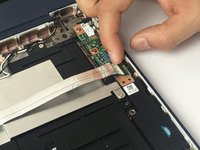
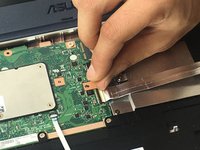
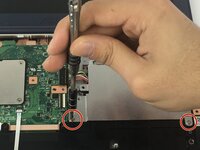
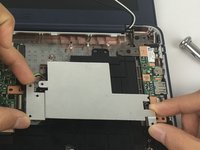
Pull the latch out on both the Input/Output board as well as the motherboard.
-
Gently remove the ribbon cable connecting the I/O board to the motherboard.
-


To reassemble your device, follow these instructions in reverse order.
To reassemble your device, follow these instructions in reverse order.
Cancelar: No complete esta guía.
4 personas más completaron esta guía.
Equipo

USF Tampa, Team 3-1, Passmore Fall 2016 Miembro de USF Tampa, Team 3-1, Passmore Fall 2016
USFT-PASSMORE-F16S3G1
4 Miembros
16 Guías creadas
2 comentarios
Worked great. Was able to order a replacement battery for my daughter’s two year old Chromebook. $39.99 and relatively easy to swap out.
You did such a great job writing this documentation. I would not consider myself to be good at taking apart things and putting them back together again but your amazing pictures showing each step of the process gave me the confidence to try it myself! It was perfect and exactly what I needed to get this switched out!