
Apple Thunderbolt Display LCD Replacement
Introducción
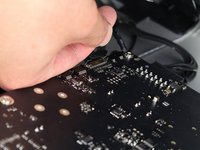
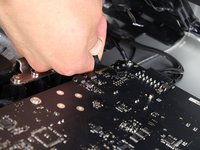
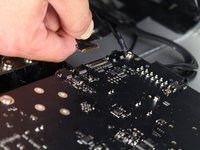
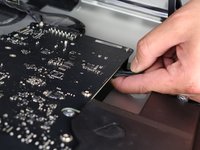
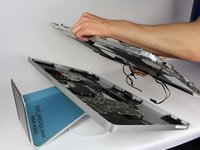
Ir al paso 1The LCD in the Apple Thunderbolt Display is the very first part that will have to be taken out no matter what piece inside this device has to be replaced. Because of this, it is essential to know how to carefully remove the LCD from the device. Something that should be noted is that even after screws are removed, don't hastily try pulling the LCD out of its casing because it is still connected to the power and logic board of the display! Once the new screen is in place, make sure that everything is connected like the original LCD was and your device should be as good as new!
Qué necesitas


-
-
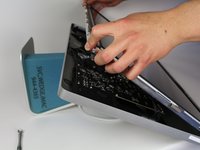
Lay down the display with screen side up.
-
Place the two suction cups on both sides of the top of the screen and make sure to lock them in place.
-
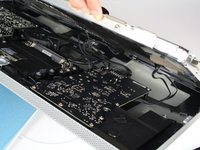
The glass screen is connected to the rest of the display by small magnets. Lift slowly and the screen will come right off.
-
-


To reassemble your device, follow these instructions in reverse order.
To reassemble your device, follow these instructions in reverse order.
Cancelar: No complete esta guía.
28 personas más completaron esta guía.
Equipo

Cal Poly, Team 5-11, Maness Spring 2015 Miembro de Cal Poly, Team 5-11, Maness Spring 2015
CPSU-MANESS-S15S5G11
4 Miembros
19 Guías creadas
13 comentarios
Love your site! Proved very helpful on multiple occasions and your products are fantastic!
Forgive my ignorance...
Is it possible to (1) Are any of the components of Thunderbolt Display upgrade-able? .... (2) There appears to be plenty of real-estate, can a Thunderbolt Display be turned into mac and/or pc? ... (3) Any way to upgrade to USB 3.0/3.1?...
I like tinkering with electronics and don't mind the complexities or if necessary getting parts, just wondering if any of these are possible and if so, can you give a clue as to where I can find more info... Thank You.
Would like to see a continuation of what it takes to replace the Thunderbolt cable that is attached to the back of the display