
Acer Aspire 5742 Hard drive Replacement

Introducción
Ir al paso 1An ageing hard drive can be a symptom of a slow or unbootable laptop as its error correction logic has to work harder and harder. Fitting a solid state drive (SSD) instead can make your laptop run faster even than when it was new.
Qué necesitas
Herramientas


-
-
Move the battery catch to the "unlocked" position.
-
Pull back the second spring-loaded battery catch until the battery pops up.
-
Remove the battery.
-
-
-
Turn the notebook around to face you.
-
There are two Phillips #00 screws securing the cover panel to the rest of the notebook. Remove these screws.
-
-
-
-
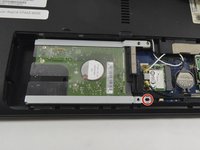
Unscrew the Phillips #00 screw which retains the hard drive in place.
-
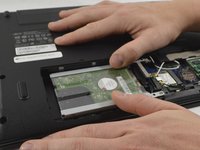
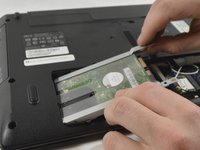
Gently slide the hard drive to the left in order to disengage the SATA connectors.
-
Lift the drive out of the notebook.
-
-
-
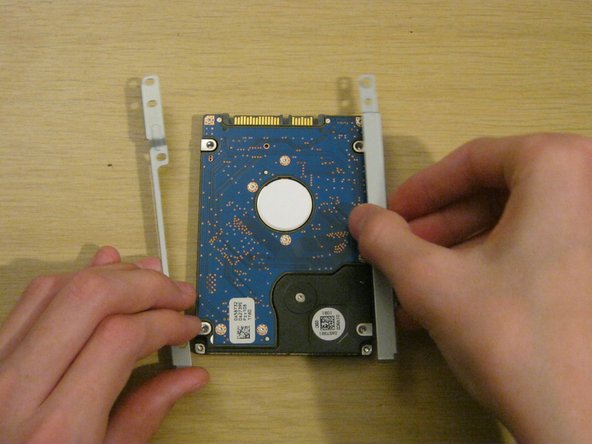
There is a small metal bracket on either side of the hard drive, with two small silver-coloured Phillips #00 screws securing the bracket to the drive on each side.
-
Unscrew the 2 screws on each side.
-
-
-
When installing a replacement hard drive (or SSD), take care to attach the brackets to the drive the same way round as they were on the old drive otherwise the SATA connector won't mate.
-
Replace the 4 screws securing the brackets.
-
Replace the drive in the laptop and slide it into position, ensuring that the SATA connector is fully mated.
-
Replace the retaining screw holding the drive in position. Take care to insert it into the correct hole otherwise it will be impossible to insert the cover screws.
-


To reassemble your device, follow these instructions in reverse order.
To reassemble your device, follow these instructions in reverse order.
Cancelar: No complete esta guía.
2 personas más completaron esta guía.

Equipo
