Saltar al contenido principal
ASUS ZenPad S 8.0 Motherboard Replacement

ASUS ZenPad S 8.0 Motherboard Replacement

Jessica Voss

Jessica Voss y 3 otros contribuidores

Última actualización: May 7, 2024

5 minuto
Moderado

Introducción

Ir al paso 1

Once you have removed the battery you will be able to remove the motherboard from your device. Make sure the battery is completely removed before working on the motherboard as to prevent shorts in the circuitry As a precautions ground yourself to prevent frying the internal components. Also make sure to keep track of screws and label them.

Qué necesitas

Herramientas

Ver más…

  1. ASUS ZenPad S 8.0 Motherboard Replacement, Rear Cover Removal: paso 1, imagen 1 de 3 ASUS ZenPad S 8.0 Motherboard Replacement, Rear Cover Removal: paso 1, imagen 2 de 3 ASUS ZenPad S 8.0 Motherboard Replacement, Rear Cover Removal: paso 1, imagen 3 de 3
    • if present, remove the MicroSD card before disassembly. Failure to remove could lead to damage to the MicroSD card , rear cover, or MicroSD card slot.

    • Use the plastic tool to pry between the silver bezel and the back case

    • Work the tool around the device to free the back case

  2. ASUS ZenPad S 8.0 Motherboard Replacement: paso 2, imagen 1 de 2 ASUS ZenPad S 8.0 Motherboard Replacement: paso 2, imagen 2 de 2
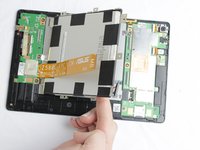
    • Remove the ribbon cables by lifting up the white retaining flap on the ZIF connectors, then pulling the ribbon cable away.

    • Do not kink the ribbon cables as they can break easily

  3. ASUS ZenPad S 8.0 Motherboard Replacement: paso 3, imagen 1 de 3 ASUS ZenPad S 8.0 Motherboard Replacement: paso 3, imagen 2 de 3 ASUS ZenPad S 8.0 Motherboard Replacement: paso 3, imagen 3 de 3
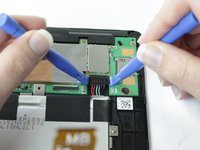
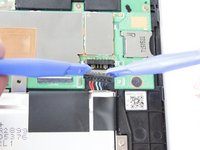
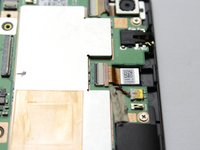
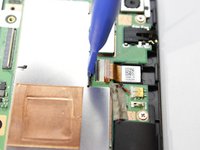
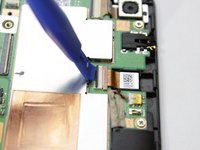
    • Remove the battery connector by prying it up away from the device using 2 plastic pry tools

  4. ASUS ZenPad S 8.0 Motherboard Replacement: paso 4, imagen 1 de 2 ASUS ZenPad S 8.0 Motherboard Replacement: paso 4, imagen 2 de 2
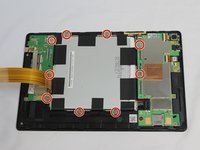
    • Remove all 9 of the 1.5mm #00 Philips screws

    • Gently lift the battery out of the device

    • Use an opening pick or similar tool to separate the adhesive on the bottom and top of the battery.

  5. ASUS ZenPad S 8.0 Motherboard Replacement, Front Facing Camera: paso 5, imagen 1 de 3 ASUS ZenPad S 8.0 Motherboard Replacement, Front Facing Camera: paso 5, imagen 2 de 3 ASUS ZenPad S 8.0 Motherboard Replacement, Front Facing Camera: paso 5, imagen 3 de 3
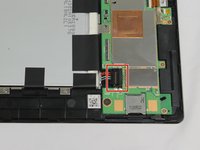
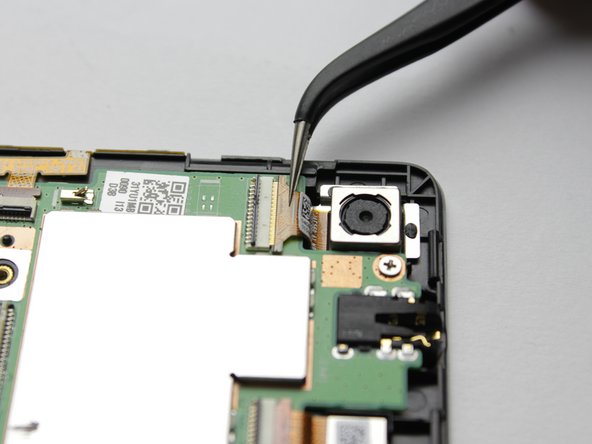
    • Use a plastic opening tool to lift the black retaining flap on the ZIF Connector

  6. ASUS ZenPad S 8.0 Motherboard Replacement: paso 6, imagen 1 de 1
    Herramienta utilizada en este paso:
    Tweezers
    $4.99
    • Use a tweezers to lift out the camera

    • If you lifted the latch for the ribbon cable then it should come out with little resistance.

  7. ASUS ZenPad S 8.0 Motherboard Replacement, Motherboard: paso 7, imagen 1 de 2 ASUS ZenPad S 8.0 Motherboard Replacement, Motherboard: paso 7, imagen 2 de 2
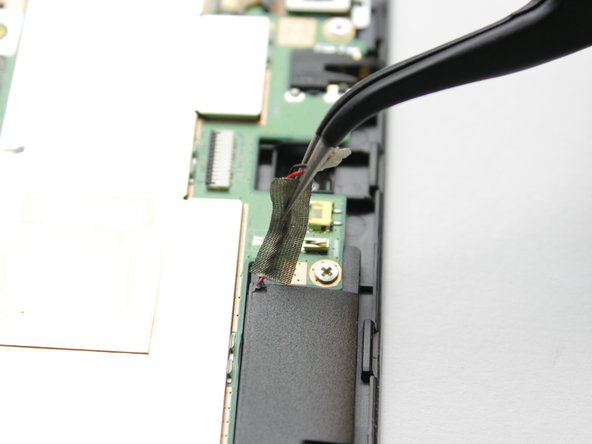
    • Using the plastic prying tool, lift the small retaining flap on the ZIF Connectors holding the ribbon cables to the motherboard

    • The removing of the ribbon cable is done in the same way as the front facing camera.

  8. ASUS ZenPad S 8.0 Motherboard Replacement: paso 8, imagen 1 de 3 ASUS ZenPad S 8.0 Motherboard Replacement: paso 8, imagen 2 de 3 ASUS ZenPad S 8.0 Motherboard Replacement: paso 8, imagen 3 de 3
    Herramienta utilizada en este paso:
    Tweezers
    $4.99
    • Using the tweezers remove the connector gently from the yellow slot

    • Gently peel up the tape until is is completely released from the motherboard

  9. ASUS ZenPad S 8.0 Motherboard Replacement: paso 9, imagen 1 de 2 ASUS ZenPad S 8.0 Motherboard Replacement: paso 9, imagen 2 de 2
    • Cut the warranty tape connecting the motherboard to the metal plate under the battery

  10. ASUS ZenPad S 8.0 Motherboard Replacement: paso 10, imagen 1 de 1
    • Using the #00 Phillips head screwdriver, remove the remaining 1.5mm screws in the motherboard

  11. ASUS ZenPad S 8.0 Motherboard Replacement: paso 11, imagen 1 de 1
    • Gently lift the motherboard from your device

Conclusión

To reassemble your device, follow these instructions in reverse order.

Una persona más ha completado esta guía.

Jessica Voss

Miembro Desde 10/04/16

319 Reputación

1 Guía escrita

Equipo

USF Tampa, Team 2-2, Cagle Fall 2016 Miembro de USF Tampa, Team 2-2, Cagle Fall 2016

USFT-CAGLE-F16S2G2

Miembros de 4

5 Guías creadas

2 comentarios

Where can I buy a spare motherboard for this device.

Partha Tripathy - Contestar

Where are the motherboard sold and how do I purchase micro USB ports

Xibu Zhang - Contestar

Agregar Comentario

Ver Estadísticas:

Ultimas 24 horas: 0

Ultimos 7 días: 0

Ultimos 30 días: 8

Todo El Tiempo: 2,679