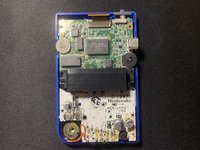
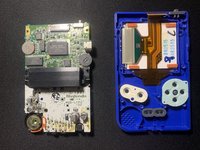
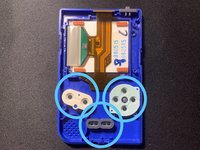
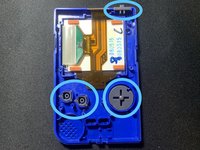
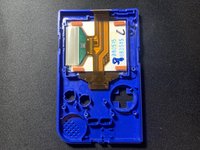
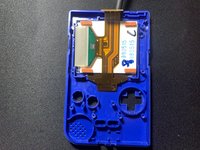
Saltar al contenido principal

Qué necesitas

Este desmontaje no es una guía de reparación. Para reparar tu Game Boy Pocket, utiliza nuestros manuales de servicio .

  1. Game Boy Pocket Teardown, Game Boy Pocket Teardown: paso 1, imagen 1 de 2 Game Boy Pocket Teardown, Game Boy Pocket Teardown: paso 1, imagen 2 de 2
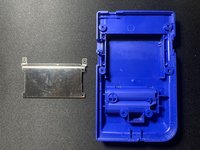
    • Turn the game boy pocket around and remove the battery cover and batteries.

    • Please do note that I don’t have a battery cover.

  2. Game Boy Pocket Teardown: paso 2, imagen 1 de 2 Game Boy Pocket Teardown: paso 2, imagen 2 de 2
    • Using a Y00 screw, remove 6 screws from the back.

  3. Game Boy Pocket Teardown: paso 3, imagen 1 de 1
    • Remove back cover.

  4. Game Boy Pocket Teardown: paso 4, imagen 1 de 2 Game Boy Pocket Teardown: paso 4, imagen 2 de 2
    • Remove 4 screws from the cartridge panel using a JIS000 screw.

    • Remove cartridge panel.

  5. Game Boy Pocket Teardown: paso 5, imagen 1 de 1
    • Remove 3 screws on the motherboard using a JIS00 screw

  6. Game Boy Pocket Teardown: paso 6, imagen 1 de 1
    • Push on two lock pins that are locking the ribbon cable for the screen using a spudger.

  7. Game Boy Pocket Teardown: paso 7, imagen 1 de 3 Game Boy Pocket Teardown: paso 7, imagen 2 de 3 Game Boy Pocket Teardown: paso 7, imagen 3 de 3
    • Using a plastic tweezer, remove the ribbon cable.

    • Be careful not to scratch or break the ribbon cable!

  8. Game Boy Pocket Teardown: paso 8, imagen 1 de 2 Game Boy Pocket Teardown: paso 8, imagen 2 de 2
    • Remove motherboard.

  9. Game Boy Pocket Teardown: paso 9, imagen 1 de 2 Game Boy Pocket Teardown: paso 9, imagen 2 de 2
    • Remove covering on buttons.

    • Remove buttons.

  10. Game Boy Pocket Teardown: paso 10, imagen 1 de 2 Game Boy Pocket Teardown: paso 10, imagen 2 de 2
    • Remove display using a spudger.

    • Be careful not to break the display!

  11. Game Boy Pocket Teardown: paso 11, imagen 1 de 1
    • Done!

John

Miembro Desde 07/04/22

376 Reputación

2 Guías creadas

Un comentario

Came here because I thought I missed a screw in the back or something. Nope, still had a game inserted which holds the two parts together, haha.

Bart - Contestar

Agregar Comentario

Ver Estadísticas:

Ultimas 24 horas: 2

Ultimos 7 días: 25

Ultimos 30 días: 123

Todo El Tiempo: 1,099