Introducción
¿Tienes una batería inservible o hinchada en tu Apple Watch? Usa esta guía para reemplazarla.
Nota: Si tu batería está hinchada, [Qué hacer con una batería hinchada|toma las precauciones necesarias].
Qué necesitas
-
-
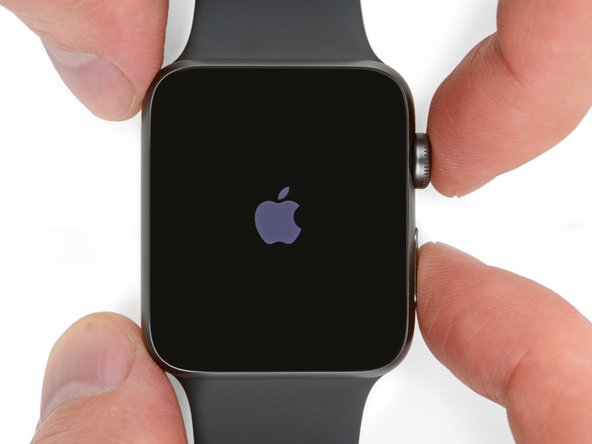
Antes de iniciar la reparación, quita el reloj del cargador y apágalo
-
-
-
Prepara un iOpener (o agarra un secador para el pelo o una pistola de calor) y calienta la caratula del reloj hasta que esté ligeramente caliente para tocar.
-
Deja el iOpener en la caratula por lo menos un minuto para calentar completamente la pantalla y ablandar el adhesivo que la asegura a la caja.
-
-
In my instance, the problem started with the face/screen popping off because the battery swelled. So I didn’t need to heat the face and pry it off. I did heat it a bit in order to warm the residue adhesive on the edge of the face and the case frame and found it easier to scrap it off gently with the craft blade that came with the $39.21 battery replacement kit. If this is your issue, you can skip the prying up steps.
Same situation as jeb605 - my watch battery swelled and popped the screen off. Fortunately the force touch sensor did not debond from the watch. Thinking about just cleaning the back side of the screen and applying new adhesive. I used an alternate kit that did not come with the force touch sensor.
-
-
Colocar la sección curvada de la cuchilla en el espacio entre el vidrio y la caja en la esquina inferior de la caratula, y presiona firmemente hacia abajo en el espacio.
-
Cuando el vidrio se haya levantado, gira suavemente la cuchilla hacia abajo, abriendo más el espacio empujando el vidrio hacia arriba.
It is not possible to separate the screen from the casing? I have heated this thing numerous times and the opening is way too small to get any type of blade, knife or other tool in between. Any suggestions???
Using a curved blade like the guide recommends, angle the blade straight down between the glass and the edge of the frame, mid-way along the bottom edge of the case. The metal of the case will flex *just a little bit*, allowing you to slowly rotate the blade so the cutting edge is now pointing towards the center of the watch instead of down towards your work surface. You may need to rock the blade back and forth, sort of massaging the curve into the seam between the glass and the metal before it works. And like they mention above, lots of heat. I used the heatpack they sell, put it in my toaster oven on 200. I started at 130, and went up in 20 degree increments until it worked.
Pete -
I've tried everything, heating it up until it's too hot to touch, pressing the knife in the gap straight down, at an angle, nothing seems to work. I've tried using all my arm strength and it still doesn't even enter the gap. Is the iFixit Jimmy not thin enough for the job?
It’s not. The Jimmy’s a great pry tool, but not a cutting blade and not sharp enough for this particular job. You want a curved razor like the guide suggests.
Just to emphasise after quite a struggle - the blade absolutely matters!! I tried about 5 and almost gave up before the last one lifted the glass quite easily. Obviously, you want a thin blade! No, thinner than that!
I got hung up on this step for over an hour. The key for me was to keep the watch straps on! I initially took them off thinking it would be easier to work with the watch, but I guess just the little pressure I placed on the glass while trying to hold the watch and use the blade was enough to keep it in place. At first I thought I didn’t use enough heat and ended up reheating the iOpener a few times and applying it to the watch over the course of an hour. I put the top strap on, put it back flat on the table and held the watch secure with just the strap. I gave it another go with the blade and the screen instantly popped off. Also, be careful with the force you use on the blade… it seems with adequate heat, you don’t need to use that much (I ended up cutting through the Force Touch sensor and punctured the battery).
I would never use a knife like this to remove the screen. It’s way to wide to get in between the glass and body, without potentially breaking the glass. I use the Ultra Thin iFlex Opening Tool, sold by IFIXIT. Seriously. You won’t wanna use a fat blade like that after you take the iFlex for a test drive.
I used the rounded blade provided by iFixIt themselves as part of the Series 1 battery replacement kit and even that was wide enough that it scratched my case while trying to pry the screen up. Also I had to heat the iOpener like 3 or 4 times consecutively at 30s each and leave it on the screen for 5+ minutes before the screen would even budge. Heating for 30 sec and leaving on the screen for 1 minute was not even close to enough.
The display came off nicely after heating the iOpener a couple of times and wiggling the blade a bit. Now i have replaced the battery and the force touch sensor an thought I was ready for a dry run. So I did not peel off the final layer of film so that I can still remove the display. What I see is not good, the display is full of stipes and pixles in many colors. So, did I break the display (e.g. by heat) or does it have to be completely glued to the sensor in order to work?
I got the answer. Unfortunately, I broke the display. A magifying glass revealed that I have scratched the cable where I inserted the blade. Replacing the display and I fixed it!
Jörg -
For anyone who’s having trouble getting the screen separated from the case, try leaving the iopener on the Watch for longer like around 4 or 5 minutes
-
-
-
-
Ligeramente haz palanca en el lado derecho de la pantalla, para liberarla de cualquier adhesivo restante.
-
Haz palanca en la izquierda para liberar lo también—pero no intentes de remover la pantalla ya que esta detenida en su lugar por dos cables.
My iwatch screen came lose. There are two strips loose I don’t know how or where they connect to. The watch still powers on and screen is not cracked. Can you advise how to get it back on again?
-
-
-
La capa superior del sensor puede estar pegada al lado reverso de la pantalla—si es así, empújalo hacia abajo y sepáralo.
Hi, thanks for the guide, nice work. I miss a picture of the natural opening of the screen, as the mentioned “Force Touch sensor slides” gets connected from the screen to the main body of the watch by a pair of very thin wires. None of these wires are seen in any of the pictures among this guide, which may lead novices to not pay enough attention to them, broke them accidentally, or not knowing what are them for. Picture on step 13 is absolutely impossible without removing the slides / thin wires of the force touch sensor in advance.
Cheers
"If you can see the top layer of your Force Touch sensor" - How are we supposed to know whether we can see this or not? If one of your images shows us this then can you please point this out. Also, an image of what it should look like, without the problem would be good.
Just discovered this article you have posted about replacing the Force Touch Sensor. After looking at the article I can now see your first image, above, is showing the separated Force Touch Sensor. Perhaps you should link to it in this article, so people can get a better idea of what it is and what it looks like:
Same issue as djones I think. My watch was forced apart by an expanding battery and it came apart in such a way that the force touch sensor was still intact, connected to the watch back and still glued to the face. If I had an image showing the two connectors to the force touch sensor along the same side as the cables, I would have better understood and released the force touch sensor from the face before pulling the sensor away from it's connection in the base. Would have saved $20+ on buying a replacement sensor. Thank you for the documented process.
-
-
-
Levanta la pantalla hacia arriba y mueve la pantalla hacia la izquierda, prestando atención a los cables de datos de pantalla y digitalizador.
I have 2 other small cables which are missing in your photos. Can you also explain what to do with them? https://drive.google.com/file/d/1_6ngMn9...
Looks like you forced touch sensor is still attached to the screen and not the body. I’ve got the same issues. I’m going to try to use the plastic tool and heat to gently remove it from the screen and return it down to the body. You can see it in their fix of it… Reemplazo del sensor Force Touch de Apple Watch . Hope this helps.
-
-
-
Coloca el reloj en una superficie elevada, por lo menos 1/2" o 1 cm de altura—una caja pequeña o el borde de un libro funcionara perfectamente. Esto permitirá que la pantalla se cuelgue hacia abajo verticalmente y dará mejor acceso a la batería.
I would taped the watch to the elevated surface and rotated the surface around as I needed to
-
-
-
Usa una tijera para cortar una de tus púas de apertura para que tengan el ancho de la batería. Trata de no dejar esquinas afiladas.
-
Inserta la púa modificada entre el lado derecho de la batería y la carcasa.
-
Usa una presión constante para lentamente levantar la batería, separándola del adhesivo que la asegura a la placa del sistema.
-
En los modelos más grandes (42 mm) es posible levantar accidentalmente la placa del sistema por debajo de la batería. Inserta la púa solo lo suficiente para llegar debajo de la batería, no la placa del sistema.
-
Si es necesario, aplica una pequeña alta concentración de alcohol isopropílico (90% o mejor) alrededor y debajo de la batería para ayudar a aflojar el adhesivo.
I tried removing the battery with the prying tool as instructed, but I think it may have slightly damaged the outer black plastic wrapping of the battery. Does this mean the battery is now damaged and needs to be replaced? Or is that just a cover around the battery and it doesn’t matter? I just don’t want any battery chemicals leaking out. Asking before I stick the screen back on the watch, I’ve done all the rest and it seems fine otherwise.
Hi Danae, the black plastic is technically just protective, but I would highly recommend replacing the battery. It’s possible there is additional unseen damage, and that plastic helps protect against swelling and normal wear of the battery inside the device.
I had to use the pry tool instead of the pick as the pick was not moving it. Was careful not to damage the battery but found it much easier to get movement and know exactly where I was prying with the pry tool.
Great tutorial but I’ve run into a problem changing the battery on my 42mm Original Series watch .
Getting the battery off with the pick has proven impossible and I’m about to try using the isopropyl alcohol.
• Can you provide any tips on how best to apply it, how long to give it to take effect, how often to apply etc. ?
• Given how narrow the gap is, also how to ensure nothing gets damaged by the alcohol?
• Is there any inherent risk in using the pry tool as Joey ended up doing?
Thanks for any advice
Hey so I’m about to do a repair on one and noticed that it’s drains of battery making it pretty much safe to work with but do I really need to remove the battery? Like can’t I just remove the screen right there and now?
-
-
-
Agarra la batería hacia arriba y fuera del camino para exponer el conector del cable de la batería.
-
Utiliza una herramienta plástica de apertura contra el inferior de la caja para separar el conector del cable de la batería del cable de la batería del reloj.
-
Saca la batería fuera del reloj.
Why should you remove the battery if you only need to replace the screen?...?
Douglas - this iFixit is for Apple Watch Battery Replacement - looks like you need to remove the screen to replace the battery...
You will find that it is a good precautionary measure to disconnect the battery anytime you are repairing or replacing a screen as a short can occur when reconnecting the screen rendering it useless even if you have the unit turned off.
Great repair guide! You iFixit guys are awesome. Took me about 2 hours but then I am very careful and I replaced the touch sensor at the same time since I had it open anyway. Make sure you have at least 2, and better 3 adhesive gaskets. You need 2 and, well, it’s easy to mess one up while trying to place it.
Will removing the battery reset my icloud info? I have a guy who says he can do this, but i dont want him to run off with my watch after he replaces the battery…
I did not disconnect the battery first. After replacing the screen, it didn’t work. I have to assume I created a short. The watch will still turn on and haptics are evident, but the display doesn’t work. Are there any further repairs to save my watch at this point?
Yeah, sounds like you shorted part of the board. If it’s a Series 0 you’re working with, just go get a new one. Not worth fixing.
After replacing the battery I tried to turn it on and was presented with the red snake, I let it go for about an hour. When I checked it the red snake was gone, when I tried to turn it on it showed the Apple logo for about 4 seconds then went away. Is this normal, and if not what should I do?
I'm having a similar issue, did you manage to resolve it?
Did you calibrate the battery? You need to fill it up completely and let it continue to charge for a few hours first.
Is it possible to place a battery in and charge/start the watch without the screen plugged in? I want to check integrity of the battery. I was thinking to put it on charge in a closed clear plastic container without the new screen on to see if the battery is good. I ‘really’ do not want to wait another 20 days for a battery replacement and the battery has no visual punctures, front looks good and the back where the adhesive is (or were, rather) is deflated and slightly ‘knobby’. I do not know if it is damage or just how it generally looks like or maybe it looks like so because of the old adhesive. It is not inflated or abnormally expanded. Anyone who knows about this? I used a hair dryer directly on the watch opened to loosen up the adhesive, is that a no-no?
The battery swelled up and popped off the screen, so went directly to Step 12. Luckily the adhesive below the Force Touch sensor was intact. Was able to complete the fix using the Adhesive Strip after replacing the battery. Works again! Thanks!
Hi Alex, I’m having the same problem with my series one with the screen has popped off due to the battery swelling. Did you have any issues starting from step 12?
Glenn -
The apple logo keeps flashing on my series 1 watch, tried force restart with crown and side button but it still just keeps on flashing the apple logo, does anyone have any advise? Is the issue with the battery? Do I need to get a new battery? I change the screen as the screen was broken and used the existing battery.
yes the issue was with battery, swapped with a new battery and booted up fine.
Having the same issue.good to hear it’s the battery and not me.
my watch was completely unloaded and stays in power saver mode when I charge. When I load in power saver mode the red light turns green for a few moments then switch back to red and no longer charge. When I remove the battery and put it back on the charger the charge starts again for a while and then stops. Do I need to change the battery? (apple watch serie 4 nike)
I replaced the screen and battery on mine. Now, it will not charge. Everything works fine, except charging. Any ideas why this may be?
My series one has two other cables/strings in the bottom left corner. Why do none of the pictures address this?
My watch hasn’t recalibrated with the new battery. Even a couple of weeks later I still get premature low battery - it can take hours for the final 10% to run out after the first 90% only took 9 hours. I left it off the charger for multiple days after installation and yet I could still quickly wake it up by pressing the crown to see the time reported with red numbers, so I don’t think it fully ran out.
Is there a way to force calibration? A Google search didn’t yield anything useful in the first several pages of results.
Hy Chris,
Same problem as you. Have you found a solution ?
luc poli -
Watching various videos and instructions from others, I found that there’s no need to remove the screen if your goal is to only swap out the battery.
It’s meant to make it easier to clean off the old glue and install some double-sided adhesive tape but it was far more simpler to loop the tape around the screen with a pair of tweezers than to try to wrangle with the metal bracket securing the display and digitiser cable connectors.
T-7000 glue can presumably be used in lieu of double-sided adhesive tape but it’s definitely more messier.
Anyway, I was initially quite annoyed about my battery expanding and popping the screen off but very quickly got over it when I realised it was a simple $20 DIY fix. Guess I got lucky this time..
I’m just replacing the battery. The screen and eveything is fine. While i’ve done just that and the new battery seems secure and eveything, i don’t know which is the adhesive strip that i’d use to re-secure the watch face back onto the watch itself. I don’t need a sensor because the watch face is fine, i just need the adhesive strip and i’m not seeing anything labelled as such in the kit. Ive got 2 tesa stickers (?) and one 3M sensor thing with a little compotent thingy attached to it. Which is the double sided adhesive that goes around the base of the watch to secure the face to the watch?? I was lucky in that my old swollen battery pushed the face off so replacing the battery was fairly easy. Now i just need to secure the face to the body. Any advice?
Have followed the guide as best I could but when everything is reconnected the watch will not power up. Have disconnected and reconnected several times but still the same. Fear that is only going to do damage. Watch was working before removing swollen battery which had caused screen to detach.
How do you put in the battery and close the Watch
DOESN'T WORK FOR ME : Have followed the guide in every point but i have now the red snake.
Just after repairing i put the watch on the charger, let it some hours to charge.
when I took it, the watch was hot. It started up and was working. I let it discharge then put it back on the charger. After a few hours, it was not charged and showed the green snake. When I took it out, it showed the red snake.
Has anyone had this problem and found a solution?
Replaced my Series 1 battery/force sensor. The swelled original battery popped the watch open, so no prying necessary. However, the watch wouldn't work normally afterward, only displaying the "put me on my charger!" image of the charge cord with the disc on the end.
iFixIt was great about sending a replacement... battery, tools, force touch sensor, the whole kit, no charge. Replacement #2 required prying it open, but the force touch sensor stayed put, so I didn't have to replace that the second time. Watch is charging and behaving normally as I calibrate the battery. Can unlock etc.
Be very gentle/careful with the tiny force touch sensor screw. A great comment above says if you lose it, you can put in bit of a pick to press the sensor snug where the screw would hold it. I strongly recommend using a cheap hands-free, head-mounted magnifier w/light for this job. A loop of tape to stick the watch to a surface to hold it still while fiddling with the tiny cable connections was a HUGE help. Take your time!
Bonjour, connaissez-vous par hasard la référence de la batterie pour AppleWatch 2 de 42mm ?
Merci
Bonjour @drakkar1er35709
Nous la vendons dans notre boutique : Apple Watch (42 mm Series 2) Battery Si vous avez besoin d'autres infos, veuillez contacter notre service client au support@ifixit.com (pour la boutique américaine) ou au eustore@ifixit.com (pour la boutique européenne et française).
Ce sera un plaisir de vous aider !
Bien à vous, Claire
-


***Continúa desde el paso 17 de guía de Sensor de Force Touch para volver a sellar tu reloj y completar tu reparación.**
***Continúa desde el paso 17 de guía de Sensor de Force Touch para volver a sellar tu reloj y completar tu reparación.**
Cancelar: No complete esta guía.
362 personas más completaron esta guía.
Un agradecimiento especial a estos traductores:
100%


Estos traductores nos están ayudando a reparar el mundo! ¿Quieres contribuir?
Empezar a traducir ›

30 comentarios
I did a battery replacement in a 38mm Series 1 iwatch and the darn battery is not charging properly. It's been on the charger about 3 hours and I'm only at 14%. Any suggestions?
I managed to replace a swollen battery ($33.25 on amazon) that popped the screen, but this is not for the faint of heart. Special emphasis needs to be placed on not twisting the digitizer connectors as they are quite fragile ($119.99 on ebay for a new digitizer). It's also easy to damage the force-touch sensor ($24.95 on iFixit). You also need adhesive gaskets ($12.98 for 5 on Amazon)
iFixit lists all the parts required but were out of stock on all but one of the items I needed at the time.
Battery:
https://www.amazon.com/gp/product/B01MV2...
Digitizer:
http://www.ebay.com/itm/262744629522?_tr...
Force Touch Sensor Gasket:
[producto vinculado inexistente o deshabilitado: IF308-013-2]
Adhesive Strips:
Appreciate the detailed steps, happy for the option but after reading the $79 to get Apple to replace vs the $33, plus tools for battery... taking it to Apple Store does not seem so bad.
79 is just for battery …there Will be around 220$ service fees extra !!!
Nope $79 complete. Just had it done at Apple store. Took about 30 minutes.
Albert -
#purnendra pratap singh - I think you just wanted to post something, or you like arguing because what you say is fundamentally false. It’s 79$ incl. Service fee
I’ve been on a bootloop for a day now after replacing the battery for my Apple Watch series 1
any suggestions on how I can fix this?
I’ve been stuck on a bootloop for a day now
I was planning to only replace the seal - just glue it back down and call it good. The watch front looks flat when I put it back and the battery doesn’t seem to be pushing up on it. (!&&* I had been thinking about buying some super- glue or silicone glue and not ordering anything)
THOUGHTS? SUGGESTIONS? BEEN THERE DONE THAT?
glue does the job …
Mattis -
How long did it take to charge the new battery after replacement?
This is such an odd question, why wouldn't you just plug it in and charge it instead of asking this question? Hopefully you haven't been waiting all this time to get an answer before you plugged it in.
Robb M -
I heated the glass until it was too hot to hold a finger on, but I still could not pry the glass loose with the curved razor knife blade. I also tried pulling the glass up with a suction cup and was able to exert quite a bit of force but not enough to release the glass.
I had a swollen battery that popped the display off. Apple store would not replace the battery for $79, so I got a replacement from iFixit. The paper “how to condition your battery” notice got stuck to the glue on the replacement battery, so I used a little bit of Scotch double-sided tape to stick the battery to the case interior. Wish I’d used glue, the display is raised a barely noticeable fraction of a millimeter. Connecting the new battery to the battery cable connector was very difficult. I ended up using a pair of needle-nose pliers to squeeze them (carefully and delicately!) together. Be sure to remove the existing adhesive gasket lining before adding the replacement: I had to use an exacto blade to peel up and cut off a bit of it, then tweezers to pull it off. Applying the replacement double-sided tape gasket is very tricky. If I were to do it again, I’d decouple the display cable first (and get a second pair of hands). Fortunately, I have an LED-lighted magnifier visor and lots of patience.
I did it, and made a video about it
You can watch it here: https://youtu.be/s8uyA3dQgXg
The battery change was not difficult, everything worked as described, all the tools and parts were there (even the battery adhesive was included, despite the description saying that it isn’t).
Except one thing: the description is missing what to do if the Force-Touch-sensor is NOT damaged.
What is the best way to put the screen back on without replacing the Force-Touch sensor?
Does it need glue? Or just re-heating and pressing it on is enough?
I tried the re-heating and so far ok, but I’d really like some guidance… will this hold? Or should I use glue… what kind of glue?
follow-up: Found the answer - it is not enough to just re-heat it, display falls of again. And in the process of cleaning the edges I finally managed to rip off one contact of the Force touch sensor. So maybe should have taken it out in the first place to do the cleaning. Was just trying to avoid disconnecting the other two connectors which looked scary but wasnt.
Ended up having to use the sensor that came with the kit… and then… big disappointment - the necessary screwdriver bit was missing from the kit. I think the screwdriver is supposed to come with three bits, one of them the tri-tip. But mine had only two bits in the handle… maybe better that way, cos looking at those other bits… not very impressive precision there. So ordered a separate Y000 screwdriver online and did the whole thing again. Now I think it finally works though…
Instructions almost great (missing my scenario), parts great, tools big miss. Probably worth 3.5 stars…
my watch was completely unloaded and stays in power saver mode when I charge. When I load in power saver mode the red light turns green for a few moments then switch back to red and no longer charge. When I remove the battery and put it back on the charger the charge starts again for a while and then stops. Do I need to change the battery? (apple watch serie 4 nike)
after following all the steps and getting the battery from ifixit my watch will not charge or turn on now. i will see the apple logo for a second then it goes dead. any ideas?
I had to manually charge the battery outside of the watch as it had entered “over-discharged protection” (reading 0 volts) and the watch doesn’t appear to have the power to kick the battery back out of that mode. It only needed “charging” manually for a minute or so before it had enough power to run in the watch and charge that way. Did it on a breadboard with some solid core wire hooking up the positive (left wide gold pin) and ground (silver casing). I know they come sealed, but would be nice if the batteries were tested/charged enough before being sent out. I wouldn’t expect many people to be able/willing to manually charge a battery with the size of the connector, and also because it carries some risk!
Symptoms of this were the green charging snake appearing for less than a second, and then the watch not responding when pressing the button. It should wake the screen back up if the battery is okay/charging.
My battery swelled up and made this a bunch easier to do. I used the pick (see second picture in step 14) in this orientation to drop a bit of alcohol down under the battery to help with the adhesive. That worked a treat! Battery is in and it’s on the charger now, waiting to see if force touch works when it boots up.
Everything went well with the repair and the guide was tremendously helpful. Just a few caveats I’d like to add:
1. The old battery may REALLY be stuck down on to the case. Go VERY slowly when prying it out.
2. You will have to remove the screen, regardless whether or not you need to replace the Force Touch sensor. Prying apart that metal clip which encloses the screen cable, is a royal PITA…just be patient.
3. The adhesive ring to reseal the watch is quite flimsy to handle. You’ll have to be very careful lining it up properly. And make sure you really clean the surfaces with alcohol and let them dry thoroughly before applying the new adhesive ring.
Thanks iFixIt!!
I tried everything on here and once I replaced the battery nothing turned on. In fact with the old swollen battery it did turn on. I’m not sure if the battery I got is faulty or not. That or I have done the replacement incorrectly
Replaced the battery but it wont charge. Screen shows a charging cable with a green lightning bolt, but it wont ever charge enough to turn on?
Thank you Andrew for this amazing tutorial on how to change the battery in my Apple watch. My battery is Still at 95% capacity but I want to be prepared as this watch was way too expensive to just discard and as I understand, if Apple services it I probably will not get my original device returned to me. Thank you
I replaced the battery and it holds a charge. For some reason, it starts to boot up and then turns off. Not a boot loop, but it just turns off while trying to boot, it does not show the Apple logo again after that. I fully drained the battery and charged it but nothing happened
I also have the same problem, did you solve it?
Money miser !$$&*! apple. Couldn’t give us a little win by not containing an battery that’s hard to change. What ever over to pixel next so bugger you apple you lose another customer. They will never satisfied. GREED!!!!!!!!!!!!!!