Introducción
Usa esta guía para remover o reemplazar una placa lógica defectuosa en tu iPhone 7.
Es importante tener en cuenta que la placa lógica de cada iPhone y el sensor de huella digital Touch ID se emparejan en fábrica, por lo que reemplazar la placa lógica desactivará el Touch ID a menos que también se instale un botón de inicio de reemplazo que haya sido emparejado correctamente con su nueva placa lógica.
Qué necesitas
Resumen del Video
-
-
Apaga tu iPhone antes de comenzar el desmontaje.
-
Remueve los dos tornillos pentalobe de 3.4 mm en el borde inferior del iPhone.
-
-
-
Utiliza una pistola de calor o preparar un iOpener y aplicarlo en el borde inferior del iPhone durante un minuto para suavizar el adhesivo debajo.
-
-
-
Inserta el borde plano de un spudger en la esquina inferior derecha del dispositivo.
-
Gira el spudger para ampliar el espacio entre el ensamblaje de la pantalla y la caja trasera.
-
Desliza el extremo plano del spudger por el lado derecho del teléfono para romper el adhesivo que sostiene la pantalla en su lugar.
-
-
-
Retira los siguientes tornillos triples Y000 del soporte del conector inferior:
-
Tres tornillos de 1.2 mm
-
Un tornillo de 2.4 mm
-
-
-
-
Utiliza la parte plana de un spudger o tu uña para desconectar los dos conectores inferiores de la pantalla haciendo palanca hacia arriba de sus puertos de conexión en la placa lógica.
-
-
-
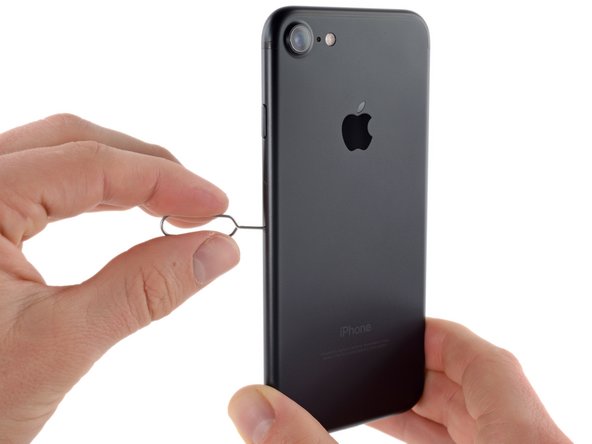
Inserta una herramienta de extracción de tarjeta SIM o un clip de papel en el pequeño orificio en la bandeja de la tarjeta SIM.
-
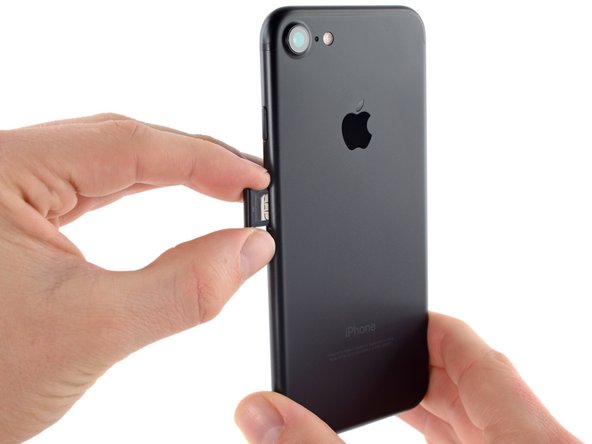
Presiona para extraer la bandeja.
-
Remueve la bandeja de tarjeta SIM del iPhone.
-
-
-
Usa el extremo plano de un spudger para desconectar el conector de cámara trasera.
-
-
-
Usa la punta de un spudger para levantar los conectores del cable de antes de sus zócalos en la placa lógica.
-


Para volver a ensamblar tu dispositivo, sigue estas instrucciones en orden inverso.
Para volver a ensamblar tu dispositivo, sigue estas instrucciones en orden inverso.
Cancelar: No complete esta guía.
158 personas más completaron esta guía.
Un agradecimiento especial a estos traductores:
100%


Estos traductores nos están ayudando a reparar el mundo! ¿Quieres contribuir?
Empezar a traducir ›

13 comentarios
I had an accident where my iphone has got some damage (cracked screen, metal frame slightly bent).. I can see a lot of iCloud locked devices for sale, some of them for a cheap price. Would replacing the logic board and home button give me a non-damaged working phone? Or what parts would need to be moved for this? Sure I can buy a brand new phone but I like a bit of a challenge :)
the logic board holds the OS, so yes if you were to replace the mother board of the iPhone it should work like a new phone but without touch id
I have the same idea and i found to buy this one
https://www.aliexpress.com/item/For-iPho...
You think it will work?
Hi,
I’ve got a problem with my iphone7. I just took some videos under the water using my iphone. But later it’s finger id has gone and it’s fully damaged. Now the phone is not working. Is there any option to repair this ….?
Hi Muhammed, sounds like some water got inside your phone. Check out our iPhone liquid damage guide for some basic troubleshooting you can do on your own. When you have the phone open check connectors and pins on the board for any corrosion. If the damage is serious enough that cleaning won’t fix it, you can take your phone to a local repair shop for more extensive repairs.