Esta traducción podría no reflejar los cambios más recientes añadidos a la guía de referencia. Ayúdanos a actualizar la traducción o revisa la guía original.
Introducción
Utiliza esta guía para reemplazar la pantalla de tuMoto G6, incluyendo el marco medio que está pegado a la pantalla.
Antes de comenzar, descarga la aplicación Rescue and Smart Assistant para hacer una copia de seguridad de tu dispositivo y diagnosticar si tu problema está relacionado con el software o el hardware.
Asegúrate de que tu pieza de repuesto incluye tanto la pantalla como el marco medio-esta guía no cubre la separación de la pantalla del marco medio.
Este procedimiento implica retirar la batería, que puede dañarse durante el proceso de extracción. Te recomendamos encarecidamente que no vuelvas a utilizar la batería, ya que ello podría suponer un riesgo para la seguridad. Reemplázala por una batería nueva.
Qué necesitas
-
-
Inserta un clip o una herramienta de expulsión de la tarjeta SIM en el pequeño orificio de la bandeja de la tarjeta SIM en el lado derecho del borde superior del teléfono.
-
Presiona la herramienta en el orificio para expulsar la bandeja.
-
-
-
Si es posible, drena la batería antes de desmontar. Cuando la batería está cargada, aumenta el riesgo de un evento térmico peligroso si la batería se sobrecalienta o se daña durante la reparación.
-
Prepara un iOpener y calienta la parte trasea del teléfono a lo largo del borde inferior durante dos minutos o hasta que esté ligeramente muy caliente al tacto. Esto ayudará a suavizar el adhesivo que sujeta el cristal trasero.
At what temperature shold the glass be heated to? My heat gun goes from 250 up to 1350.
START LOW.
These plastics can be almost endlessly remelted, held at temp, etc., if done gently.
With a heat gun, I'd hesitate to go too far past 250°F/115°C too quickly until I was comfortable with the material.
Plastic WILL begin to burn and permanently deteriorate at 350-400°F or so.
Silicone can handle up to 400-500°F.
(Get a cast iron pot or pan to roughly 250°F/110°C, then invert and put a silicone cookie sheet on it to make a work surface that will make life waaaaaay easier. Preheat the device along with the pan for a few minutes, too.)
-
-
-
Aplica una ventosa en el borde inferior del cristal trasero
-
Tira de la ventosa con presión firme y constante para crear una grieta pequeña entre el cristal trasero y el marco.
-
Si tienes problemas, aplica más calor para ablandar aún más el adhesivo, e inténtelo de nuevo. El adhesivo se enfría rápidamente, por lo que es posible que necesites calentarlo repetidamente.
-
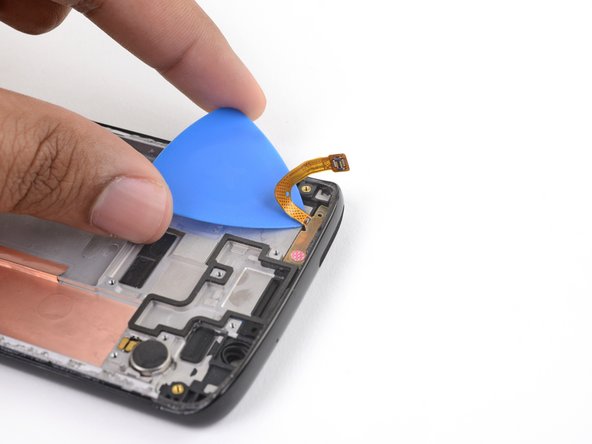
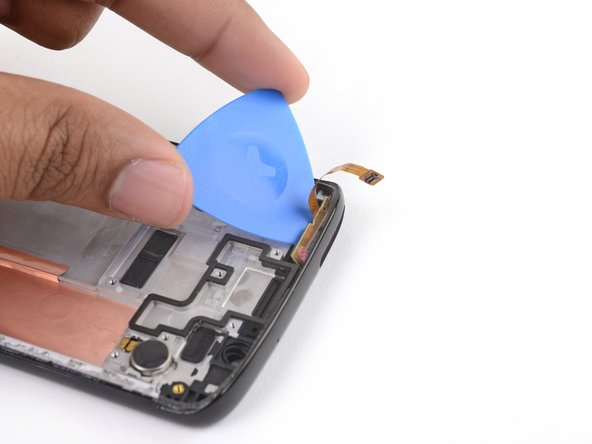
Inserta una púa de apertura en el espacio que creaste debajo del cristal trasero.
My back delaminated at this point. That is, the clear plastic started to come away leaving the paint layer behind. Mine is (was) the indigo blue one.
-
-
-
Si el cristal continúa atascado, vuelve a calentar y cortar el adhesivo cuantas veces sea necesario.
-
Levanta el cristal trasero con cuidado, asegurándote de que esté completamente separado del adhesivo.
-
Remueve el cristal trasero.
-
Durante el reensamblaje, haz una pausa aquí para reemplazar el adhesivo del cristal trasero con una tarjeta adhesiva precortada o una cinta adhesiva de doble cara de alta resistencia, como la Tesa 61395.
When cleaning old adhesive off the back glass, be careful not to scratch the inner coating of the glass. If you scratch this coating with tweezers, it will leave visible “nicks” on the back glass.
-
-
-
-
Usa un par de pinzas para despegar la cinta negra que cubre la batería.
-
Remueve la cinta.
Yes, there's the NFC tag that isn't mentioned, with its connection to the left. Thanks for the tip, Stuart; I gently lifted mine to the left and it seems to be intact. I guess I won't know until I try to pay for something.
-
-
-
Usa un destornillador Phillips para remover los 17 tornillos que sujetan la tapa de plástico.
-
Once tornillos grises de 3 mm de largo
-
Cinco tornillos negros de 2.5 mm de largo
-
Un tornillo plateado de 3.5 mm de largo
The holes for the black screws are marked with a small triangle to differentiate them from the holes for the gray ones. I found this super helpful when reassembling!
-
-
-
Inserta el extremo puntiagudo de un spudger en la muesca en el borde superior izquierdo de la tapa de plástico.
-
Usa el spudger para levantar el borde superior de la tapa y liberar los clips que sujetan la tapa.
-
Remueve la tapa de plástico.
When reinstalling plastic cover, alignment is critical for underlying contacts to line up. Test all functions before sealing up the phone. If camera or speaker don’t work, recheck plastic cover installation and correct until all phone functions operate.
-
-
-
Usa el extremo puntiagudo de un spudger para levantar el conector de la batería y desconectarlo.
What is the black part the battery is connects to called? The black part connected to the body of the phone.
Be very careful on this step! If you pry it out too roughly the connector will break. If you aren't very precise when putting the plug back in you will smash either the tiny tabs on the plug or the connector itself.
-
-
-
Prepara un iOpener y aplícalo a la mitad derecha de la pantalla durante al menos dos minutos, para suavizar el adhesivo de la batería que hay debajo. Recalienta y vuelve a aplicar el iOpener según sea necesario.
-
-
-
Usa una púa de apertura para levantar la batería comenzando desde el borde exterior de la batería.
-
Remueve la batería.
I found it easier to remove the battery after I removed the mother board.
It’s much easier to remove the battery after the motherboard is removed from the opposite side
Merci. La batterie est difficile À décoller Mais tout été parfait.
-
-
-
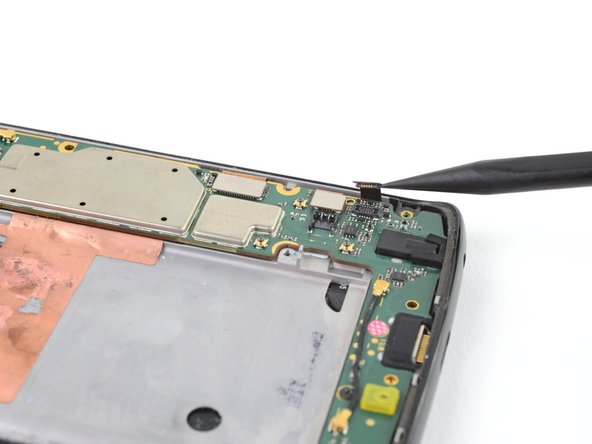
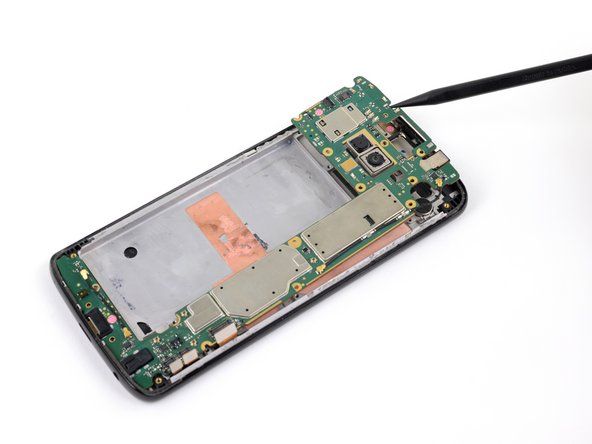
Usa el extremo puntiagudo de un spudger para levantar y desconectar los tres cables planos en el borde derecho inferior de la placa madre.
-
-
-
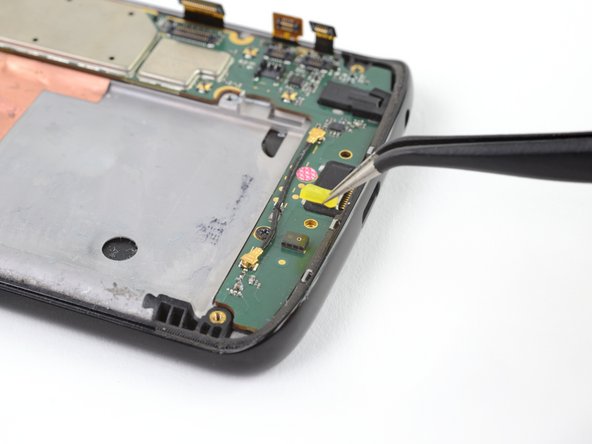
Usa un par de pinzas para remover la junta amarilla del micrófono.
It's not entirely necessary to remove this gasket if you're replacing the screen, as the motherboard will lift out just fine with it attached. The important part is to make sure it doesn't fall off and get lost!
-
-
-
Usa el extremo puntiagudo de un spudger para levantar la pestaña de bloqueo en el conector ZIF del cable bel botón.
-
Usa un par de pinzas para deslizar el cable de botón de su zócalo.
-
-
-
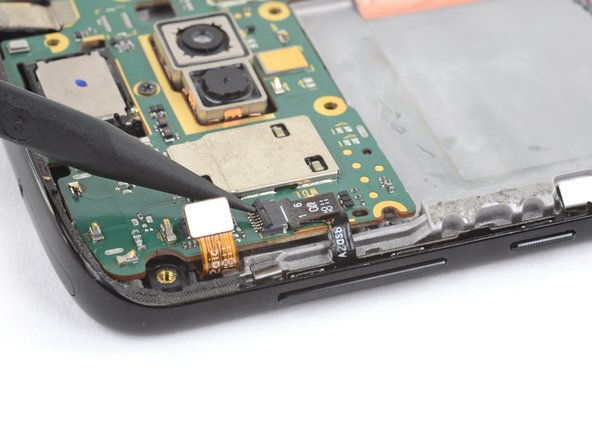
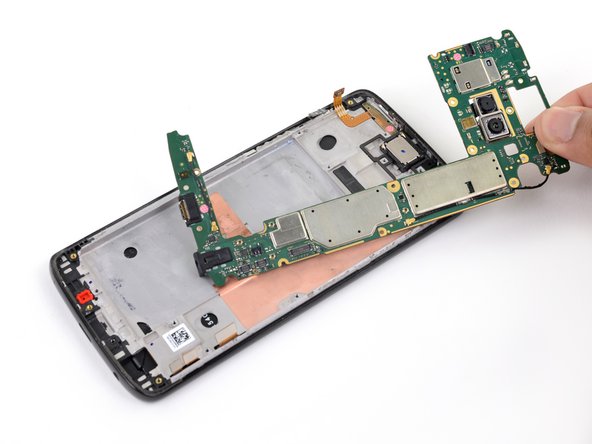
Usa un destornillador Phillips #000 para remover dos tornillos de 2.5 mm que sujetan la placa madre.
-
-
-
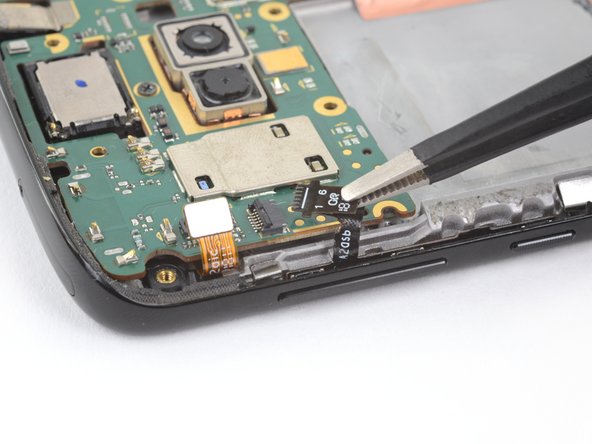
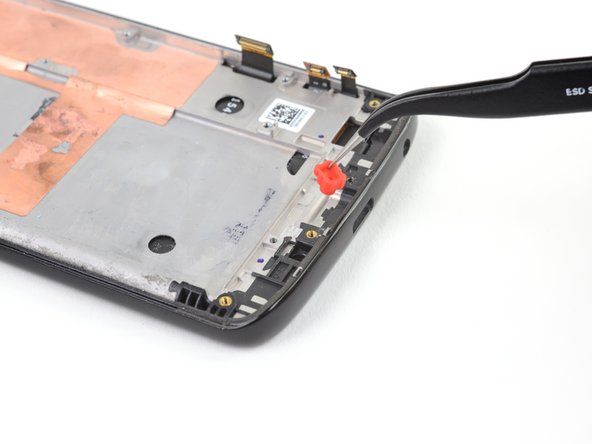
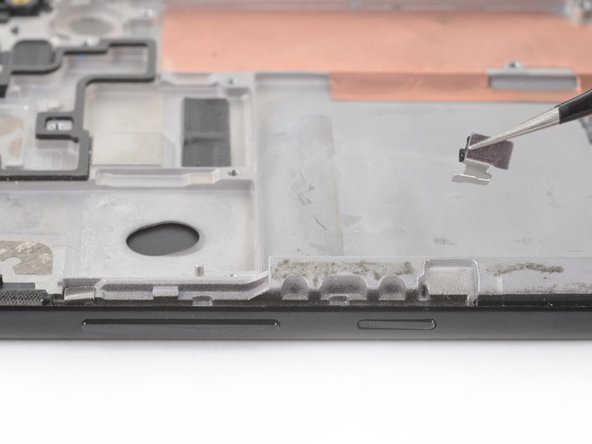
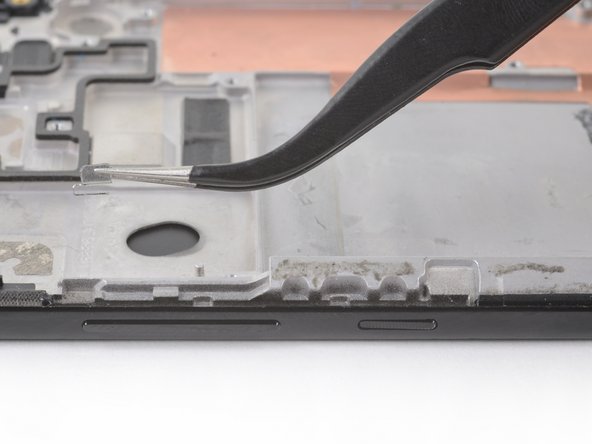
Utiliza unas pinzas para sacar la junta roja del micrófono de su hueco en el marco.
-
-
-
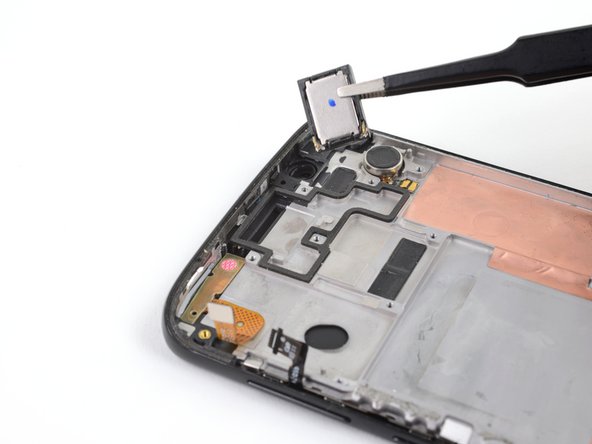
Usa pinzas para levantar los dos soportes de retención plateados que flanquean los botones de volumen y encendido y retíralos del teléfono.
In my phone these were adhered to the frame. I thought I was doing something wrong at first when they didn't lift as I expected, but they just needed a bit of prying to lift!
-
-
-
Utiliza la punta de un spudger para empujar contra la parte posterior del botón de volumen, detrás de su extremo superior, de modo que el extremo superior del botón se deslice fuera del teléfono.
-
Usa las pinzas para quitar suavemente el botón de volumen, tirando hacia arriba del extremo superior.
-
-
-
Utiliza la punta de un spudger para empujar contra la parte posterior del botón de encendido, detrás de su extremo inferior, de modo que el extremo inferior del botón se deslice fuera del teléfono.
-
Usa las pinzas para quitar suavemente el botón de encendido, tirando hacia abajo desde el extremo inferior.
I thought this button was symmetrical when I removed it. It's not. The slightly larger hook goes towards the bottom to hook around the retaining bracket
-


Para volver a ensamblar tu dispositivo, sigue estos pasos en orden inverso.
Lleva tus desechos electrónicos a un centro de reciclaje certificado.
Para un rendimiento óptimo, después de completar esta guía, calibra tu batería recién instalada.
¿La reparación no salió como planificaste? Intenta alguna resolución de problemas o pide ayuda a nuestra comunidad de respuestas Motorola Moto G6
Cancelar: No complete esta guía.
29 personas más completaron esta guía.
Un agradecimiento especial a estos traductores:
95%


Estos traductores nos están ayudando a reparar el mundo! ¿Quieres contribuir?
Empezar a traducir ›

8 comentarios
Nice instructions. I suggest adding that around step 24 or 25 removal of the rubber gasket/boot around the selfie camera be included. I didn’t see this anywhere in the instructions but found the part rolling around my table shortly after these steps. Also, as a general suggestion, and ice cube tray make organizing all the screws and little parts pretty easy.
Thanks for identifying the selfie gasket.
This can be done more quickly and easier by removing the front glass too. Then unplugging the 3 cables from the motherboard, and feeding your new screen cables through the front into the back.
I followed this guide and it worked like a charm to replace my broken screen. However, now the phone won’t get a cell signal. Does anyone have any ideas what might have happened?
Very helpful, thanks!
I found it helpful to remove the motherboard first, then the battery, as it gave me more room to work when loosening the battery adhesive, and then reinstall the motherboard first to help with positioning the battery during reassembly.
The sim card eject tool has snapped inside the ejector hole,is there another way to get the sim card out ?.
Amanda Ashley - Contestar
You can try to carefully push the snapped pin with another ejector tool to eject the tray. Otherwise, lightly tap the phone edge to try to get the snapped pin out.
Arthur Shi -