Introducción
Esta guía de reparación ha sido elaborada por el equipo de iFixit y no cuenta con la aprobación de Google. Más información sobre nuestras guías de reparación here.
Utiliza esta guía para reemplazar una pantalla agrietada o defectuosa, incluida la pantalla y el digitalizador, en tu Google Pixel 2 XL. Si no incluye adhesivo, la pieza de repuesto necesitará adhesivo de repuesto para poder sellar el teléfono. También puede haber piezas pequeñas que deban transferirse de la pantalla original a la de reemplazo. Inspecciona ambas pantallas de cerca para asegurarte de que todos los componentes relevantes se trasladan de la pantalla original a la de repuesto.
Qué necesitas
-
Paso 1 Procedimiento de apertura
Aviso: los pasos 1-12 provienen de una guía que está marcada como "En progreso".
-
Aplica una ventosa lo más cerca posible del borde del teléfono donde se encuentra la ranura de la tarjeta SIM evitando el borde curvado.
-
-
-
No insertes la púa más de 6 mm dentro del borde inferior del teléfono. Si la púa contacta la porción doblada del panel OLED, la pantalla puede resultar dañada.
-
No cortes a lo largo del borde izquierdo; hay cables de pantalla delicados que podrían dañarse.
-
Solo haz cortes muy poco profundos en la esquina izquierda superior. Hacer palanca muy profundamente puede dañar la cámara frontal.
-
-
-
-
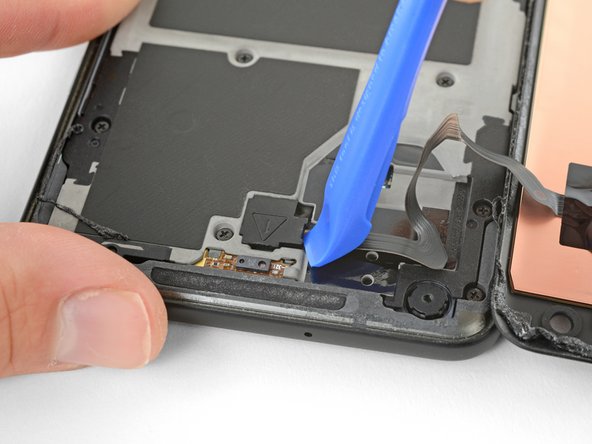
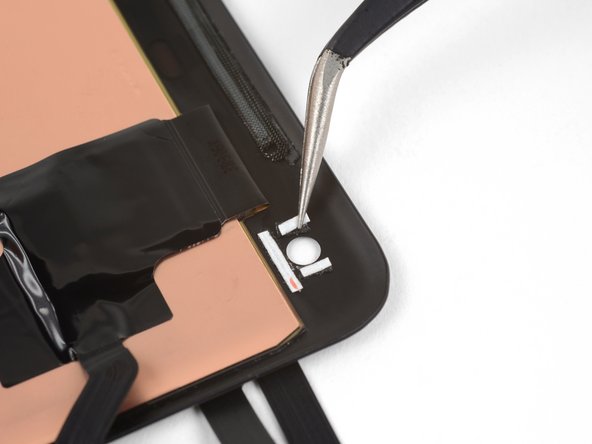
Tu pantalla de reemplazo podría no venir con las rejillas del altavoz preinstaladas o una junta de la cámara frontal. Si este es el caso, usa pinzas para remover con cuidado estas partes de tu pantalla vieja y sigue el resto de la guía para instalarlas en la pantalla nueva.
-
Limpia cualquier residuo de adhesivo de las partes antes de aplicar el adhesivo de la pantalla.
-
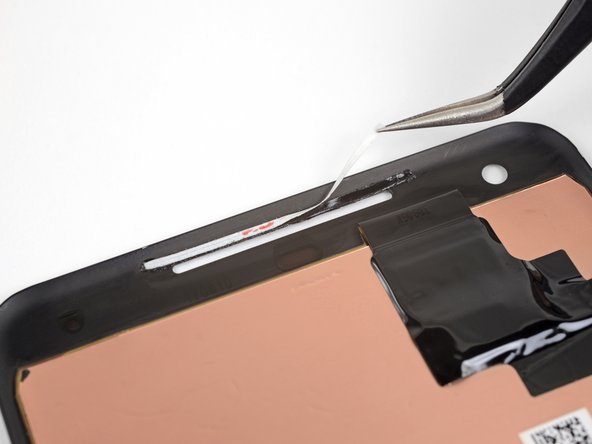
Corta una tira de 1 mm de ancho de cinta de doble cara que tenga alrededor de 3 cm de largo.
-
Coloca la tira adhesiva a lo largo del borde superior de la ranura del altavoz auricular en tu pantalla nueva para que esté centrada sobre la ranura y tocando el borde superior.
-
Con cuidado presiona la tira de adhesivo en su lugar en la pantalla con tu dedo o un spudger.
-
Despega el respaldo blanco de la tira adhesiva.
After “use tweezers to carefully remove these parts from your old display” - be sure to check the front of the grille. It’s easy to accidentally leave on the old grille adhesive. When you go to insert the old grill on top of your new tape in the display, you can accidentally stack up new tape + old tape + grille.
I soaked the old grilles in a 91% isopropyl solution for about 5min and then used an electronics wire brush (very small with a few strands of thin brassy wires). The old adhesive fell right off, and all of the built up dust has washed away. Tried using qtips at first, that was a huge mistake as the grill rips into the qtips and pulls off strands of cotton
-
-
-
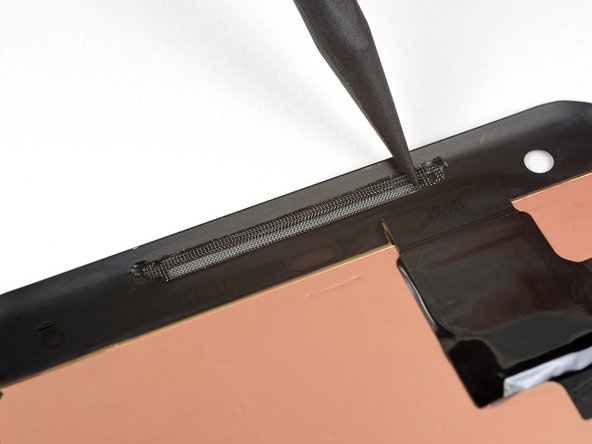
Encaja la rejilla en su ranura para que la mitad marcada de la rejilla quepa dentro de la ranura, y la otra mitad plana y sin marcas de la rejilla esté por encima de la ranura encima del adhesivo. No la empujes en el adhesivo aun.
-
Usa la punta de un spudger para empujar los bordes de la rejilla contra los bordes de la ranura, centrando la rejilla en la ranura.
-
-
-
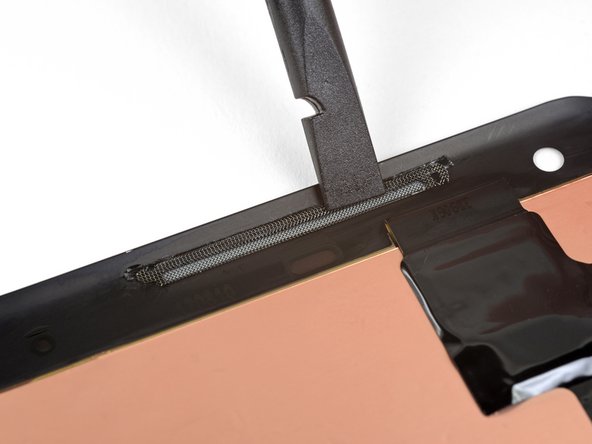
Usa el extremo plano de un spudger para empujar la parte superior de la rejilla contra la tira adhesiva.
-
Repita los tres últimos pasos para instalar la rejilla del altavoz inferior.
-
Al instalar la rejilla del altavoz inferior, aplica la tira adhesiva al borde inferior de la ranura del altavoz y posiciona la rejilla con la mitad plana debajo de la ranura.
-
-
-
Corta una tira de adhesivo de 1 mm de ancho y 6 mm (1/4") de largo.
-
Coloca el adhesivo por debajo del orificio de la cámara frontal paralelo al borde superior de la pantalla.
-
Corta dos tiras de adhesivo de 3 mm (1/8") de 1 mm de ancho.
-
Coloca las tiras adhesivas a la izquierda y derecha del orificio de la cámara, perpendicular a la tira adhesiva inferior.
-
Con cuidado presiona las tiras adhesivas en su lugar en la pantalla con un dedo o un spudger.
-


Compara tu parte nueva de reemplazo con la parte original. Puede ser que tengas que transferir los componentes restantes o remover los respaldos adhesivos de la parte nueva antes de instalar.
Para volver a ensamblar tu dispositivo, sigue estos pasos en orden inverso.
Toma tus desechos electrónicos a un centro de reciclaje certificado.
¿La reparación no salió como planificaste? Consulta nuestra comunidad de respuestas para ayuda en la resolución de problemas.
Cancelar: No complete esta guía.
83 personas más completaron esta guía.
Un agradecimiento especial a estos traductores:
100%


Estos traductores nos están ayudando a reparar el mundo! ¿Quieres contribuir?
Empezar a traducir ›

37 comentarios
Be very careful on the bottom connection, if done incorrectly, 2 small components controlling bottom speaker are easily damaged, this will result in a motherboard replacement or replacing someones phone. Take it from me and a few others on the site…go at this slow and careful. Besides that risk, the phone is pretty simple to repair.
Hi Tom, what component are you talking about? I'm about to dive into this and it might be wise for me to doublecheck this prior to repairing it!
Showing where to place the new tape would be helpful.
Agreed. And also which one we need, is it the 1mm or others? Putting off my repair until I get this tape, going with the 1mm for now…
Is it correct in saying that you have to replace the screen and digitizer? You can not just replace the screen itself, correct?
That’s correct—the LCD and digitizer are fused and have to be removed as one unit.
I see sites selling just the screen and I assumed it was bogus. Thanks for the confirmation. Is there only that one company that sells it? The UBreakIFix site? https://goo.gl/VPg5oQ
I’m not sure of the best place to buy the screen, but I’m sure some other stores sell it as well. I would just read reviews and make sure you purchase from a reputable seller.
I found the instructions pretty helpful. For me the hardest parts were removing the screen since it was extensively cracked and the suction cup wouldn’t stick with tape, and removing the plastic covers without feeling like I was going to break the phone. The screen yielded with a heat gun and careful prying. I bought my screen from Witrigs and it came with 2 sets of adhesive stickers. Applying the sticker was a little challenging, but I succeeded with the second sticker.
My issues were also the cracked and shattered screen made removing all the adhesive tricky. I was a little wary because it seemed like there was still adhesive on the flat areas on the top and bottom, but after wiping it down with alcohol, applying the adhesive, and putting the screen on, everything holds very well. My adhesive was kind of stretchy, but I was able to get it to sit well enough. Some spots had to overlap because of the extra stretched length, but no noticeable gaps occurred from it.
Excellent guide, especially when followed with an I-opener tool kit… the adhesive that is suggested is a joy to work with (get the 1mm thick roll) i placed a single strip along each edge and another two small strips just on the far side of each speaker had zero issues lining up and there is no gap between new screen and the body. A+ repair guide, great tools. Happy phone.
My advice for shattered screen removal is to fix transparent tape or film over the screen to hold the splinters together before removal. Tried it and worked.
I have a question though please, there is a tiny rubber ring that is fixed under the screen in front of the front camera, what is it’s purpose?, would it’s absence affect my front camera photo quality someway?. I discovered the piece after replacing the screen, unfortunately the replacement screen did not include that.
My guess is that the ring keeps dust and debris off the front of the lens, and maybe helps stabilize it. It shouldn’t effect the function of the camera, but since the lens is not sealed against the front glass, dust might accumulate on the lens over time.
You keep saying lcd but is t it a oled display. Is your replacement the same or lcd?
Hi Danny, I misspoke in one of the above comments when I said LCD. Our replacement part is a P-OLED, the same as the stock screen.
So I live in the Louisiana heat and it kind of melted the adhesive off my old case and so I am in the business of buying a new one but I dropped it and I think the display cable just snapped out because there was no seen damages and then after a week of not wanting to take it an hour away (because google doesn’t like others &&^&^$^ with their phone) I found the tutorial (here) that shows the input behind the glass so I just pushed it back in and POW back to working
How do you get the digitizer display connector cover and display cable connector cover (step 8 and 9) back in? Do you have any tips on doing so? It’s pretty difficult
Hi James, there are a couple tabs around the edges of the rubber pieces that slot under the metal frame. I’d line up the biggest tab first and slot it into place, then press straight down on the rubber piece to snap the rest of it into place.
@adamocamb This may be a beginner question, but feels genuine, as @roanoke mentioned above if the glass and lcd/led panel are not easy to seperate, then, why are they selling these https://www.dhgate.com/product/50pcs-che... and How are people making use of them? Having said that, I don’t see the glass sold separately on ifixit.
Hi Richard, that’s a great question! Separating the digitizer from the OLED without breaking the OLED and correctly bonding a new digitizer to the OLED is very hard to do and requires a special machine. We try to make our guides and parts easy to use and cost-effective for the average fixer, and that repair is not something that we feel comfortable advising most people to do. I don’t know why DHgate sells that part or how many people successfully use it—it might be that professional repairers that already have the proper equipment are the only ones that order it. Hopes that help clarify things!
I know this might be nitpicky but steps 1 and 2 show the suction cup in totally different places and the instructions say that you should place it along the edge with the SIM but in the next picture it is shown on the total opposite side of the phone. So make sure you place it on the proper side!
Great tutorial! My phone works like new!
Best guide I have seen in a long time. Tight as!
Sounds like bullsh!t to me . I don’t known what affiliation this website has with the parts it links you too but this is a %#*@ joke.
200$ for the screen and I replace it myself? Do we live on the same planet?
and from a site who claims they are giving me power and saving me money and whatever.. you can BUY a refurbished pixel2 xl for 200$…. used for less than 140$. There are places offering to do job for more like half of what your advertising us to pay for a screen alone
this is just. Really shameful and pathetic .
Examples of where at those prices? None near me…
I tried changing the display for Pixel XL and it cracked like chips.
Does Pixel 2 XL has a reinforced display that it is easier to replace?
I think the pixel XL screen is impossible to replace without the separation machine.
The Pixel 2 XL does not have a reinforced display—the top glass and panel are unfortunately just as fragile as the original XL screens.
Crap I forgot to ensure the camera gasket was in place before putting my new screen on. Is this a huge deal?
Hi Thomas, it’s not necessarily a huge deal—you should be able to use the camera just fine. I think the worst that can happen with the gasket missing is that dust accumulates on the lens under the screen.
so i got my screen replacement order today but not sure what pre cut tape goes where? Is there more information for this?
Great guide, except some guidance on where to put the new screen adhesive would have been helpful. Just finished repairing my old pixel for my son to use for retro gaming, and he's super excited!