Introducción
Use this guide to replace the screen on your Moto G6 Play, including the midframe which is glued to the display.
Before you begin, download the Rescue and Smart Assistant app to backup your device and diagnose whether your problem is software or hardware related.
Make sure your replacement part includes both the display and the midframe—this guide does not cover separating the display from the midframe.
If your battery is swollen, take appropriate precautions.
This procedure involves removing the battery, which may be damaged during the removal process. We strongly advise you do not reuse the battery as doing so may pose a safety hazard. Replace it with a new battery.
Qué necesitas
-
-
Insert a paperclip or SIM card eject tool into the small hole in the SIM card tray on the upper right edge of the phone.
-
Press the tool into the hole to eject the tray.
-
-
-
If possible, drain the battery before disassembly. When the battery is charged, there's an increased risk of a dangerous thermal event if the battery is overheated or damaged during repairs.
-
Prepare an iOpener and heat the back of the phone along its bottom edge for about two minutes, or until it's slightly too hot to touch. This will help soften the adhesive securing the rear glass.
-
-
-
Apply a suction cup to the bottom edge of the rear glass.
-
Pull up on the suction cup with firm, constant pressure to create a slight gap between the rear glass and the frame.
-
If you have trouble, apply more heat to further soften the adhesive, and try again. The adhesive cools quickly, so you may need to heat it repeatedly.
-
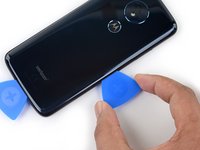
Insert an opening pick into the gap you created under the rear glass.
-
-
Herramienta utilizada en este paso:Tesa 61395 Tape$5.99
-
If the glass remains stuck, re-heat and slice any remaining adhesive repeatedly as needed.
-
Lift the rear glass carefully, making sure it's fully separated from any adhesive.
-
Open the rear glass.
-
-
-
Use a Phillips screwdriver to remove the two screws securing the fingerprint sensor cable retention bracket:
-
One silver 1.5 mm screw
-
One gold 3.5 mm screw
-
-
-
Herramienta utilizada en este paso:Tweezers$4.99
-
Use a Phillips screwdriver to remove the fifteen gold 3.5 mm screws securing the plastic midframe.
-
-
-
Insert a spudger into the notch on the upper right edge of the midframe.
-
Pry the midframe up to release the clips securing it to the device's aluminum frame.
-
Remove the plastic midframe.
-
-
-
Prepare an iOpener and apply it to the middle of the screen, directly behind the battery, for at least two minutes, in order to soften the battery adhesive underneath. Reheat and reapply the iOpener as needed.
-
-
-
Remove the two adhesive strips on either side of the battery well.
-
-
Herramienta utilizada en este paso:Tweezers$4.99
-
Use a pair of tweezers to carefully remove the tape covering the camera module connector.
-
-
-
Insert the pointed end of a spudger underneath the bottom left corner of the earpiece speaker and pry it up.
-
Remove the earpiece speaker.
-
-
-
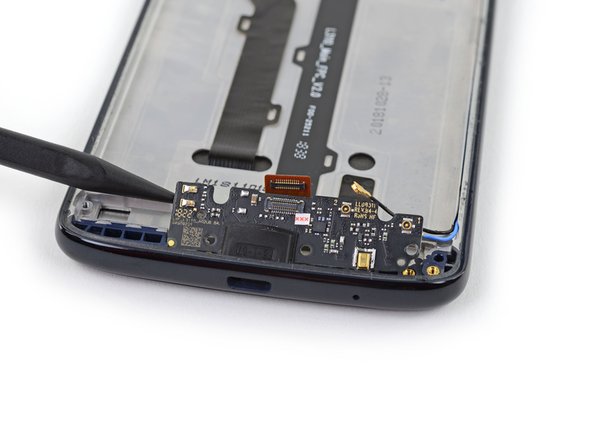
Use a spudger to pry up and disconnect the daughterboard flex cable.
-
-
-
Use a Phillips screwdriver to remove the single silver 2 mm screw securing the daughterboard.
-
-
-
Use a spudger to pry up and disconnect the daughterboard flex cable from the motherboard.
-
-
-
Use the pointed end of a spudger to flip up the locking flap on the side button ZIF connector.
-
-
-
Use a Phillips screwdriver to remove the two silver 2 mm screws securing the motherboard.
-
-
Herramienta utilizada en este paso:Tweezers$4.99
-
Use a pair of tweezers to remove the black strip of tape covering the antenna cables.
-
Retain this piece of tape for reassembly.
-
-
-
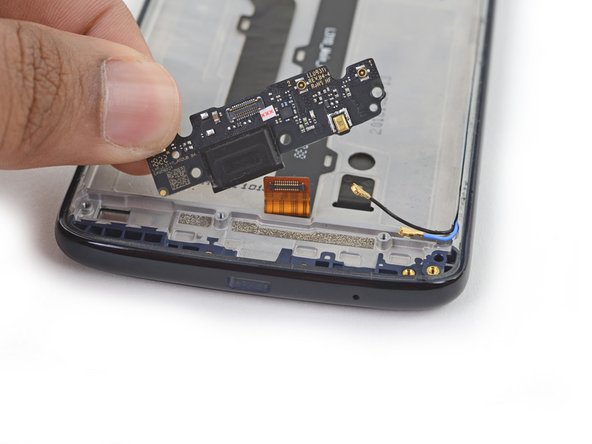
Peel up the daughterboard flex cable and remove it.
-
-
-
Use a pair of tweezers to remove the small silver side button retention bracket from the left side of the device.
-
-
-
Only the screen assembly remains.
-
Compare your new replacement part to the original part—you may need to transfer additional components or remove adhesive backings from the new part before installing.
-
To reassemble your device, follow the above steps in reverse order.
Take your e-waste to an R2 or e-Stewards certified recycler.
For optimal performance, after completing this guide, calibrate your newly installed battery.
Repair didn’t go as planned? Try some basic troubleshooting, or ask our Moto G6 Play Answers Community for help.
Cancelar: No complete esta guía.
7 personas más completaron esta guía.


