Introducción
Your MacBook bit the dust. It has happened to the best of us. Maybe it won't power on, or it simply doesn't boot correctly. You check the backups you thought had been going all this time—but they’re empty. Or it hasn’t completed in longer than you care to think about. Perhaps getting it set up to begin with kept slipping your mind. Whatever the reason, if your Mac has suffered some sort of failure, chances are your data is still there—if you know how to get to it.
Qué necesitas
-
-
If your device doesn’t boot, but is getting some signs of power, use Target Disk Mode to access your files through another Mac.
-
Power off the machine. Press the power button and then quickly press and hold the T button.
-
Your machine may flash the Apple symbol briefly. If successful, this will be followed by a bouncing logo for FireWire, USB or Thunderbolt depending on the model of your Mac.
-
-
-
Use the appropriate cable to connect the two Macs together. This is best accomplished using Thunderbolt, but USB C can be used if your device has these ports.
-
Your Mac's internal drive should appear on your desktop, the same way a flash drive would. You may need to enter your login password to access files.
-
-
-
Devices with Apple Silicon replaced the tried and true Target Disk Mode with the less helpful, but still better than nothing Share Disk Mode.
-
To access Share Disk Mode, you’ll need to get the Mac into Recovery Mode. With your Mac off, press and hold the power button until you see “Loading Startup Options” on screen.
-
Select “Options” on the startup menu screen.
-
If prompted, enter the password for an Administrator account.
-
Now you’re in Recovery Mode!
-
-
-
Now that you’re in Recovery mode we’ll need to enable the Share Disk function. Use the menu bar at the top edge of the screen and select “Utilities.”
-
Select “Share Disk” from the drop down menu.
-
In the Window that appears, indicate which volume you want to share and click “Start Sharing.”
-
Ensure your two Macs are connected with a Thunderbolt cable.
-
-
-
On the Mac receiving the shared access, open a Finder window and go to Network in the sidebar.
-
Your source Mac should should up here. Select it and click the “Connect As” button in the upper right corner.
-
Select Guest in the Connect As window and then click the “Connect” button to confirm.
-
Files from the source Mac should be accessible and can be transferred to another location.
-
-
-
-
This method is a bit more advanced, but will fit the bill if you don't have access to another Mac. We'll be using recovery mode for this Guide, but Single User Mode would also work if your machine will not boot to Recovery.
-
First you'll need to connect a flash drive to your Mac and boot to Recovery, or Single User Mode.
-
-
-
When in Recovery Mode, select Utilities on the Menu bar at the top of the display.
-
Click Terminal in the drop down that appears.
-
If you know, or have already found the exact file path for the folders you want, use the rsync or cp commands to copy the contents from your Mac's storage, to the connected destination.
-
The necessary command will look something like rsync -r /Volumes/"Name of your Boot Disk"/Users/useraccountname /Volumes/"Name of your External Drive"
-
-
-
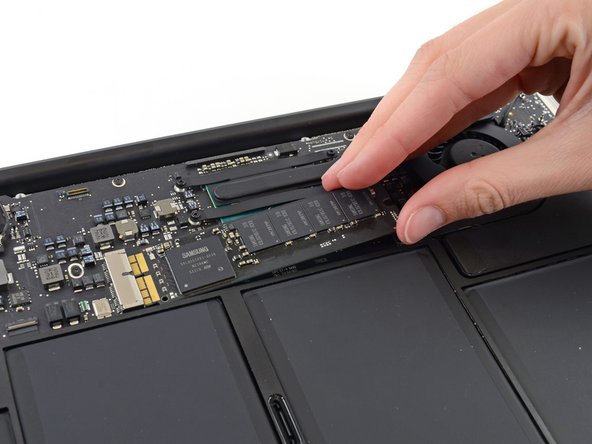
If your MacBook contains a removable hard drive you can use an enclosure to house the hard drive and connect it to another Mac to extract the data.
-
Use the Hard Drive Replacement Guide for your model to extract the drive.
-
-
-
On Touch Bar variants of the 2016 and 2017 MacBook Pros, Apple included a port on the logic board which taps into the soldered on storage.
-
To combat inaccessibility of user data in the case of board failure, Apple also produced a tool specifically for retrieving data via this port.
-
Apple themselves, or Authorized Service Providers are the most reliable way of getting data via this tool. They alone have access to its direct purchase.
-
-
-
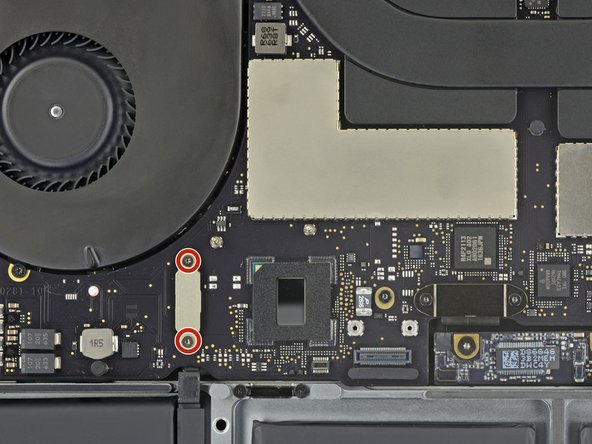
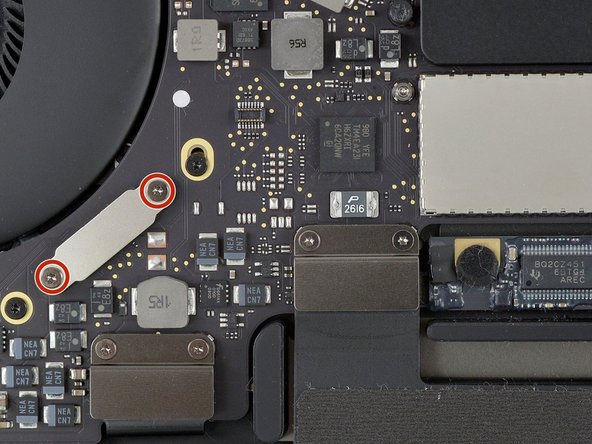
Disconnect the battery for the machine whose data needs extraction.
-
Remove the two T3 screws holding in the LifeBoat Connector. Note the slightly different locations of the port on the 13" versus the 15" models.
-
The tool itself consists of a box with three points of connection. One for power, one to tap into the faulty logic board, and one to connect the faulty board to a known good Mac for data transfer.
-
Connect the cable to the open port on the Mac in need of data extraction and then Thunderbolt cable to the destination or conduit Mac before connecting the power cable to the Migration Tool.
-
If the storage is functional on the Mac, it will appear on the good Mac as an external drive.
-
-
-
As it currently stands, this method is only available from Apple or an Authorized Service Provider, due to its reliance on proprietary software tools, but its existence warrants acknowledgement.
-
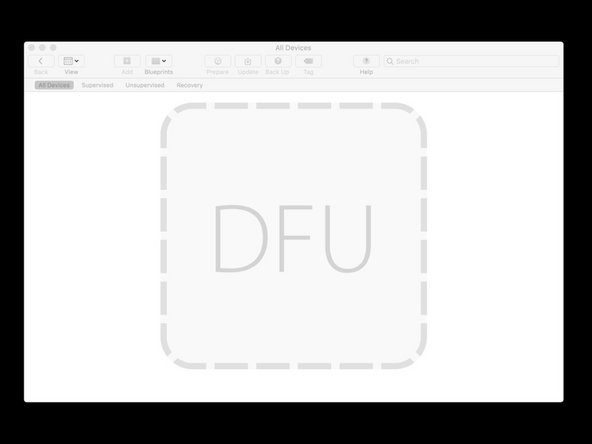
All Mac devices with a T2 chip can make use of the method. The device does not need to be able to power up all the way, but it does require the Mac be capable of accessing Direct Firmware Upgrade, or DFU Mode.
-
While in DFU mode, Apple's tool loads software onto the device which allows the internal storage to be accessed.
-
If you take the device to Apple or an Authorized Service Provider for potential repair, ask about this process. It is under utilized and the technician you work with may not offer it without prompting.
-
-
-
There is a common misconception that if a logic board is damaged or faulty, your data is "just gone," or that you need to send out to pricey data recovery specialists to get your files back.
-
There is a whole industry of local repair technicians fixing logic boards for the sole purpose of recovering data.
-
Ultimately, you'll need to repair the fault preventing the device from powering on or booting to recovery the data.
-
This will likely require microsoldering. If you don’t know what this means, you may not have the knowledge or tools undertake this repair. If you’re curious and want to know more about getting into micro soldering, here’s some good reading and some good watching to get you started.
-
-
-
Once your machine is in a state where data is accessible, there are a few ways to retrieve it that aren’t just dragging and dropping every file or folder you want onto another storage medium.
-
If you want to transfer entire user accounts, apps and settings included, Migration Assistant is Apple’s tool for doing this.
-
Using Migration Assistant is possible with all methods outlined in this Guide aside from using Terminal commands. Terminal will bypass the need for this and copy items directly.
-
-
-
If you want to make a solid back up of your whole drive without restoring it to a new machine, this is your best option.
-
There are a couple ways to accomplish this, but either one will require another Mac and a destination drive to clone the one from the dysfunctional machine onto.
-
Apple built this capability into the Disk Utility App right in macOS. In most current versions of the operating system, it works best if done from Internet Recovery to avoid any background access to the disks.
-
Third party software also exists if Disk Utility does not work, or gives an error, but this software may not be free.
-
-
-
Assuming your hard drive is functioning properly, you can use it as an external startup disk.
-
On the working Mac your disk or device is connected to, press and hold the Option key as you power on. This should bring you to the startup disk selection menu.
-
In the list of startup disk options select the connected disk.
-
Once booted, you can use Time Machine to make a full backup of your device as though it were functioning normally.
-


With any luck, you’ve now got copies of whatever files you absolutely need or a full backup of your device.
With any luck, you’ve now got copies of whatever files you absolutely need or a full backup of your device.
Cancelar: No complete esta guía.
5 personas más completaron esta guía.

Equipo
