Saltar al contenido principal

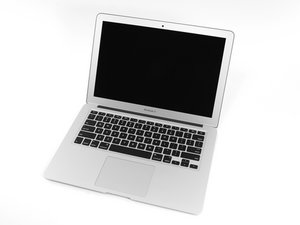
La actualización de marzo de 2015 del MacBook Air de 13" de Apple presenta procesadores Intel Core i5 e i7 de quinta generación, lo que resulta en un rendimiento ligeramente mayor y una mayor duración de la batería.

Preguntas 634 Ver todo

MacBook Air 2015: seems to boot normally, LCD screen does not turn on

My Macbook Air (A1466, 13 inch, early 2015) has a loose screen hinge, so I followed this guide for removing the display assembly, removed the black shroud (with some difficulty), and tightened the screws in the hinge. But when I reassembled the laptop, the screen will not turn on. I cannot see an image when I shine a flashlight through the translucent Apple logo on the back. The laptop seems to boot as normal: I hear the chime and I hear system sounds (such as when I insert a USB stick), and I can turn the keyboard backlight on and off. The laptop also seems to charge normally, since the LED is amber when I plug it in and turns green after a while.

I've previously replaced the SSD and the battery in this laptop, and the laptop worked fine after those repairs.

I've disassembled the laptop again (using this guide) and used a can of computer duster to blow out dust on the logic board and inside the connections. The pins on the connectors look okay. I cannot see any damage to the wires. I wiped the board with some 99% isopropyl alcohol.

I do not have a Thunderbolt adaptor to test with an external display.

Imagen de MacBook Air 13" Early 2015 Placa Lógica

Guía

Reemplazo de la placa lógica del MacBook Air 13" de principios del 2015

Dificultad:

Moderado

1 - 2 hours

Imagen de MacBook Air 13" Early 2015 Ensamblaje de pantalla

Guía

Reemplazo del ensamblaje de pantalla de MacBook Air 13" de principios de 2015

Dificultad:

Moderado

45 minutes - 2 hours

Contesta esta pregunta Yo también tengo este problema

Es esta una buena pregunta?

Puntuación 0
Agregar un comentario

2 Respuestas

Respuesta Más Útil

Open it up and check that:

a) the Display Cable is actually plugged in

b) the Display Cable is seated. Push it in a bit

unfortunately, if it is, and it was working before you took it apart, then the display cable is busted. They are notorious for this and are extremely delicate. If this is the case you might have to replace the display, which will get cost. Meanwhile, you could plug a display in and use the Mac.

Let me know how it goes!

Fue útil esta respuesta?

Puntuación 1

4 comentarios:

The cable's connected and pushed in. I've also blown the socket with compressed air to clear out any dust. No dice.

The keyboard backlight has also stopped working. Aside from getting a dongle and plugging in an external display, is there any other way to check if it's the display cable or the logic board?

- de

I am afraid, you might be in for a new screen by the sounds of it. Sorry mate. It's just that the display cable is the one thing to be scared of inside a Mac.

However, I was growing eBay a while ago, and you can get these Macs for really cheap if for parts. I saw one for about 15 or 30 AUD before. Buy that and stick the new screen in. Screen for dirt cheap!

I hope this answers your question. If so, could you mark the thread as answered/upvote my answer?

Thanks.

Hope this helped. If not, feel free to reach out to me.

--Falcon16

- de

XD Might you please accept this answer so the thread is closed?

Thanks!

--Falcon16

- de

It would be worth buying a thunderbolt adapter to test the display.

- de

Agregar un comentario

@elmererlen if nothing else I would measure the voltage on the DP connector to make sure the panel even gets power. As you said "The keyboard backlight has also stopped working" which leads to more than just a LCD issue. This could be an issue with your WLED driver or the enable circuitry. You may have to dig deeper into your board level components. I'd check the voltages on pin 3,4,14 (when turning computer on it should go high to about 3V),18,19 of the LCD connector. You can measure the voltages on the components around the connector. That way you do not have to worry about shortening out the pins with a multimeter probe.

Of course, check the connector for any damaged or burned looking pins etc.

Block Image

Block Image

Now, all of this is just academics unless you have the right tools and the experience to check your board. It will always help if we can see your board instead of a standard internet image.

Agregar imágenes a una pregunta existente

Fue útil esta respuesta?

Puntuación 0

2 comentarios:

He would need a multimeter with extremely fine tips though! The pins on the display socket are less than half a milimeter wide....

- de

@falcon16 hence to either use the right probes or measure on the corresponding components that are located just before the connector. Each of these lines actually has a capacitor connected to it :-)

- de

Agregar un comentario

Añadir tu respuesta

elmererlen estará eternamente agradecido.
Ver Estadísticas:

Ultimas 24 horas: 0

Ultimos 7 días: 0

Ultimos 30 días: 6

Todo El Tiempo: 43