Saltar al contenido principal

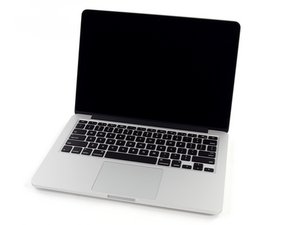
Procesador Intel de doble núcleo modelo A1502 / 2.4, 2.6 o 2.8 GHz / Lanzado en octubre de 2013

Preguntas 552 Ver todo

Display assembly replacement on backlight failure?

Hello,

recently my Macbook pro (late 2013, Retina) 13", made a silent "puuk" sound and the display stopped working. Apple authorized service said - after a diagnosis - that I need display assembly replacement due to the backlight failure. It is weird because backlight chip & fuse is on the board. Can they have right?

Block Image

Block Image

Next:

Block Image

Block Image

Block Image

Block Image

Contestado! Ver respuesta Yo también tengo este problema

Es esta una buena pregunta?

Puntuación 0
3 comentarios

Sure the tires are round and so is your cars steering wheel! So replacing it will fix your flat tire ;-]

Your right! The logic is part of the main logic board. While that is true lets properly diagnose the issue first.

So using a flashlight shine it through the Apple logo (a poor mans backlight) are you able to see your desktop and its icons? If you do then the circuit issue is likely the main logic board. Take the bottom cover off and locate the display connector in the top right corner how does it look clean and shiny or dull and corroded?

- de

The laptop is in Apple service now. I will take it back after weekend and - with your help - try to diagnose the (real) damage. Thanks for the trick with flashlight backlight. I only took cover off and IPA cleaned signal connector. The were no oxides there. Laptop itself is working, excluding the screen. I have a multimeter and soldering station, but have no motherboard scheme.

- de

I finally got laptop back. Flashlight on Apple logo makes a nice tiny backlight. I see a part of a login screen. @danj , could you guide me through the diagnostic procedure?

- de

Agregar un comentario

1 Respuesta

Solución Elegida

Pop off the bottom cover following this guide Reemplazo de la placa lógica del MacBook Pro 13" Pantalla Retina Late 2013 Follow steps to Step6, jump down to Step22 carefully disconnect the connector and inspect both the solder joints and the contacts they both need to look like this:

Block Image

Make sure the rest of the logic board has no stains or corrosion. Let us know what you discover… If you need to post a picture of the damage Agregar imágenes a una pregunta existente

Imagen de iFixit

Guía

Agregar imágenes a una pregunta existente

Dificultad:

Muy fácil

2 - 5 minutes

Imagen de MacBook Pro 13" Retina Display Late 2013 Placa Lógica

Guía

Reemplazo de la placa lógica del MacBook Pro 13" Pantalla Retina Late 2013

Dificultad:

Moderado

1 - 2 hours

Fue útil esta respuesta?

Puntuación 2

8 comentarios:

@danj on a camera magnification the connetor doesn't look good anymore, namely pin marked red. Thanks !

- de

Carefully use a pink pencil eraser going with the direction of the pin to clean off the corrosion.

- de

Ok, I've cleaned the pin using eraser trick and the port using deoxiding chemicals. There is no backlight yet.

Meanwhile I've tried to get/buy/download openboardview mobo schematic, without success. I only was able to get A1502 2015 edition.

Edit: I forgot to add one thing that may (or may not) be important. When the backlight went off also a computer restart sound gone. The sound came back after SMC reset.

- de

I will post comment after comment, to make it visible on the queue.

I had to wait for thinner probes and now I continue a diagnostic procedure. I also got the right schematic.

There is 0V on pin 1. I follow PPVOUT_S0_LCDBKLT line. After C7713 capacitor I must get to the other board side, to get - in the end - to the U7700 and XW7710 (@danj is it a correct diagnostic way?)

The thing is I can not unplug two connectors marked green and yellow. Shall I use the force or is there a trick to unplug it?

Edit: I noticed quite big oil stain under the fan, is it normal?

- de

Use care as these connectors can be easily damaged!

The Yellow marked cable uses a latch on each side of the base to hold the cable end in place you need to pry up on the sides tilting it up from the cable end. The Green connector uses a wedge design looking at gold contacts is a thinner plastic bar which slides upwards a slight amount to the which releases the tension onto the ribbon cable. Now carefully slide the cable out as seen in the Reemplazo de la placa lógica del MacBook Pro 13" Pantalla Retina Late 2013 guide Steps 19 & 20 and 29 & 30.

- de

Mostrar 3 comentarios más

Agregar un comentario

Añadir tu respuesta

Yoshi estará eternamente agradecido.
Ver Estadísticas:

Ultimas 24 horas: 0

Ultimos 7 días: 1

Ultimos 30 días: 3

Todo El Tiempo: 292