Saltar al contenido principal

Reemplazo de pantalla de Google Pixel 8

Aviso: Estás editando una guía de requisitos previos. Cualquier cambio que realices afectará a todas las 12 guías que incluyen este paso.

Inglés
Español

Traduciendo paso 20

Paso 20
Google Pixel 8 Screen Replacement, Reassembly information: paso 0, imagen 1 de 3 Google Pixel 8 Screen Replacement, Reassembly information: paso 0, imagen 2 de 3 Google Pixel 8 Screen Replacement, Reassembly information: paso 0, imagen 3 de 3
Reassembly information
  • If you're installing a new screen with pre-installed adhesive, follow this step during reassembly. Otherwise, follow this guide to apply adhesive to your old screen.

  • Use the pull tabs to remove the liners covering the front camera cutout, the rear camera pad, the back of the screen, and the perimeter adhesive.

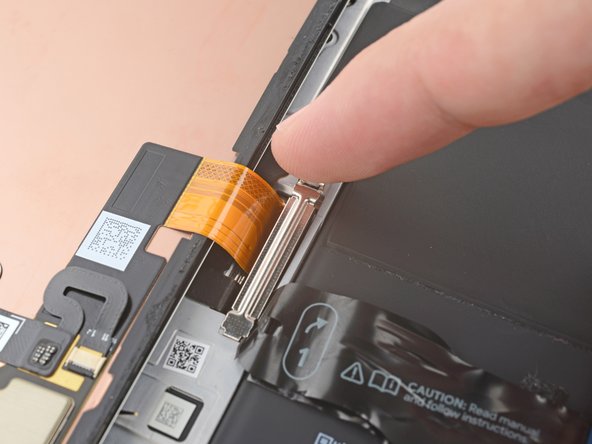
  • Reconnect the screen cable and reinstall its cover.

  • This is a good point to test your phone before sealing it up. Temporarily power on your phone and make sure it works as expected. Power it down before continuing.

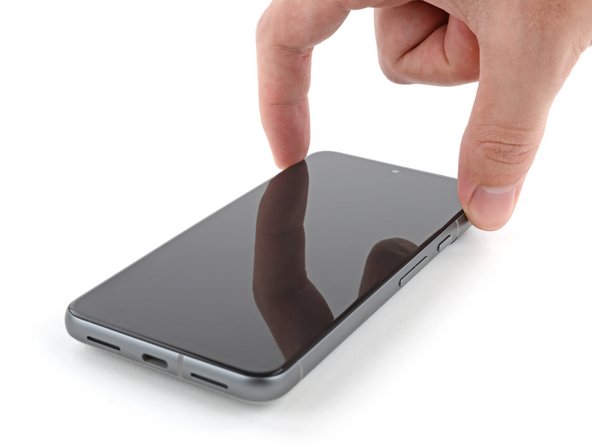
  • Firmly press the screen into place on the frame. You should feel the clips "pop" into place.

  • Press firmly around the perimeter of the screen to secure it with the new adhesive.

  • Optionally, you can strengthen the adhesive bond by applying pressure evenly to the phone.

  • Follow this guide to calibrate the fingerprint sensor.

Si estás instalando una nueva pantalla con adhesivo pre-instalado, sigue este paso durante el rearmado. De lo contrario, sigue esta guía para aplicar adhesivo a tu pantalla original.

Usa las tiras de extracción para remover los revestimientos que cubren la cámara frontal, la almohadilla de la cámara trasera, la parte trasera de la pantalla, y el adhesivo perimetral.

Reconecta el cable de la pantalla y vuelve a colocar su cubierta.

Este es un buen punto para probar tu teléfono antes de sellarlo. Enciende tu teléfono temporalmente y asegúrate que funciona según lo esperado. Apágalo antes de continuar.

Firmemente presiona la pantalla en su lugar en el marco. Deberías escuchar a los clips colocarse en su lugar.

Presiona firmemente alrededor del perímetro de la pantalla para asegurarla con el nuevo adhesivo.

Opcionalmente, puedes reforzar la unión del adhesivo aplicando presión uniformemente al teléfono.

Sigue esta guía para calibrar el sensor de huella dactilar.

Tus contribuciones son autorizadas bajo la licencia de código abierto de Creative Commons.