Esta traducción podría no reflejar los cambios más recientes añadidos a la guía de referencia. Ayúdanos a actualizar la traducción o revisa la guía original.
Introducción
Tomé estas imágenes de varias guías de personal de iFixIt, así como también de imágenes de google. Gracias a todos por leer, ¡espero que esto ayude! Siéntete libre de dejar cualquier comentario, bueno o malo, para ayudarme a mejorar la guía para otros.
Qué necesitas
-
-
Si el cristal de la pantalla está agrietado, mantén la rotura contenida y evita que se produzcan daños corporales durante la reparación pegando el cristal con cinta adhesiva.
-
Coloca tiras superpuestas de cinta de embalar transparente sobre la pantalla del iPhone hasta cubrir toda la cara.
-
-
-
Quita los 2 tornillos Phillips # 00 en la parte inferior del iPhone, ubicados a ambos lados del conector de base .
-
-
-
Este paso está sin traducir. Ayuda a traducirlo
-
After connectors 1, 2, and 3 are detached, you can lift the display assembly off completely, and set apart the case for the iPhone, you will only need the assembly for now.
-
-
Este paso está sin traducir. Ayuda a traducirlo
-
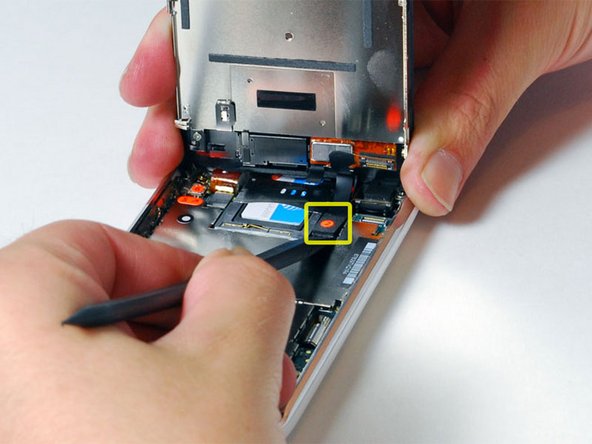
It will be easy to locate the home-button assembly from here.
-
Make sure the cable that runs into the home button assembly is not damaged or loose. This cable is indicated in the image here with a rectangular marker.
-
-
Este paso está sin traducir. Ayuda a traducirlo
-
If this STILL doesn't work, check the pins on the cables connected to the home-button (marked with a red marker in second image.) Again, if any pins are broken, you might want to buy new cables, or a new home-button, because these pins are very fragile and hard to fix.
-
-
Este paso está sin traducir. Ayuda a traducirlo
-
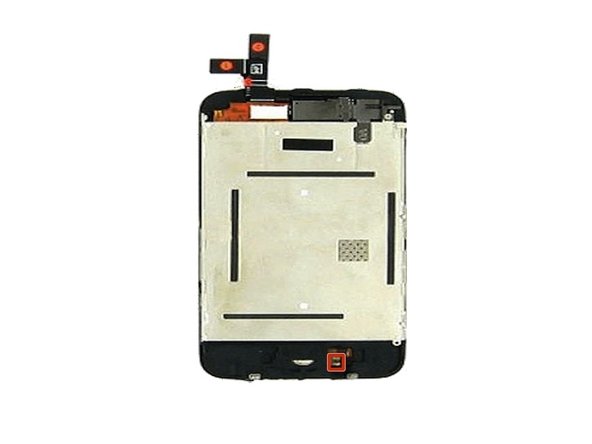
If any cables or pins are broken , you could buy new cables, as mentioned before. However, if the home-button screws are broken or missing, or the home-button is completely broken, you might want to buy a new home button assembly. This assembly is displayed on this step's adjoining image.
-


Para volver a ensamblar tu dispositivo, sigue estas instrucciones en orden inverso.
Para volver a ensamblar tu dispositivo, sigue estas instrucciones en orden inverso.
Cancelar: No complete esta guía.
41 personas más completaron esta guía.
Un agradecimiento especial a estos traductores:
63%

Estos traductores nos están ayudando a reparar el mundo! ¿Quieres contribuir?
Empezar a traducir ›

Equipo

5 comentarios
Please add comments to help me figure out what to improve about my guide!
hmm, but how do i REALLY get the home button changed? sad.
So following your instructions I found that one of the "springs" on the home button assy was missing. I ordered a replacement assembly but I can't figure out how to replace that assembly. Do I need to take the whole display apart?
Any inputs would be greatly appreciated.
Cheers,
Hans
fix3g on my LG phone