Introducción
Sigue esta guía para sustituir los botones L1 y/o R1 de tu mando Sony DualSense.
Nota: Esta guía es para los controladores DualSense actuales con ID de FCC que terminan en A. Comprueba la parte posterior de tu mando para verificar su modelo. Si el tuyo termina en 1***, se trata de un modelo anterior y habrá diferencias internas. Sigue estas guías para la versión anterior.
Qué necesitas
-
-
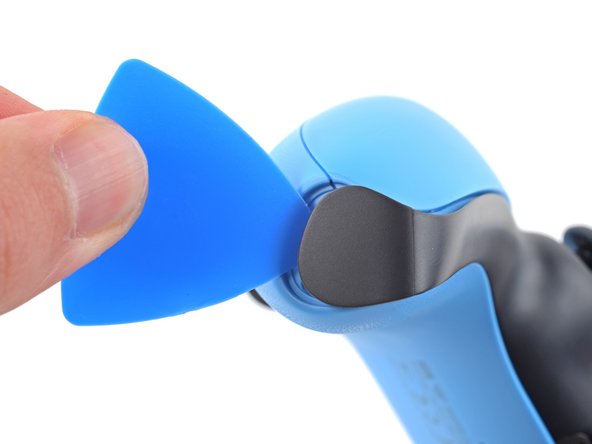
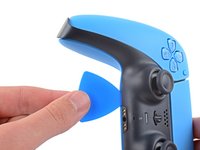
Introduce una púa de apertura por debajo del embellecedor central de la esquina inferior derecha del mando para liberar los clips que lo sujetan a la carcasa.
-
-
-
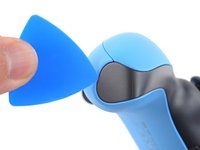
Desliza la púa de apertura a lo largo del borde inferior derecho del embellecedor central para liberar los clips que lo sujetan a la carcasa.
-
-
-
Introduce una púa de apertura por debajo del embellecedor central de la esquina inferior izquierda del mando para liberar los clips que lo sujetan a la carcasa.
-
-
-
Desliza la púa de apertura a lo largo del borde inferior izquierdo del embellecedor central para liberar los clips que lo sujetan a la carcasa.
-
-
-
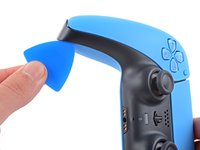
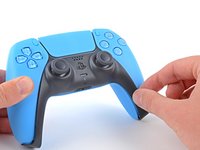
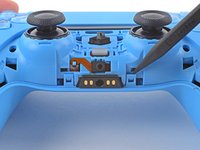
Levanta con los dedos el borde inferior del embellecedor central para soltar los clips restantes.
-
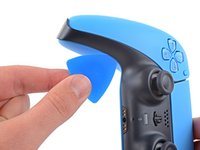
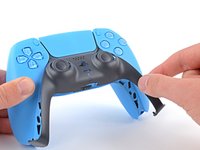
Levanta el embellecedor central sobre los joysticks para retirarlo.
-
-
-
-
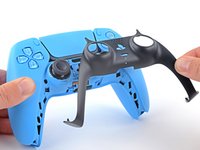
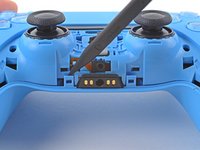
Introduce el extremo plano del spudger en el hueco situado encima del botón L1.
-
Haz palanca hacia arriba para extraer el botón L1.
-
-
-
Introduce el extremo plano del spudger en el hueco situado encima del botón R1.
-
Haz palanca con el spudger hacia arriba para extraer el botón R1.
-
-
-
Utiliza un destornillador Phillips para retirar los dos tornillos de 6,5 mm que sujetan las esquinas inferiores de la carcasa inferior.
-
-
-
Utiliza el borde puntiagudo de un spudger para soltar los dos clips situados a ambos lados de la toma de auriculares.
-
-
-
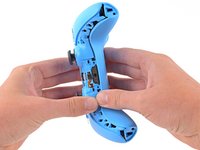
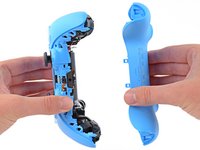
Con las manos, extrae con cuidado la carcasa trasera del controlador.
You can´t just grab both ends and expect it to open flawlessly, first you gotta travel the spudger around the seam at the outer edges of the controller, there are multiples clips in that area, there a couple really hard to get out at the outer edges of the R1 and L1 buttons, for those you need to insert the spudger bending outwards the bottom piece of the controller (a fairly amount, like 1.5mm) and while bending outwards use the same inserted spudger to lever them apart carefully, the plastic will bend quite a bit so be very careful with the motion of the spudger.
Yet again, that was my personal experience opening it up, try first as the guide says, if you feel the upper and bottom pieces glued around the R1 and L1, then try this.I had the same experience, the best way to reach these for me was to place the spunger from L1 R1 side whilst using a spunger to press outwards from the side like in Carlos's comment. Thank you Carlos I was struggling with this!
This did not work for me. Finally I just pulled the two parts apart at the bottom side, carefully twisting and manipulating until the parts clicked loose at the top side
This is the biggest hassle in the whole process. It seems that all controllers now come with those extra clips that other people mentioned here. I, however, didn't have the same success with their steps of running a spudger on the sides to undo the clip. Looking around, I found this Youtube video showing that you can undo the clips simply by twisting up from the bottom. Do it carefully because it pops off easily using this method - when I did, I used some force and the back just flew from my table.
I found it easier like that and was able to continue the process.
+1 to this. None of the suggestions worked well enough for me, but this video clip got this step done for me nearly instantly. note the position of the tech's fingers and thumbs - I copied that exactly and had no issue.
Nathan K -
-
-
-
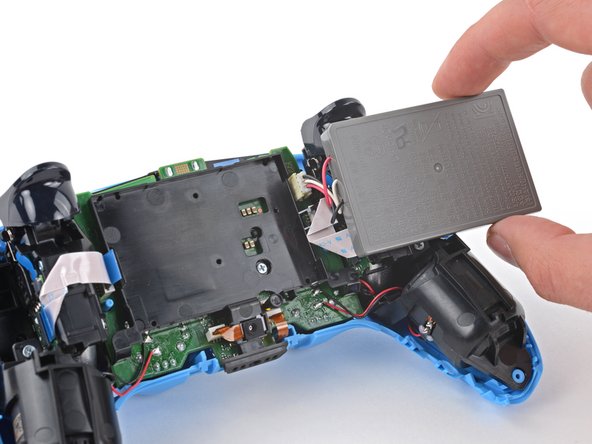
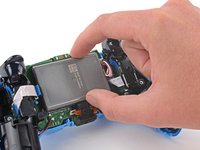
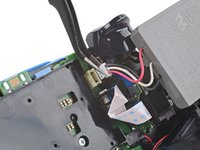
Levanta la batería de su soporte y vuelva a colocarla a la derecha para acceder mejor al conector de la batería.
-
-
Herramienta utilizada en este paso:Tweezers$4.99
-
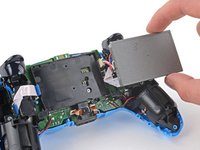
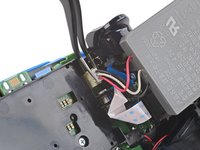
Utiliza unas pinzas o tus dedos para desconectar la batería de la placa base.
-


Para volver a montar el dispositivo, siga estas instrucciones en orden inverso.
Lleva tus residuos electrónicos a un R2 o e-Stewards.
¿La reparación no ha ido según lo previsto? Prueba a solución de problemas básicos, o pide ayuda a nuestra Comunidad de respuestas].
Para volver a montar el dispositivo, siga estas instrucciones en orden inverso.
Lleva tus residuos electrónicos a un R2 o e-Stewards.
¿La reparación no ha ido según lo previsto? Prueba a solución de problemas básicos, o pide ayuda a nuestra Comunidad de respuestas].
Cancelar: No complete esta guía.
3 personas más completaron esta guía.
Un agradecimiento especial a estos traductores:
100%


Estos traductores nos están ayudando a reparar el mundo! ¿Quieres contribuir?
Empezar a traducir ›

Un comentario
The guide was very helpful for most everything. I did have trouble prying off the back plate, what wasn’t clear was that clips near the L1 & R1 need to be pried ~ 1.5 mm with a spudger in the direction of the face buttons and not the back plate.