Esta guía ha sufrido modificaciones. Revisa la última versión sin revisar.
Introducción
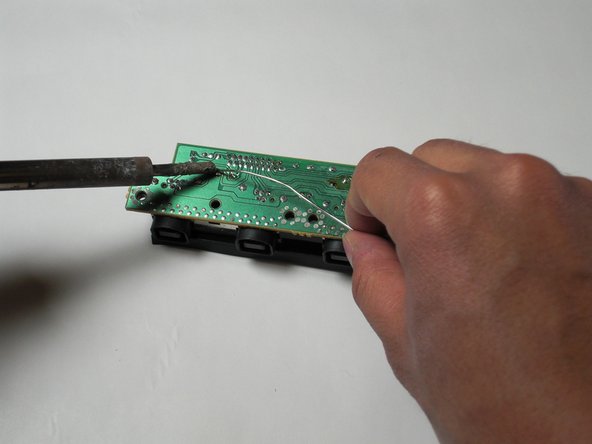
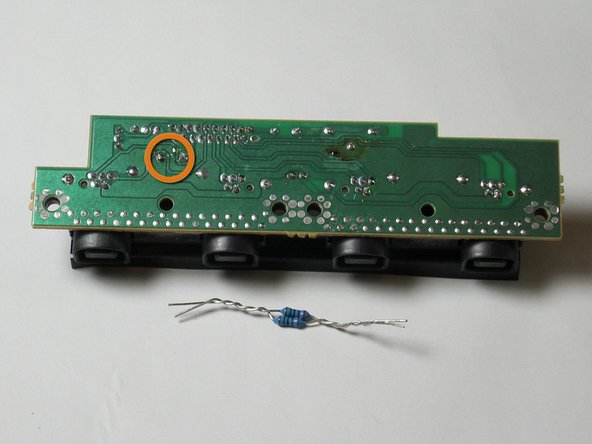
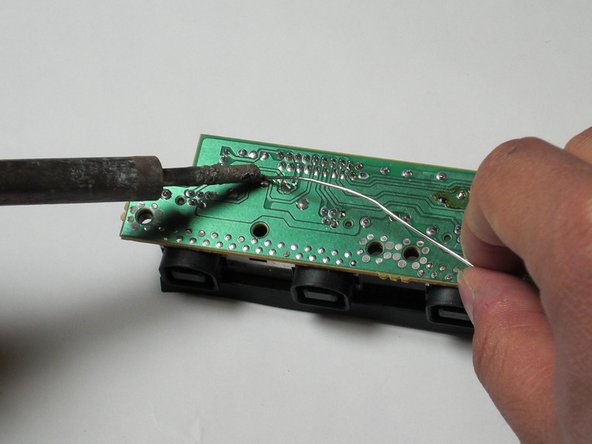
Replacing the F1 fuse on the controller board of the Sega Dreamcast. Soldering is required for repair.
Required parts
- 5 Ohm 1/2 watt fuse resistor OR two 10 Ohm 1/4 watt metalized resistors
- Controller board
Qué necesitas
-
-
Flip the console over on its back.
-
Take note of your model number, in case replacement parts are needed.
-
-
-
Locate and remove all four black 12mm Phillips #02 screws from the underside of the console.
-
-
-
Disconnect the white controller cable by gently pulling the the cable while wiggling it back and forth until it detaches from the controller board.
-
-
-
-
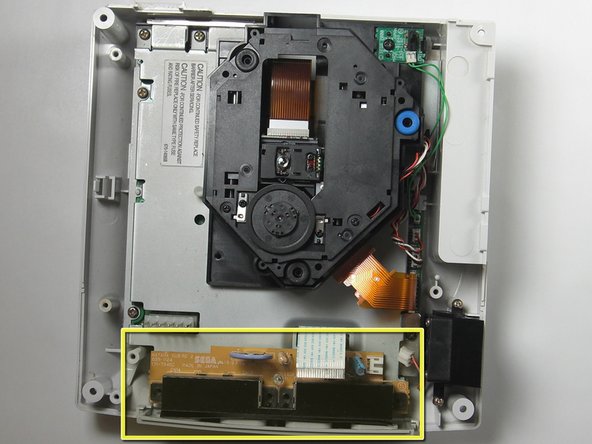
Flip the controller board on its underside so that the solder joints are exposed.
-


To reassemble your device, follow these instructions in reverse order.
To reassemble your device, follow these instructions in reverse order.
Cancelar: No complete esta guía.
6 personas más completaron esta guía.
Equipo

Cal Poly, Team 5-1, Regan Fall 2009 Miembro de Cal Poly, Team 5-1, Regan Fall 2009
CPSU-REGAN-F09S5G1
5 Miembros
21 Guías creadas
6 comentarios
Hello, Darren. I am having the utmost difficulty doing this with two 1/4 watt resistors, as you have demonstrated. I have three dreamcast systems, I would like to repair (all with a bad controller port.) What would be the chance that I could send you the ports, packs of resistors and and solder and pay you to do this to all of them?
I would even be willing to give you two of them! I just want one working system!
djresree -
I need this board, were do I find one?