Introducción
Reemplaza ese disco que se comió tu copia favorita de Call of Duty.
Nota: La unidad óptica y la placa base están emparejadas y deben reemplazarse juntas. Si intentas reemplazar la unidad óptica pero no la placa base, es posible que los discos del juego no se lean y que tenga problemas con el juego en línea.
Qué necesitas
-
-
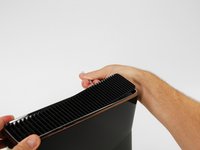
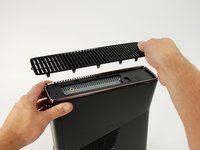
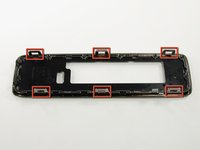
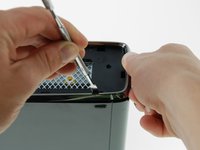
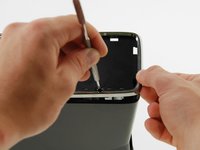
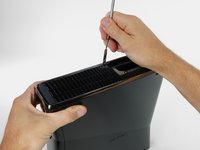
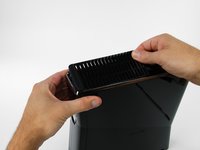
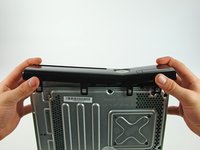
En los siguientes pasos, removerás la ventila superior, asegurada al panel superior por los trece clips mostrados a continuación
-
-
-
Orienta la consola de modo que las palabras "XBOX 360" de los lados miren hacia la derecha y estén orientadas hacia arriba, y la placa frontal mire hacia la izquierda
-
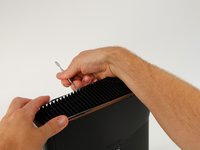
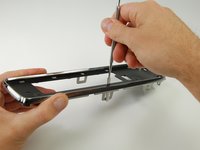
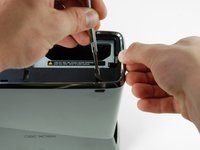
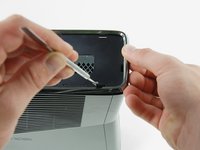
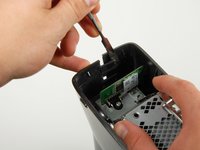
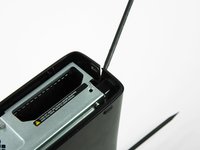
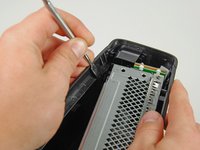
Inserta un spudger metálico entre la ventila superior y el bisel superior cerca de la parte trasera de la Xbox
-
Rota el spudger hacia afuera de la consola, haciendo palanca hacia arriba en el borde de la ventila hasta que se liberen los clips de plástico
This step is and the others following are to rough and not needed, simply put smth in between the lamellar and push it up with littlebit pressure thats better for the plastic parts.
-
-
-
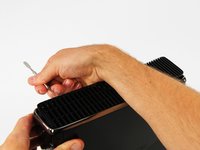
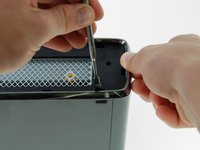
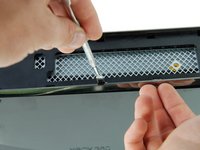
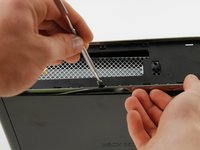
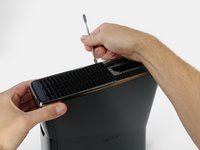
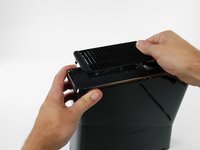
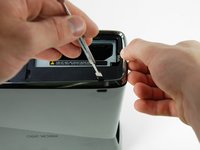
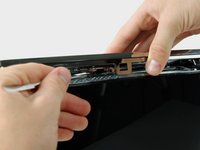
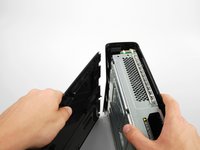
Inserta un spudger metálico entre la ventila y el bisel superior a lo largo del lado izquierdo de la consola
-
Del mismo modo descrito arriba, empieza a hacer palanca hacia afuera del bisel superior en el lado izquierdo de la ventila superior
-
Continúa haciendo palanca a lo largo del lado izquierdo del dispositivo, liberando todos los clips de ese lado
-
-
-
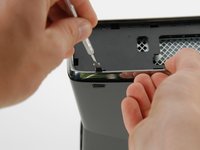
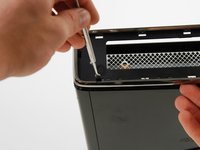
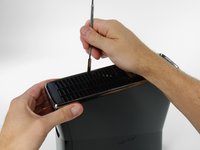
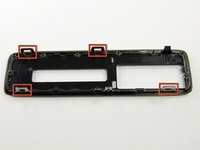
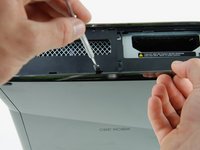
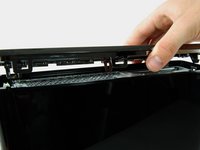
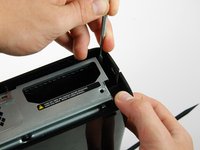
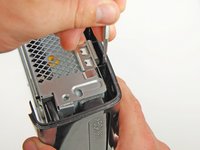
Inserta un spudger metálico a través de la ranura en el borde izquierdo del borde superior ubicada más al frente y entre el borde inferior del clip y la carcasa izquierda como se muestra arriba
-
Simultáneamente rota el spudger metálico hacia afuera de la consola tira hacia arriba en el bisel superior para liberar el clip
So I got the fan filter thing off, but the black edge plate thing isn't coming off. All I did was warp my flathead screwdriver and scratch the console.
-
-
-
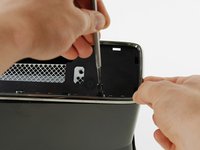
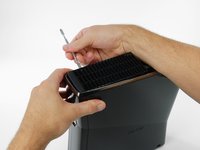
Rota la consola de modo que la parte trasera de la Xbox 360 S mire hacia la derecha, y la carcasa derecha mire hacia ti
-
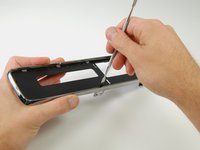
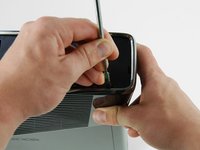
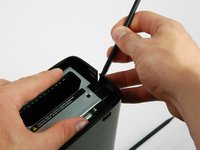
Inserta un spudger metálico a través de la ranura del borde derecho del bisel superior ubicada más hacia atrás, y entre el borde inferior del clip y la carcasa derecha
-
Rota el spudger hacia afuera de la consola mientras levantas el bisel superior con tus dedos para liberar el clip
-
-
-
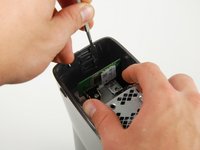
Empuja hacia la izquierda el pestillo que sostiene la cubierta del disco duro
-
Tira la cubierta del disco duro hacia afuera de la consola
-
-
-
Agarra firmemente la etiqueta de tela que dice la capacidad del disco duro( Ej: 250 GB), unida al disco duro
-
Tira el disco duro hacia afuera de la consola
If i buy a new xbox 360 and replace the hardrive inside with my own, will i have my account and saves? or will i have to recover my account and start over?
You will still have your saves and account if you replace your hard drive in the new xbox
hola tengo un disco de laptop y quiero ponerle 100 juegos como puedo hacer la xbox me reconose el disco y todo lo configuro pero cuando conecto a mi pc para pasar los juejosel emulador no me deja
-
-
-
-
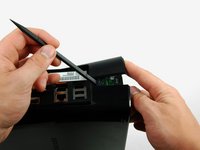
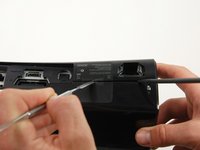
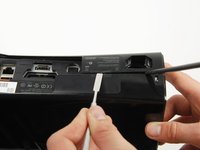
Inserta un spudger metálico a través de la abertura cerca la esquina inferior izquierda del bisel inferior
-
Rota el spudger hacia afuera del dispositivo mientras levantas el bisel inferior hacia arriba (valga la redundancia) con tu otra mano
These are pretty awkward to remove, but once you understand how they work its easy enough. The goal here is to slot the spudger THROUGH the gap of the silver tabs (visible in previous steps image, circled) and then pry. Put pressure against the wall of the Xbox case and push downwards, once you feel the spudger slot in, then apply force away from the Xbox and pull up a little with your free hand.
-
-
-
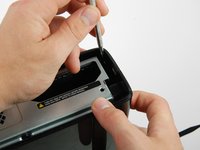
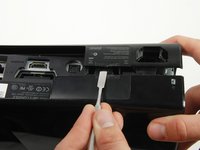
Inserta un spudger metálico a través de la abertura izquierda en medio del bisel inferior, y entre el borde inferior del clip y la carcasa izquierda
-
Jala hacia arriba el bisel inferior y rota el spudger hacia afuera de la consola simultáneamente para liberar el clip
-
Libera el clip al frente del borde izquierdo del bisel inferior del mismo modo
-
-
-
-
Localiza los dos clips que conectan el panel izquierdo y el derecho junto al borde de la parte de arriba de la consola, detrás de la carta del Wi-Fi.
-
Mientras empujas el panel izquierdo y el derecho lejos de cada uno con una mano, saca los clips del panel con una espátula de metal.
-
-
-
Inserta el borde plano de un spudger de metal entre las cajas izquierda y derecha donde solía estar la etiqueta de garantía.
-
Haz palanca en la caja izquierda hacia arriba para formar un espacio entre las dos cajas y desliza el spudger hacia la caja izquierda.
-
Gira el spudger hacia arriba para liberar el último clip.
if you make a hole right here like the link`s picture you can boot the lock
As the user above me said, please avoid doing it like shown in the guide. It just didn’t work on my Xbox (unless your goal is to destroy the plastic case). Instead, pick some small needle like object (the spudger was too short for this, I used the SIM bit of my iFixit driver kit) and find the right spot on the big sticker which is on the left in the pictures shown in the guide. That spot is just between the text and the column of logos (Dolby Digital, etc.) (https://team-xecuter.com/slim/slim_secre..., picture not mine). Poke it (don’t be too gentle, you have to apply some force) and you will hear the clip release.
Both the above links are dead, i used this YouTube video which shows you the process of getting the hidden clip
I was able to open it by pushing on the sticker to unclamp the clip while another person helped me pull open the case.
Here is a Video that shows the small hole behind the sticker, ist in german but ist good to see how to open that hidden clip easiely.
None of the above options by the other commenters worked for me, but I found a video that points out there's a little hole right in the middle of the "SEE PRINTED MANUAL" and "UL" on the sticker under the Xbox 360 warranty sticker that I stuck a sewing needle into and it unlatches the latch: https://youtu.be/7mC8ckDvKqc?si=CVyCszpF...
-
-
-
Voltea la consola de modo que la parte inferior quede hacia arriba.
-
Suelta un clip en la esquina frontal izquierda del borde inferior que sujeta la carcasa izquierda a la placa frontal.
-
Gira la carcasa izquierda lejos del dispositivo para liberar los dos últimos clips internos.
-
Retira la carcasa izquierda.
-
-
-
Suelta el clip cerca de la esquina frontal derecha del borde superior que sujeta la carcasa derecha a la placa frontal.
There are 4 black screw that has to be removed before you can detach the other cover. Please note
Sorry, there 5screws, one in the middle and 4 at the edges
-
-
-
Levanta el borde izquierdo de la placa frontal hacia arriba para soltar los dos últimos clips que sujetan la placa frontal a la caja derecha.
-
Separa la placa frontal del resto del dispositivo.
There isn’t 2 clips there is 4 clips
I tore this on reassembly and it was barely held together. Be careful!
-
-
-
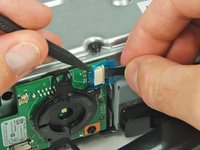
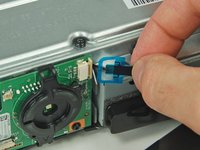
Usando un spudger o una uña, levanta la pestaña azul transparente del conector.
-
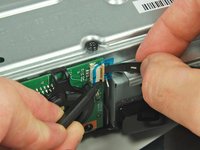
Desliza la lengüeta de bloqueo del conector del cable de la placa del interruptor de alimentación hacia la parte superior de la consola.
-
Saca el cable del interruptor de alimentación directamente del conector.
-
La placa frontal ahora está libre del resto de la consola.
-
-
-
Retira los dos tornillos Torx T8 de 5,6 mm que sujetan el módulo de RF a la caja de metal.
On my disassembly during this part, I found the T9 Torx to be too big and had to use the T8 Torx instead.
The correct size is T8!
-
-
-
Tira de la placa directamente lejos de la Xbox para quitarla.
It may not be required but recommended. As you move the xbox around you could break this part. Removing it and placing it in a safe place keeps that from happening.
-
-
-
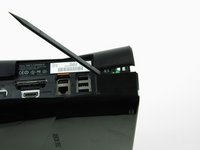
Retira el único tornillo Torx T10 que sujeta la tarjeta inalámbrica.
-
Extrae la placa Wi-Fi de la consola.
-
-
-
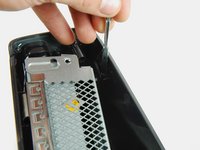
Retira la pegatina blanca grande del marco metálico para exponer un tornillo.
-
-
-
Retira los cinco tornillos Torx T10 de 55,5 mm que sujetan la carcasa derecha al marco de metal.
I opened an Xbox 360 S manufactured in 2010. These 5 screws are needed to be undone in order to complete step 30. I didn't know about the one under the sticker so I ended up breaking the housing as a result. I'd appreciate it if you could make a note to step 30 pointing you to this step if you are having trouble taking the side off, as it is highly likely that these screws are the reason.
-
-
-
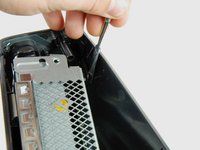
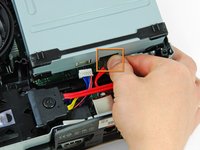
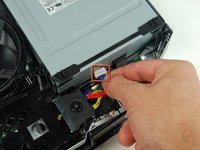
Desconecta el cable de datos de la unidad óptica de la parte posterior de la unidad óptica.
-
Desconecta el cable de alimentación de la parte posterior de la unidad óptica.
-
-
-
Levanta la unidad óptica de la Xbox.
Is there a specific Optical Drive that Microsoft uses in these or can I upgrade my drive?
i took my drive out but when installed my replacement it would not work
WAS thinking of possibly trying to repair my son's Xbox 360S, by replacing the optical drive, but after looking at all the spudger steps to get to the drive and then your comment that the replacement might not actually work... forget about it! I ain't going to all that work for possibly nothing... t'ain't worth it!
Anyone want a perfectly working Xbox 360S with a drive the spins game discs upon ejection? We've already bought a replacement, so this unit is for sale... name your price.
Luposian -
In regards to davidgardner301 comment there is a extra step they. Didn't show on this replacement guide in order for your new disk drive to work you will need to remove the origional board connected to thje origional drive that came with the system and soler that onto the new one its a tricky process however its a step most people over look
Without the origional board the xbox will not accept the replacement drive only because each disk drive is coded to work with tat soecific xbox only so your out of luck if you already. Tossed out your old disk drive
The DVD drives are coded to the Motherboard. If you buy the same exact drive to replace the broken one. You will still need to either 1) transfer the DVD circuit board OR 2) get the Firmware from the old DVD drive using a PC and then transfer it to the New DVD. There are website regarding this procedure if you want to look it up.
-


Para volver a armar tu dispositivo, sigue estas instrucciones en orden inverso.
Para volver a armar tu dispositivo, sigue estas instrucciones en orden inverso.
Cancelar: No complete esta guía.
170 personas más completaron esta guía.
Un agradecimiento especial a estos traductores:
100%


Estos traductores nos están ayudando a reparar el mundo! ¿Quieres contribuir?
Empezar a traducir ›

18 comentarios
I have to admit that i used this exact guide step by step and managed to fix a stuck DVD tray. I had to use another guide to disassemble the DVD drive but this guide is top notch.
How did you get it unstuck? I’m having the same problem?
Used this guide to remove the optical drive from my sons Xbox to remove a piece of paper put there by his little sister! The guide is relatively easy to follow and the hardest part is getting the casing off, beyond that you just need patience.
I agree. Especially near the back where the warranty sticker is. I think they made it hard on purpose so you wouldn’t break it
Hi Fixit, I work pretty much exclusively with Apple products, but was bullied into replacing the optical drive in a 360S.
Having never opened an XBox, I followed your guide to the letter. I completed the job in 1 hour with no problems, broken parts or skinned knuckles.
Keep up the good work guys.
A grateful Ian Younie
How do I find out what drive to purchase?
I recommend you try y ok get a xbox 360 slim that's broken, then take both apart and swap the drives.
Thank you for this guide. It worked perfectly! However, you should really put at the top, in big letters, that fact that following this guide will result in Microsoft banning the console, so you will never be able to play online games on it again. This is exactly what happened to me. If I had known this ahead of time, I would have sent the Xbox back to Microsoft for repair rather than fixing it myself.
So I installed the drive but the thing keeps reading the games as dvds, hence; wont play them, why?
Did you ever figure this out? I am having the same problem
Won't read Games because you didn't swap the motherboard over as well. Its possible to flash it over but you'll still need original motherboard that was with the disk drive.
In case noone figured it out you can also swap the system board from the old drive into the new one but it may require some soldiering
I followed this to try to fix my DVD Drive. The tray is stuck and it thinks it either ejecting or closing. I’ve opened the drive up and it appears to be in fine condition. Nothing is blocking anything. Anyone have any idea why this is happening?
Steps are a littlebit to rough and offensive for the plastic parts, please check the Xbox 360 Opening (X-Tools) Tutorial on YouTube and fix your guide.
Hi my sister has two Xbox 360s’s one with the red ring of death and another that won't read discs. So I found this guide to swap the drives but nowhere do you show how to swap the mother board as well. Is that pretty straight forward once you have it gutted or did I miss something?
This guide is great for getting to the disc drive but it leaves out several key details for it to be usable as a guide for replacing the drive. You will not end up with a properly functioning console by following this guide.
-If you do a straight up replacement of the drive, which is all this guide covers, then it'll recognize everything as a DVD instead of a game disc because the new drive's PCB isn't paired to your old motherboard.
-It does briefly mention that the board and drive are paired. What it doesn't say is that it's just the drive's PCB that is paired. You do not need a motherboard replacement if you swap out the PCB on the new drive with your old one, assuming the old drive's PCB is still good, which it most likely is. A PCB swap requires a bit of soldering.
-If you do a full drive replacement then you have to replace the motherboard with one that's paired to the new drive. This guide says you need to swap out the motherboard (which isn't entirely true) but doesn't actually show the steps to do so.
Now I need to figure out the PCB swap thing. Thanks for the guide!
The motherboard and the disc drive's PCB (circuit board) are paired. If the drive's PCB is fine, which it most likely is, then all you need to do is swap out the PCB on the new drive with your old one before installing it. No motherboard replacement required.
Only in the unlikely case that the drive's PCB is fried will you require a full drive and motherboard replacement.
SirStephenH - Contestar