Esta traducción podría no reflejar los cambios más recientes añadidos a la guía de referencia. Ayúdanos a actualizar la traducción o revisa la guía original.
Introducción
Sigue esta guía para quitar y reemplazar la pantalla de tu Samsung Galaxy J3. Esto incluye el cristal frontal, el digitalizador y el panel LCD.
Asegúrate de apagar el teléfono antes de seguir esta guía.
Este procedimiento elimina la pantalla de forma destructiva. No sigas esta guía para reemplazar los componentes internos del teléfono.
Qué necesitas
-
-
Inserta una uña o el extremo plano de un spudger en el orificio a la izquierda de la cámara trasera.
-
Retira suavemente la tapa posterior del teléfono hasta que se suelten todos los clips de plástico que sujetan la tapa.
-
-
-
Inserta una uña o el extremo plano de un spudger en el pequeño orificio debajo del paquete de baterías.
-
Levanta el paquete de batería de su alojamiento.
-
Remueve el paquete de batería.
-
-
-
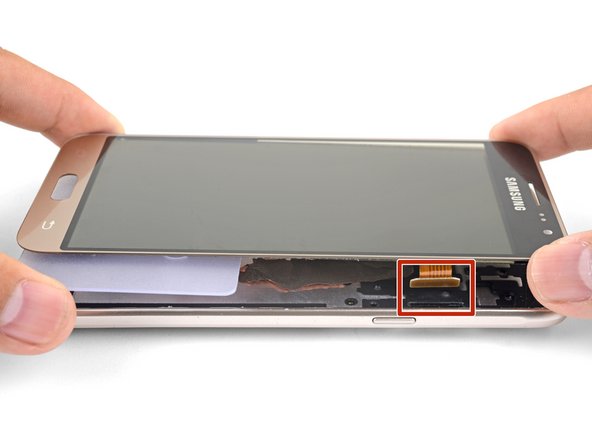
Inserte el borde de una herramienta de apertura en el orificio de la tapa del conector de la pantalla. La tapa está situada en el borde izquierdo por encima del hueco de la batería.
-
Saca la tapa del conector de la pantalla de su hueco.
-
Retira la tapa del conector de la pantalla.
-
-
-
Da vuelta el teléfono.
-
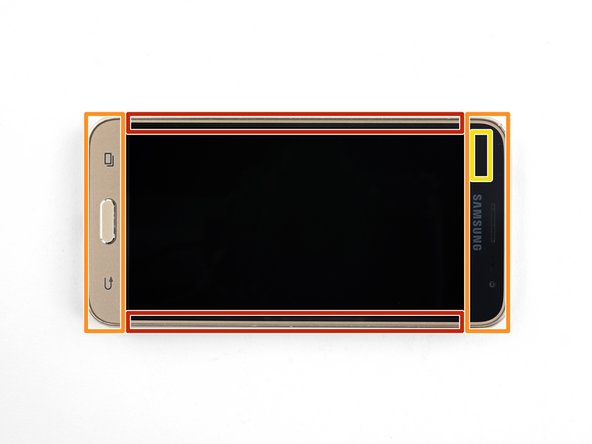
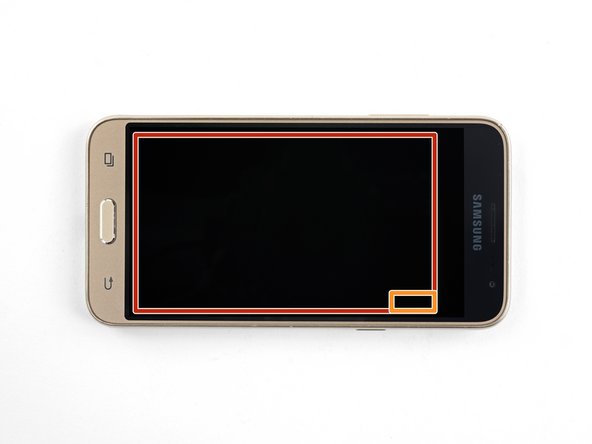
Calienta un iOpener y aplícalo en el borde derecho del teléfono durante un minuto.
-
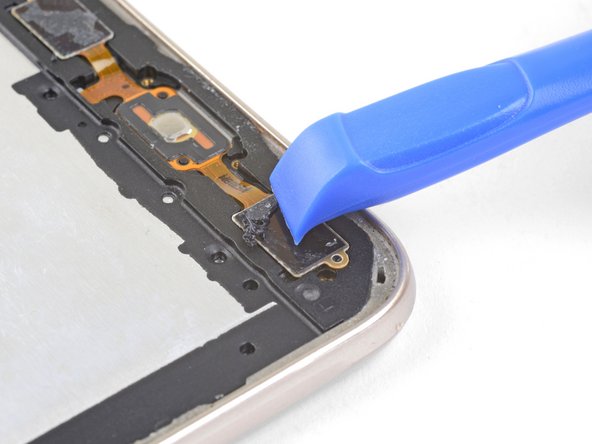
El adhesivo fino que bordea el panel de pantalla.
-
El adhesivo grueso que sujeta los biseles superior e inferior.
-
El cable del digitalizador, que dificultará el corte si es golpeado.
-
-
-
-
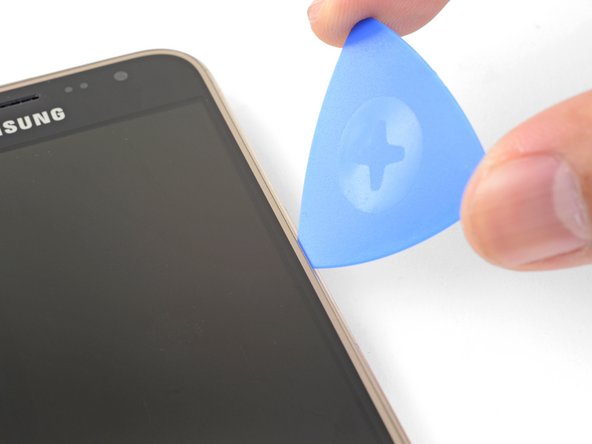
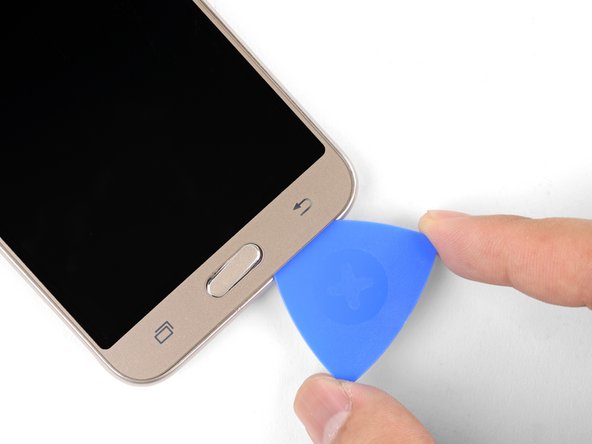
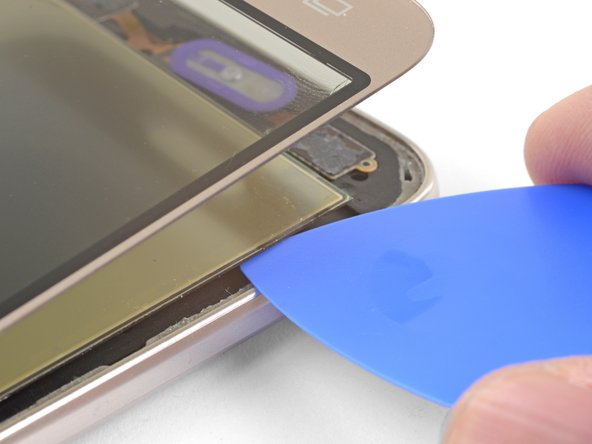
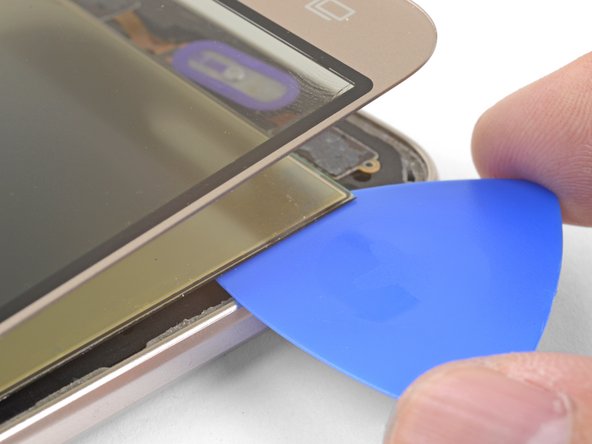
Sujeta el panel superior por las esquinas y gira lentamente el borde inferior ligeramente hacia arriba.
-
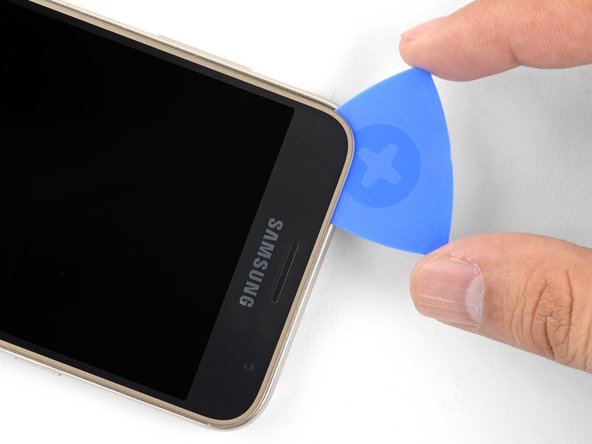
Mueve suavemente el panel superior y utiliza una púa de apertura para cortar cualquier resto de adhesivo.
-
Lo más probable es que el botón de inicio se caiga. Quítalo y guárdalo en un lugar seguro para volver a montarlo.
Question: Does it render the old display (LCD) unusable or just the touchscreen?
It will render the entire screen (LCD and touch) unusable.
Be careful with the bottom bezel area especially if fully removing the top panel. I thought I had freed the whole bottom from the adhesive, but one of the capacitive buttons stuck to the panel instead of the phone and I tore its connecting ribbon when I pulled the panel loose.
-
-
-
Calienta un iOpener y aplícalo en la parte frontal del teléfono durante un minuto, cubriendo la mayor parte posible de la pantalla.
-
Toma nota de las siguientes áreas cuando hagas palanca en el panel LCD:
-
El adhesivo fuerte que sujeta el panel LCD al marco
-
El cable flexible de la pantalla, lo que dificultará el corte en caso de impacto
-
-
-
Inserta la punta de una púa de apertura debajo de la esquina inferior izquierda del panel LCD.
-
Lenta y firmemente empuja la púa para cortar el adhesivo debajo del panel LCD.
The display panel itself is very likely to shatter during this step. Do not be alarmed, and keep working. Make sure you continue to use plenty of heat! You want the device to just a little too hot to touch while removing the display from the phone.
-
-
-
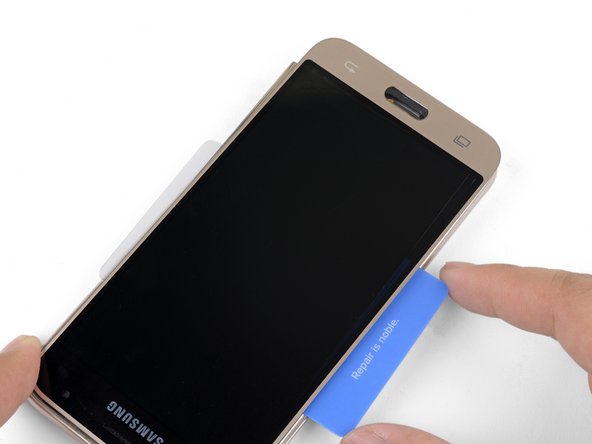
Una vez que la tarjeta de plástico atraviese el ancho del teléfono, empújala lenta y firmemente hacia la parte superior, moviéndola según sea necesario.
-
Continúa hasta que sueltes el panel LCD del marco.
-
Aplica un iOpener caliente para ayudar a aflojar el adhesivo rebelde.
-
Usa púas de apertura para cortar a través de las áreas adhesivas perdidas.
-
-
-
Raspa todos los residuos de adhesivo de la superficie del marco. Usa alcohol isopropílico de alta concentración (más del 90%) para ayudar. Una pantalla de reemplazo unida a una superficie irregular se agrietará.
-
Usa una herramienta de apertura para raspar cuidadosamente el adhesivo de las superficies de los botones capacitivos.
-
Conecta tu nueva pantalla pasando el cable de la pantalla a través del contorno y conectándolo al teléfono. Enciende tu teléfono y pruébalo antes de volver a abrir la pantalla.
-
No olvides reemplazar el botón de inicio durante la reinstalación.
-
Mantén la pantalla de reemplazo conectada al teléfono durante el proceso de re-adhesión para ayudar a alinear la pantalla correctamente.
-
Asegúrate de pelar todos los revestimientos plásticos adhesivos de la pantalla de reemplazo cuando vuelvas a pegar la pantalla.
If you choose to test the device before you finalize the repair, make sure you test the display BEFORE removing any of the blue, protective adhesive covers. The new display will re-adhere quickly, and if you forget to re-install the home button, or forget to remove a certain part of the blue cover, you risk a significant chance of damaging the new display and digitizer. You may not be as lucky as me when attempting to place the home button in if you accidentally adhere part of the display.
What is a suitable substitute for the display panel adhesive?
-


Para volver a ensamblar tu dispositivo, sigue estas instrucciones en orden inverso.
Lleva tus desechos electrónicos a un centro de reciclaje certificado R2 o e-Stewards.
¿La reparación no salió según lo planeado? Visita nuestrocomunidad de respuestas de Samsung Galaxy J3 (2016) para obtener ayuda para la resolución de problemas.
Cancelar: No complete esta guía.
46 personas más completaron esta guía.
Un agradecimiento especial a estos traductores:
55%

¡ Mariana Roca nos está ayudando a reparar el mundo! ¿Quieres contribuir?
Empezar a traducir ›


7 comentarios
Ist es möglich nur das Glas ohne LCD zu wechseln?
Yes! The LCD is not glued to the display.
Ja! Das LCD ist nicht mit dem Display verklebt.
What kinds of adhesives can I use to put the new screen on? Double sided scotch ok?
Hi William,
Double-sided Scotch tape probably will not hold the display on for long. You will have to use something like Tesa tape along the perimeter. If you bought the part we sell in our store, it already has all the necessary adhesive pre-installed on the screen.
-1-How does one remove the glass top , which is what is cracked in my cell, from the display digitizer without rendering the display unusable?
-2- do you have the LCD screen available for purchase? if not can you recommend a seller?
Arthur I have a partial answer to my question as far as your parts store has a screen for a J3 2016. My question is will the screen for the J3 2016 fit and work in my Samsung Galaxy J3, model: SM -J327A? Also my original question stands as follows: Is it possible to remove the glass cover and separate it from the LCD Display digitizer without rendering the display unusable?, My LCD display is working fine, my glass cover is what is cracked in my cell. Please advise.
Hi Joe,
It looks like you have a J3 Express Prime. I can’t confirm if our screen will work with it or not, but the part looks identical; there is a high chance it will be compatible.
The J3 is actually has an AMOLED display panel vs. a LCD. I’ll have to fix that error in the guides. When I worked on the phone, it felt like the panel was not fused to the glass, so you should theoretically be able to replace the glass only. However, it is very easy to accidentally pry too deep and pry up/destroy the OLED panel along with the front glass. Take a look at this step to see where the separation is. Try removing the front glass only, and see if the display still works. If you are able to remove the front glass without damaging the OLED panel, the most economical option is to buy a replacement front glass. If the OLED panel breaks, you’ll have to replace the entire screen (glass and panel).