Introducción
Utilice esta guía para reemplazar el monitor Retina, vidrio del monitor y la montura de la cámara iSight.
Qué necesitas
-
-
Quita los 10 tornillos que aseguran la parte inferior de la carcasa a la parte superior:
-
Dos tornillos Pentalobe P5 de 2.3 mm
-
Ocho tornillos Pentalobe P5 de 3.0 mm
-
-
-
-
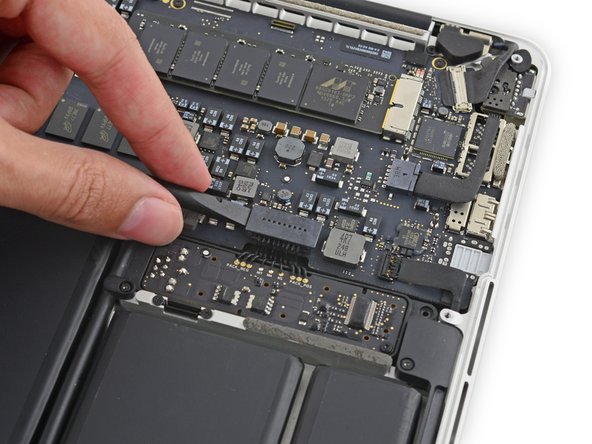
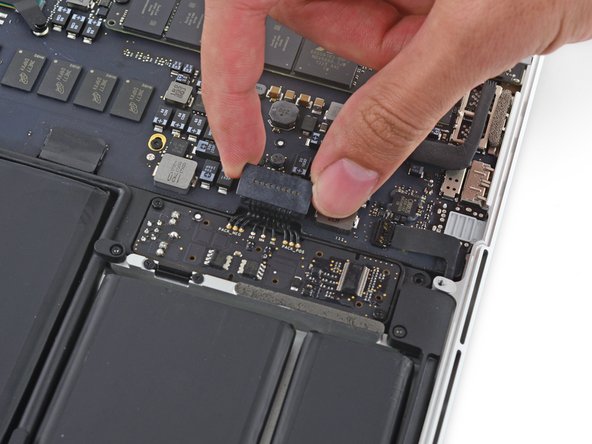
Retira con cuidado el parachoques de goma del ventilador del borde del disipador de calor para exponer el cable de la cámara iSight adherido al ventilador.
-
-
-
Inserte la punta de un palanca plástica debajo de cada uno de los cables de antena cerca de sus conectores y levante para desconectarlos de la tarjeta AirPort.
-
Conecte el cable de manga larga a la toma central.
-
El cable de manga corta se conecta al lado del tornillo.
-
El cable restante no tiene manga, y se conecta en el último zócalo vacío, al lado del ventilador.
-
-
-
Sostenga la carcasa superior con la mano derecha y gire ligeramente hacia la derecha, hacia la parte superior de la pantalla, para que los soportes de la pantalla liberen el borde de la carcasa superior.
-
Gire la pantalla ligeramente lejos de la parte superior.
-
Tire de la pantalla lejos de la parte superior de la caja, teniendo en cuenta los soportes o cables que pueden quedar atrapados.
-
Para re-armar su dispositivo, siga estas instrucciones en orden inverso.
Para re-armar su dispositivo, siga estas instrucciones en orden inverso.
Cancelar: No complete esta guía.
164 personas más completaron esta guía.
Un agradecimiento especial a estos traductores:
100%
Estos traductores nos están ayudando a reparar el mundo! ¿Quieres contribuir?
Empezar a traducir ›
35 comentarios
I've been browsing guides to this model and I don't get how in this one on Youtube the laptop looks completely different, although it also claims to be A1502. Either one of them is a different model or I'm really missing something?
Unfortunately the A1502 number isn't an exclusive model number, several devices share it, the internal differences between them vary. The more telling number is the EMC number, which tends to me more exclusive to unique devices.
After a closer look they actually seem to be the same, I just got confused by the video being a lot less detailed than this walkthrough. I just replaced the screen of my macbook following this guide (yay!) without any previous experience of fixing macbooks, though I must admit I assembled a few desktops at the dawn of the millennium. The only slight problem I encountered was that the main display cable wouldn't lie flat enough in that corner, it kept sticking out, and even after screwing the lid on the gap at that corner seems to be a tiny bit wider. But the laptop is working anyway.
Thank you Sam for posting this guide! It saved me a lot of time and money. Being in China I bought the display assembly on Taobao for $250US whereas the shop repair estimate that I got was around $400.
If anyone is still having doubts - you can do it!
Can you replace just the LCD without the clamshell bezel and cables?


