Introducción
Sigue los pasos de esta guía para reemplazar una batería vieja o desgastada de tu iPad mini 4 Wi-Fi.
Si tu batería está hinchada, toma las precauciones adecuadas.
Qué necesitas
-
-
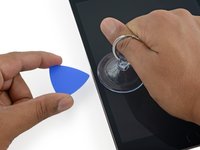
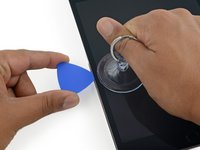
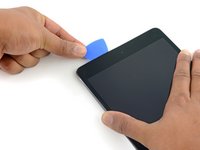
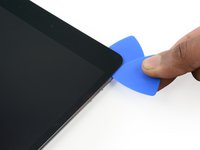
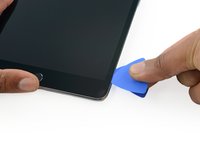
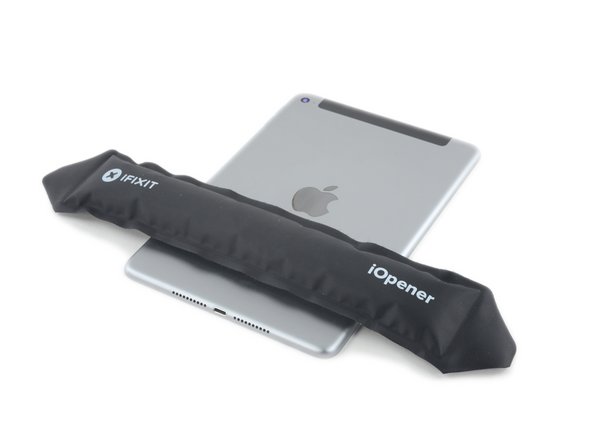
Calienta un iOpener y aplícalo en el borde izquierdo durante dos minutos.
-
-
-
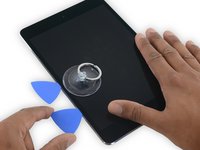
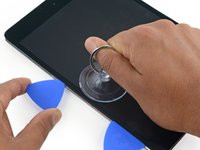
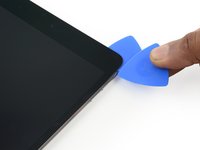
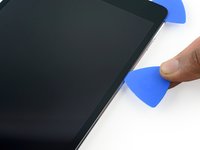
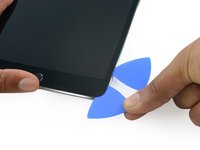
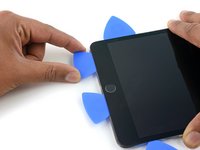
Coloca una ventosa hasta la mitad del lado calentado.
-
Asegúrese de que la taza esté completamente plana en la pantalla para obtener un sello hermético.
-
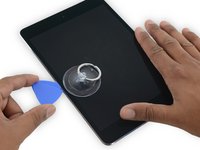
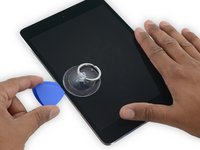
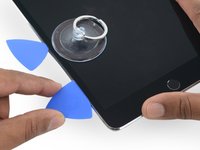
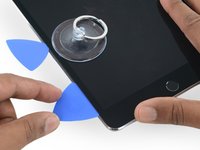
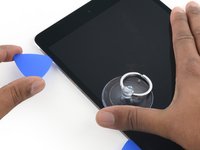
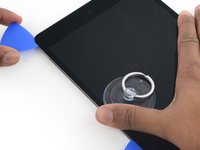
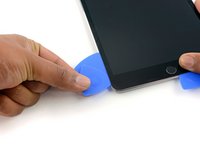
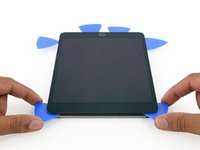
Mientras sostiene el iPad hacia abajo con una mano, tire de la ventosa para separar ligeramente el conjunto del panel frontal de la carcasa trasera.
-
-
-
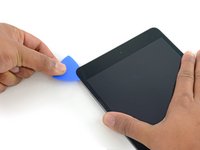
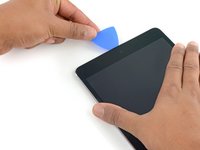
Deja la púa de plástico en el iPad, después de haber pasado la cámara frontal.
-
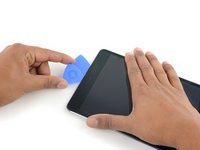
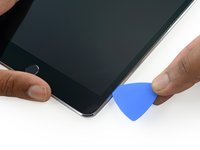
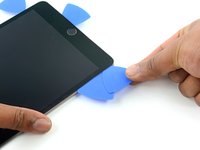
Coge una segunda púa e insértala a la izquierda de la cámara frontal, justo donde estaba antes la primera púa. Deslízala hacia la esquina para despegar el resto del adhesivo.
-
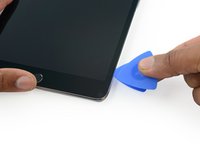
Deja la segunda púa ahí, para evitar que el adhesivo de la esquina vuelva a pegarse.
-
-
-
-
Retira los cuatro tornillos Phillips de 1.2mm que se encuentran sobre el soporte que conecta la batería y la pantalla.
-
-
-
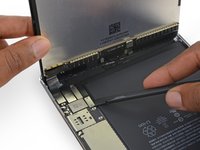
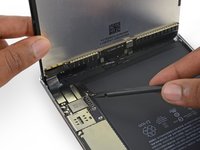
Usa el extremo puntiagudo de un spudger para desconectar el conector de datos de la pantalla de su zócalo en la placa lógica.
-
Usa el extremo puntiagudo de un spudger para desconectar el conector del cable del digitalizador de su zócalo en la placa lógica.
-
-
-
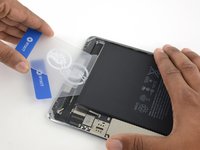
Recalienta tu iOpener.
-
Coloca el iPad boca abajo en su superficie de trabajo y coloque el iOpener en la carcasa trasera, donde se encuentra el borde inferior de la batería.
-
-
-
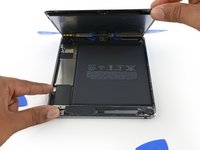
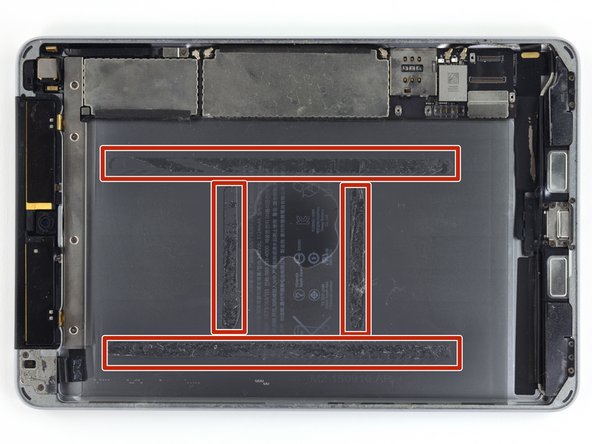
En los siguientes pasos, cortará el adhesivo debajo de la batería y lo sacará de la caja trasera.
-
El adhesivo se presenta como se muestra en esta imagen: dos tiras a lo largo de los bordes largos y dos tiras más cortas perpendiculares en el centro.
-
Para evitar dañar la batería, use herramientas de plástico, calor y paciencia. No perfores, dobles ni sobrecalientes la batería.
-
No hagas palanca cerca de la placa lógica, podría dañar tu iPad.
-
-
-
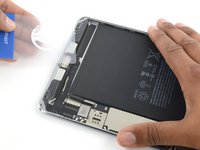
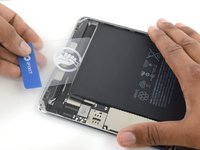
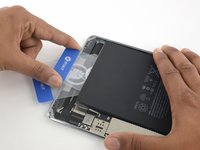
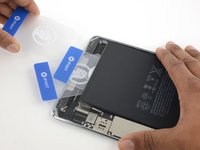
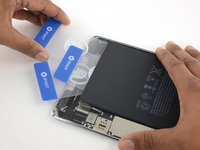
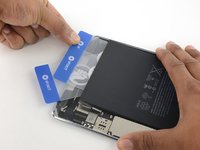
Inserta una tercera tarjeta plástica entre la primera y la segunda, esta vez alineada con el borde izquierdo de la batería.
-
Continúa cortando el adhesivo debajo de la batería hasta liberar la batería.
-
Vuelve a calentar y a aplicar el iOpener cuando hacer palanca sea difícil. Asegúrate de esperar a que el iOpener se enfríe entre sesiones.
-


Para volver a montar tu dispositivo, sigue estos pasas en orden inverso.
Para volver a montar tu dispositivo, sigue estos pasas en orden inverso.
Cancelar: No complete esta guía.
73 personas más completaron esta guía.
Un agradecimiento especial a estos traductores:
100%


Estos traductores nos están ayudando a reparar el mundo! ¿Quieres contribuir?
Empezar a traducir ›

22 comentarios
This guide is great for disassembly. I’ve just successfully removed the battery from my device by following these instructions. However, it does not provide any guidance for applying the new adhesive strips before assembling the screen. For that reason, this guide seems incomplete.
[can’t edit the guide]
Cleaningoff the old adhesive:
Remove the old adhesive from underside of the glass and the edges of the case. This was the most time consuming part. Took 2-3 hours, because the original adhesive was really gummy and i didn’t want to damage any parts with harsh solvents. (I used a series of methods": citrus oil adhesive remover, methylated spirits, sticky tape stick and lift off.)
Making sure the edges of the glass and case are spotless ensures a good result when applying the new adhesive strips. New strips can be gently applied, peeled back and reapplied to make 100% sure they are in the right place. If adhesive residue is still present the new strips could get stuck in the wrong place and be impossible to reposition.
[can’t edit the guide]
Reassembly:
Replacement double sided adhesive strips are applied to the case first. Figure which strips go top, bottom and sides. Start with the top or bottom corner. Apply the side strips last so you can figure which side is which.
Make sure the front camera and its window are clean. Use a strong magnifying glass and air duster. You won’t be able to get any dirt out unless you have more adhesive strips to use.
When you are ready to assemble, peel the backing off the double sided adhesive.
Support the screen at 90deg to case. Reattach cable connectors. Attach new battery connector then carefully position new battery with exposed adhesive into position in the case.
Attach connector clamp plate with 4 screws.
Carefully position the screen in case starting from the bottom edge. When it fits all the way around, press firmly round the edges to seal.
The guide is rated at a medium difficulty, which is out of step with a few iPhone battery replacement guides that are at a hard difficulty. Compared to the iPhone, the iPad is significantly more difficult to service. Even though there are few steps, it’s far easier to damage the device.
I’d rate it the hardest repair in earth!
cheongi -