Saltar al contenido principal
Únete a la Comunidad de Reparación - Crear Cuenta

Nintendo GameCube Controller Buttons Replacement

Qué necesitas

  1. Nintendo GameCube Controller Buttons Replacement, Back Panel: paso 1, imagen 1 de 1
    • Place the controller (buttons down) on a solid surface.

    • Remove the six 9.2mm Tri-wing Y0 screws that hold the back panel in place.

    Pregunta a FixBot

    Agregar Comentario

  2. Nintendo GameCube Controller Buttons Replacement: paso 2, imagen 1 de 1
    • Gently lift the back panel up, separating it from the front panel.

    • Some of the buttons may fall out if they are knocked around.

    Pregunta a FixBot

    Agregar Comentario

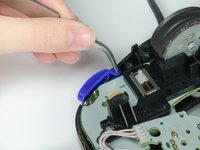
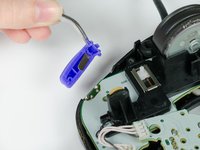
  3. Nintendo GameCube Controller Buttons Replacement, Z Button: paso 3, imagen 1 de 2 Nintendo GameCube Controller Buttons Replacement, Z Button: paso 3, imagen 2 de 2
    • Grab the Z-button by the peg with tweezers and lift it out of the controller.

    • During re-assembly, make sure the plastic rim and spring fit into the slot provided, or else the case will not shut.

    Pregunta a FixBot

    Agregar Comentario

  4. Nintendo GameCube Controller Buttons Replacement, Circuit Board: paso 4, imagen 1 de 1
    • Carefully unhook the cable that is looped around the peg.

    Pregunta a FixBot

    Agregar Comentario

  5. Nintendo GameCube Controller Buttons Replacement: paso 5, imagen 1 de 1
    • Lift the circuit board out of the controller.

    • Do not grab the rumble motor to lift the circuit board as shown in the picture. It will in many cases just remove the rumble motor. Instead, grab the edges of the board.

    Pregunta a FixBot

    Agregar Comentario

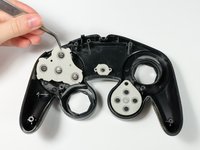
  6. Nintendo GameCube Controller Buttons Replacement, Buttons: paso 6, imagen 1 de 2 Nintendo GameCube Controller Buttons Replacement, Buttons: paso 6, imagen 2 de 2
    • Remove the rubber backing that covers the buttons.

    Pregunta a FixBot

    Agregar Comentario

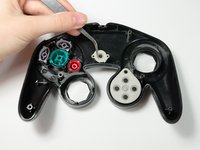
  7. Nintendo GameCube Controller Buttons Replacement: paso 7, imagen 1 de 3 Nintendo GameCube Controller Buttons Replacement: paso 7, imagen 2 de 3 Nintendo GameCube Controller Buttons Replacement: paso 7, imagen 3 de 3
    Herramienta utilizada en este paso:
    Tweezers
    $4.99
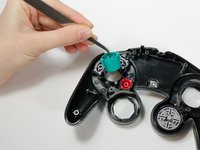
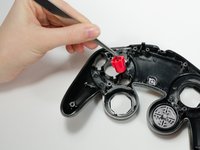
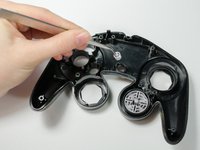
    • Use tweezers to lift buttons out of their sockets.

    • When putting the buttons back, make sure the slots properly fit back together.

    Pregunta a FixBot

    Agregar Comentario

Conclusión

To reassemble your device, follow these instructions in reverse order.

Cancelar: No complete esta guía.

20 personas más completaron esta guía.

Sean Michel

Miembro Desde 01/14/13

2,750 Reputación

8 Guías creadas

Equipo

Cal Poly, Team 19-44, Regan Winter 2013 Miembro de Cal Poly, Team 19-44, Regan Winter 2013

CPSU-REGAN-W13S19G44

Miembros de 4

34 Guías creadas

3Guía Comentarios

Is there a way I can buy the buttons separably? I lost a the X button and it's gone missing and i wanna buy one :(

tp4yourbunghole - Contestar Compartir

u can either get a 2 dollar full button set on ebay by searching ngc buttons or u can buy from battle beaver customs for 1 dollar

dariuscorrfz - Contestar Compartir

How do you put the back back on?

Steven Enns - Contestar Compartir

Agregar Comentario

Ver Estadísticas:

Ultimas 24 horas: 3

Ultimos 7 días: 30

Ultimos 30 días: 190

Todo El Tiempo: 32,990