Saltar al contenido principal

Lenovo ThinkPad T16 Gen 3 Base Cover Replacement

Qué necesitas

  1. Lenovo ThinkPad T16 Gen 3 Base Cover Replacement, Prepare your laptop for disassembly: paso 1, imagen 1 de 3 Lenovo ThinkPad T16 Gen 3 Base Cover Replacement, Prepare your laptop for disassembly: paso 1, imagen 2 de 3 Lenovo ThinkPad T16 Gen 3 Base Cover Replacement, Prepare your laptop for disassembly: paso 1, imagen 3 de 3
    • For your safety, discharge your battery below 25% before disassembling your laptop. A charged battery may catch fire if damaged. If your battery is swollen, take appropriate precautions.

    • Completely shut down your laptop (don't just put it in sleep mode) and disconnect all cables.

    • Flip the laptop upside-down, and rotate it so the screen hinge faces towards you.

  2. Lenovo ThinkPad T16 Gen 3 Base Cover Replacement, Loosen the base cover screws: paso 2, imagen 1 de 2 Lenovo ThinkPad T16 Gen 3 Base Cover Replacement, Loosen the base cover screws: paso 2, imagen 2 de 2
    • Use a Phillips screwdriver to fully loosen the seven captive screws securing the base cover.

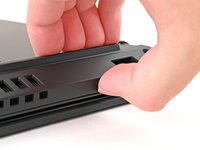
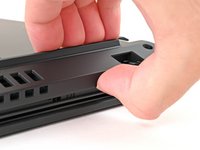
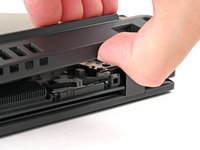
  3. Lenovo ThinkPad T16 Gen 3 Base Cover Replacement, Pry up the base cover: paso 3, imagen 1 de 3 Lenovo ThinkPad T16 Gen 3 Base Cover Replacement, Pry up the base cover: paso 3, imagen 2 de 3 Lenovo ThinkPad T16 Gen 3 Base Cover Replacement, Pry up the base cover: paso 3, imagen 3 de 3
    • Insert your fingernail or an opening pick into the gap between the base cover and keyboard deck, next to one of the screen hinges.

    • Pry up the base cover until the clips unfasten.

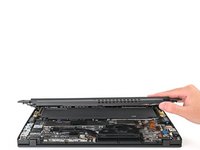
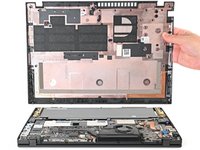
  4. Lenovo ThinkPad T16 Gen 3 Base Cover Replacement, Remove the base cover: paso 4, imagen 1 de 2 Lenovo ThinkPad T16 Gen 3 Base Cover Replacement, Remove the base cover: paso 4, imagen 2 de 2
    • Grasp the base cover along the screen hinge edge and lift slowly to unfasten the remaining clips.

    • Lift and remove the base cover.

    • During reassembly, lay the base cover into the frame, inserting it into the tabs along the battery edge. Press down firmly around the perimeter to reengage all the clips.

Conclusión

To reassemble your device, follow these instructions in reverse order.

Repair didn’t go as planned? Try some basic troubleshooting, or ask our Answers community for help.

Nick Schultz

Miembro Desde 03/24/24

19,304 Reputación

113 Guías creadas

Equipo

iFixit Miembro de iFixit

Staff

Miembros de 118

19,648 Guías creadas

0Guía Comentarios

Agregar Comentario

Ver Estadísticas:

Ultimas 24 horas: 1

Ultimos 7 días: 4

Ultimos 30 días: 23

Todo El Tiempo: 240