Saltar al contenido principal

Huawei P8 Lite Display Replacement

Qué necesitas

  1. Huawei P8 Lite Display Replacement, Back Cover: paso 1, imagen 1 de 2 Huawei P8 Lite Display Replacement, Back Cover: paso 1, imagen 2 de 2
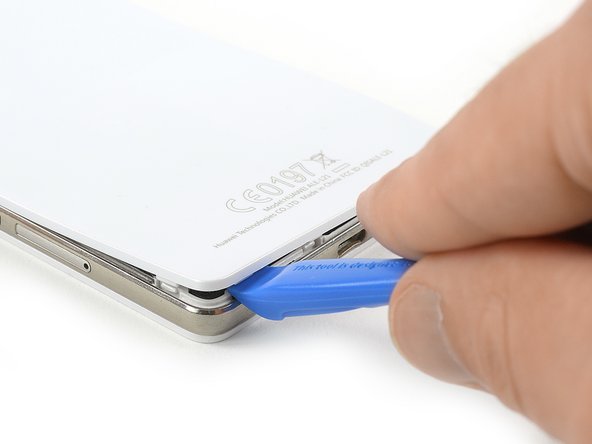
    • Use an Opening Tool and start to lever up the back cover of your Huawei P8 Lite at the bottom of your phone.

  2. Huawei P8 Lite Display Replacement: paso 2, imagen 1 de 3 Huawei P8 Lite Display Replacement: paso 2, imagen 2 de 3 Huawei P8 Lite Display Replacement: paso 2, imagen 3 de 3
    • There are clips around the whole mid frame, holding down the back cover. Open all of them with the Opening Tool.

    • When all clips are open, remove the back cover from the rest of the phone.

    • If the back cover doesn't come freely, there are probably some additional clips that need to be disconnected.

  3. Huawei P8 Lite Display Replacement, Loudspeaker: paso 3, imagen 1 de 1
    • Use a tweezer to remove the warranty sticker which sits on a screw in the bottom right of your phone.

  4. Huawei P8 Lite Display Replacement: paso 4, imagen 1 de 1
    • Remove the 4 black Torx T5 screws which hold down the lower part of the loudspeaker.

    • Remove the three silver Phillips #00 screws which hold down the upper part of the loudspeaker.

  5. Huawei P8 Lite Display Replacement: paso 5, imagen 1 de 1
    • Remove the loudspeaker carefully.

  6. Huawei P8 Lite Display Replacement, Motherboard: paso 6, imagen 1 de 3 Huawei P8 Lite Display Replacement, Motherboard: paso 6, imagen 2 de 3 Huawei P8 Lite Display Replacement, Motherboard: paso 6, imagen 3 de 3
    • Remove the three Phillips #00 screws that hold the metal plate in place.

    • Remove the metal plate with a tweezer.

    • Unplug the battery flex connector with a spudger.

  7. Huawei P8 Lite Display Replacement: paso 7, imagen 1 de 1
    • Remove the two Torx T5 screws.

    • If there is a tamper evident sticker over your screws remove them to properly seat your driver.

    • Remove the five Phillips #00 screws.

  8. Huawei P8 Lite Display Replacement: paso 8, imagen 1 de 2 Huawei P8 Lite Display Replacement: paso 8, imagen 2 de 2
    • Carefully pry off the plastic cover on the left side. The NFC antenna contacts might be slightly glued to the cover.

    • Then remove the top cover.

  9. Huawei P8 Lite Display Replacement: paso 9, imagen 1 de 3 Huawei P8 Lite Display Replacement: paso 9, imagen 2 de 3 Huawei P8 Lite Display Replacement: paso 9, imagen 3 de 3
    • Remove the SIM card and SD card trays.

    • Disconnect the three plug connectors and one ZIF connector.

    • Unlock the ZIF connector by lifting the small black plastic lever.

  10. Huawei P8 Lite Display Replacement: paso 10, imagen 1 de 3 Huawei P8 Lite Display Replacement: paso 10, imagen 2 de 3 Huawei P8 Lite Display Replacement: paso 10, imagen 3 de 3
    • Remove the volume and power button cable.

    • Take out the motherboard by lifting the bottom part first.

    • Pay attention to the cables, so they don't rip when staying stuck to the motherboard.

    • On the back of the motherboard there is a thermal pad (pink rubber-like gob) for heat dissipation. If this thermal pad broke or is too dried out you might want to replace it with a new one.

  11. Huawei P8 Lite Display Replacement, Display: paso 11, imagen 1 de 3 Huawei P8 Lite Display Replacement, Display: paso 11, imagen 2 de 3 Huawei P8 Lite Display Replacement, Display: paso 11, imagen 3 de 3
    Herramienta utilizada en este paso:
    Plastic Cards
    $2.99
    Comprar
    • Changing the display can be done without removing the battery. But for safety reasons we recommend removing it as seen in the battery guide by pulling the adhesive tab and prying it out with a plastic card.

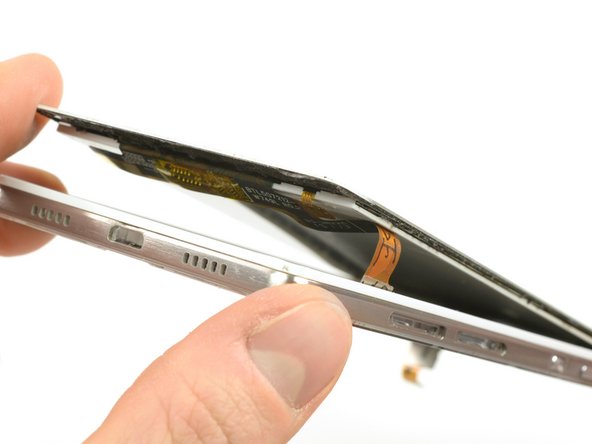
    • Heat up the top, bottom and both sides of the display with an iOpener to soften the adhesive.

  12. Huawei P8 Lite Display Replacement: paso 12, imagen 1 de 3 Huawei P8 Lite Display Replacement: paso 12, imagen 2 de 3 Huawei P8 Lite Display Replacement: paso 12, imagen 3 de 3
    • Use an opening pick to get underneath the top right part of the display and loosen the adhesive.

    • Only with the very tip of the opening pick slide along the side of the display towards the bottom.

    • Loosen the adhesive underneath the complete lower part of the display.

  13. Huawei P8 Lite Display Replacement: paso 13, imagen 1 de 3 Huawei P8 Lite Display Replacement: paso 13, imagen 2 de 3 Huawei P8 Lite Display Replacement: paso 13, imagen 3 de 3
    • Slowly but constantly lift the bottom part of the display to get underneath the screen and further loosen the adhesive.

    • Thread the cable through the midframe.

    • Open the display all the way and remove it from the midframe.

    • Make sure to test the new display and remove any old residue from the adhesive before reassembly.

Conclusión

To reassemble your device, follow these instructions in reverse order. Make sure to test the new display and remove any old residue from the adhesive.

31 personas más completaron esta guía.

Tobias Isakeit

Miembro Desde 03/31/14

117,756 Reputación

188 Guías creadas

Equipo

Master Techs Miembro de Master Techs

Community

322 Miembros

2,542 Guías creadas

0 comentarios

Agregar Comentario

Ver Estadísticas:

Ultimas 24 horas: 0

Ultimos 7 días: 21

Ultimos 30 días: 61

Todo El Tiempo: 23,822