Saltar al contenido principal

How to Upgrade the Expandable Storage in Your PlayStation 5 Slim

Qué necesitas

  1. How to Upgrade the Expandable Storage in Your PlayStation 5 Slim, Prepare your PlayStation for disassembly: paso 1, imagen 1 de 3 How to Upgrade the Expandable Storage in Your PlayStation 5 Slim, Prepare your PlayStation for disassembly: paso 1, imagen 2 de 3 How to Upgrade the Expandable Storage in Your PlayStation 5 Slim, Prepare your PlayStation for disassembly: paso 1, imagen 3 de 3
    • Before starting your repair:

    • Shut down your console.

    • Unplug all cables and accessories.

    • Remove any stands supporting your device.

  2. How to Upgrade the Expandable Storage in Your PlayStation 5 Slim, Lay your PlayStation down: paso 2, imagen 1 de 1
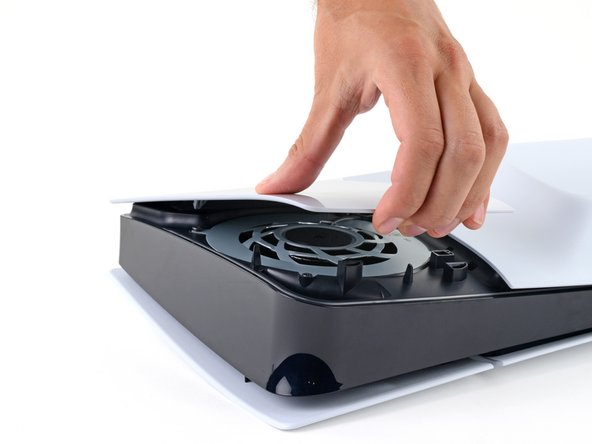
    • Lay your PlayStation on its side so the right side covers are facing up.

  3. How to Upgrade the Expandable Storage in Your PlayStation 5 Slim, Remove the fan and SSD cover: paso 3, imagen 1 de 3 How to Upgrade the Expandable Storage in Your PlayStation 5 Slim, Remove the fan and SSD cover: paso 3, imagen 2 de 3 How to Upgrade the Expandable Storage in Your PlayStation 5 Slim, Remove the fan and SSD cover: paso 3, imagen 3 de 3
    • The upper cover is secured with hooks along the back edge and clips along the front edge.

    • Firmly pull up the front edge of the cover to release the clips.
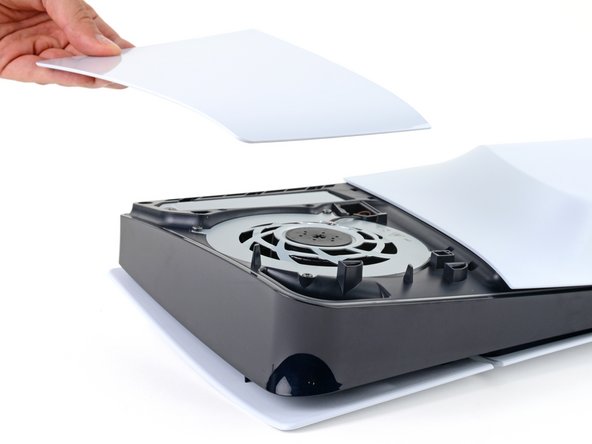
    • You'll hear distinct "pops" as the clips disengage.

    • Remove the cover.

    • To reinstall the cover, place the hooks into their cutouts along the rear edge and firmly press the front edge of the cover into place to re‑engage the two clips.

  4. How to Upgrade the Expandable Storage in Your PlayStation 5 Slim, Remove the expansion slot cover screw: paso 4, imagen 1 de 2 How to Upgrade the Expandable Storage in Your PlayStation 5 Slim, Remove the expansion slot cover screw: paso 4, imagen 2 de 2
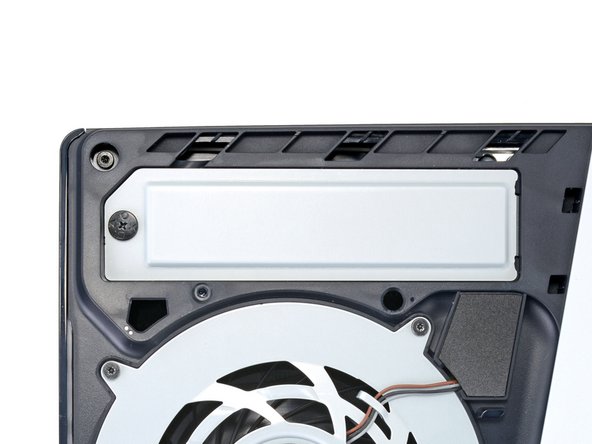
    • Use a Phillips screwdriver to remove the 17.1 mm‑long screw securing the expansion slot cover.

  5. How to Upgrade the Expandable Storage in Your PlayStation 5 Slim, Remove the expansion slot cover: paso 5, imagen 1 de 3 How to Upgrade the Expandable Storage in Your PlayStation 5 Slim, Remove the expansion slot cover: paso 5, imagen 2 de 3 How to Upgrade the Expandable Storage in Your PlayStation 5 Slim, Remove the expansion slot cover: paso 5, imagen 3 de 3
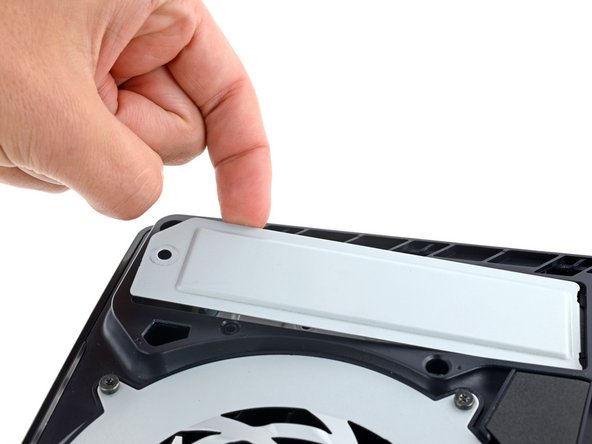
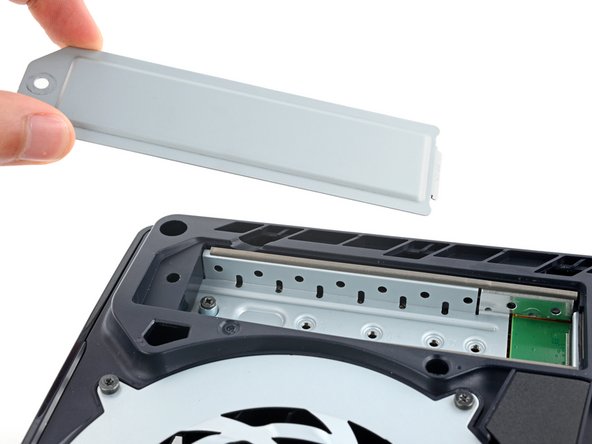
    • Use your fingers to lift the expansion slot cover near the notch by the screw hole and remove it.

  6. How to Upgrade the Expandable Storage in Your PlayStation 5 Slim, Remove the SSD screw: paso 6, imagen 1 de 2 How to Upgrade the Expandable Storage in Your PlayStation 5 Slim, Remove the SSD screw: paso 6, imagen 2 de 2
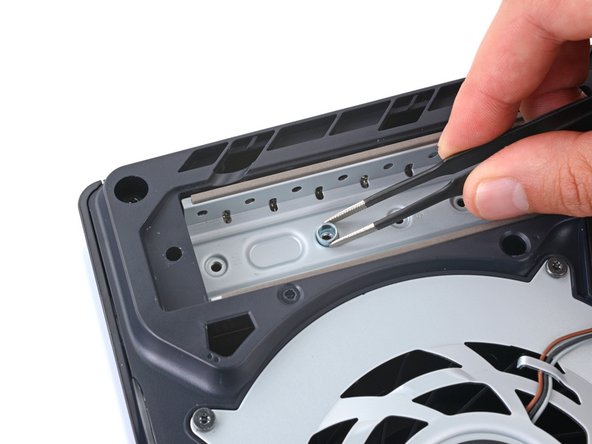
    • Use a Phillips screwdriver to remove the 10.9 mm‑long SSD screw securing the spacer.

  7. How to Upgrade the Expandable Storage in Your PlayStation 5 Slim, Move the spacer: paso 7, imagen 1 de 3 How to Upgrade the Expandable Storage in Your PlayStation 5 Slim, Move the spacer: paso 7, imagen 2 de 3 How to Upgrade the Expandable Storage in Your PlayStation 5 Slim, Move the spacer: paso 7, imagen 3 de 3
    Herramienta utilizada en este paso:
    Tweezers
    $4.99
    Comprar
    • Multiple indents along the expansion slot allow for compatibility with any sized SSD. Each indent is labeled with its corresponding size.

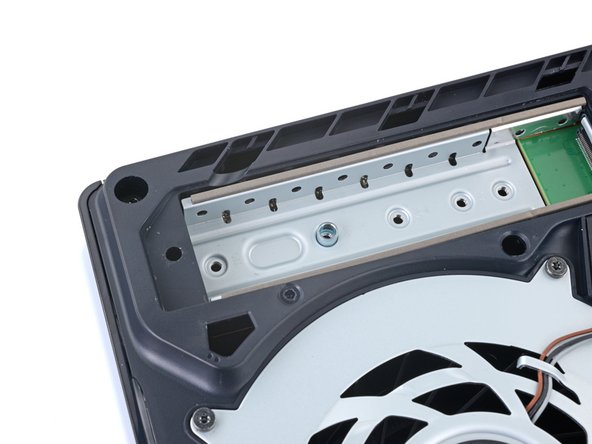
    • Use tweezers or your fingers to move the spacer to its proper indent based on the size of your SSD.

    • Do not install the SSD without the spacer.

  8. How to Upgrade the Expandable Storage in Your PlayStation 5 Slim, Fasten the SSD: paso 8, imagen 1 de 2 How to Upgrade the Expandable Storage in Your PlayStation 5 Slim, Fasten the SSD: paso 8, imagen 2 de 2
    • Make sure your SSD is compatible with your PlayStation and has a heat-dissipation mechanism such as a heatsink or thermal pad.

    • Insert the SSD into its M.2 socket at a slight downward angle.

    • Both the SSD and M.2 socket are keyed, which means the SSD only fits into the socket one way.

    • It's normal for the SSD to sit up at an angle before it's secured in place

    • With one hand, push the SSD down so its cutout is aligned on top of the spacer.

    • With your free hand, use your Phillips screwdriver to tighten the SSD screw.

    • Do not overtighten this screw, as doing so may damage the SSD.

Conclusión

To reassemble your device, follow these instructions in reverse order starting with the expansion slot cover.

If it's your first time using the SSD with your PlayStation, you'll need to format it after installation.

If you're moving games to your new SSD, follow Sony's guide.

Take your e-waste to an R2 or e-Stewards certified recycler.

Repair didn’t go as planned? Try some basic troubleshooting, or ask our Answers community for help.

Una persona más ha completado esta guía.

Spencer Day

Miembro Desde 09/14/22

55,176 Reputación

408 Guías creadas

Equipo

iFixit Miembro de iFixit

Staff

136 Miembros

17,420 Guías creadas

0 comentarios

Agregar Comentario

Ver Estadísticas:

Ultimas 24 horas: 2

Ultimos 7 días: 46

Ultimos 30 días: 219

Todo El Tiempo: 1,119