Introducción
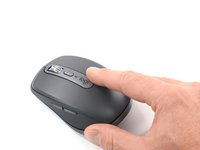
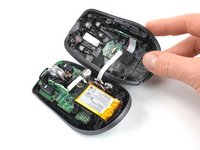
Usa esta guía para abrir tu mouse Logitech MX Anywhere 3.
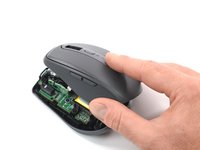
Abre tu mouse para limpiar su interior, solucionar problemas mecánicos o reemplazarlo.
Qué necesitas
-
-
Coloca el interruptor de encendido del mouse en la posición APAGADO, desenchufa todos los cables y gíralo para que las patas queden hacia arriba.
-
Calienta un iOpener y aplícalo a las patas del ratón durante unos dos minutos.
-
-
-
Hay pequeños espacios en los bordes que rodean cada pie. Aquí es donde colocar la herramienta en el siguiente paso.
-
-
Herramienta utilizada en este paso:Tweezers$4.99
-
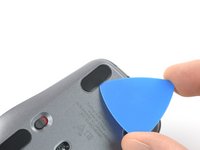
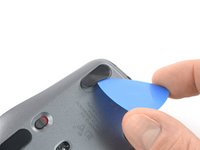
Empuja la punta de una púa de apertura debajo del adhesivo para la pata del ratón, en el espacio del borde.
-
Si planeas reutilizar las patas del ratón, ten cuidado de no arrugarlas ni separarlas de sus almohadillas adhesivas.
-
Desliza la púa debajo de la pata para separar el adhesivo hasta que puedas agarrarlo con los dedos.
-
Repite para quitar las tres patas restantes del ratón.
-
Utiliza un par de pinzas o un spudger para eliminar los trozos grandes de adhesivo sobrante. Limpia a fondo la parte inferior del mouse con alcohol isopropílico y un paño de microfibra sin pelusa. Deja que la superficie se seque por completo.
I would also suggest Tesa 61395 Tape as a replacement for the adhesive for the feet. It is extremely strong when applied.
I use it on the back of a metal plate adhered to my phone for a magnet mount in my car. And is on a silicone case.
Amazing tape and extremely thin.
-
-
-
-
Usa un destornillador Phillips para quitar los cuatro tornillos de 4,3 mm de largo que sujetan las dos mitades del ratón (mouse).
-
-
-
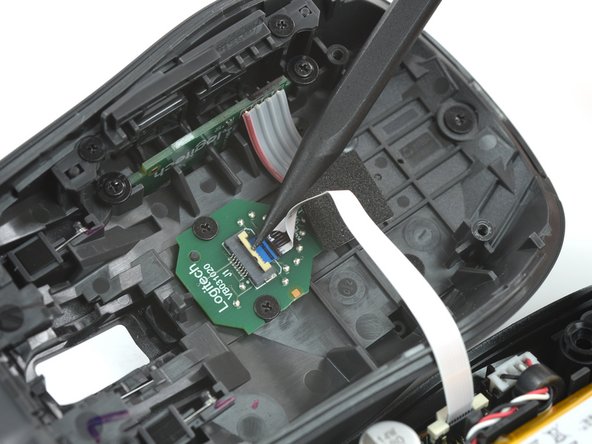
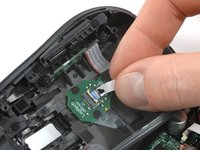
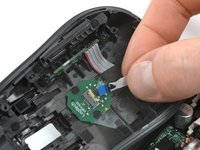
Usa la punta de un spudger, una herramienta de apertura o la uña para levantar la pequeña solapa de bloqueo con bisagras en el conector ZIF del cable de interconexión.
-
-
-
Usa sus dedos para deslizar el cable de interconexión fuera de su zócalo.
-
Durante el reensamble, orienta los cables para que la pestaña azul se nos muestre..
-
-
-
Retira la mitad superior del ratón.
-
Para volver a armar tu dispositivo, sigue los pasos anteriores en orden inverso.
¿La reparación no salió según lo planeado? Consulta nuestra comunidad de respuestas para obtener ayuda para solucionar problemas.
Para volver a armar tu dispositivo, sigue los pasos anteriores en orden inverso.
¿La reparación no salió según lo planeado? Consulta nuestra comunidad de respuestas para obtener ayuda para solucionar problemas.
Cancelar: No complete esta guía.
19 personas más completaron esta guía.
Un agradecimiento especial a estos traductores:
100%
Estos traductores nos están ayudando a reparar el mundo! ¿Quieres contribuir?
Empezar a traducir ›
12 comentarios
My left click started to have double click issue. Do you have any suggestions how to fix it? If I want to replace it, does ifixt have the part? If not, what is the part number? Thanks
You could replace the left switch. See step 9 for the part number. You’d need to desolder the switch.
Sometimes it is enough to open the case of the switch and clean or tweak the small metal plate. But this is a very delicate finger exercise.
Steps 6 and 7 are not necessary to get access to buttons (the most common malfunction). My model had this interconnect cable glued hard to the top half of the device. You can easily remove it without disconnecting the cable, oil the buttons and assemble mouse back
My interconnect cable wasn't glued hard, but was attached via adhesive which took careful effort to peel away. I had to remove the screws on the board to get to the lower level to clean up coffee, though fortunately there was very little. However when I went to reassemble, I found a free spring and no clue where it came from. Thankfully, enlarging the third picture in step 5 shows where the spring is under the wheel assembly and I was able to reassemble successfully (also the two screws holding the wheel assembly are slightly longer than all others). I even managed to reinsert and restick the interconnect cable correctly.
my mouse has a red blinking light on the battery status LED after cleaning the click switches with dielectric contact cleaner, any way to solve this?
Hi luis, I bought a used MX Anywhere 3 which middle clicks turned out to be unreliable. So I opened it, removed its battery and scrollwheel unit and also tried to fix it with dielectric cleaner. After letting it dry for a moment, I carefully reassembled everything. But just like yours, it not longer works and just flashes red. It seems like a bootloop to me, but I couldn't find any documentation on how to reset its memory or reinstall its firmware without wireless connection. Does this mean, end users are not supposed to disconnect its battery? But how would I clean or replace the switches then?
pnoqable -
I have the same issue!! Does anyone knows how to solve it???
After I reassembled my MX Anywhere 3 mouse, when I turn on the switch, the LED at the back of the mouse wheel only blinks red. I have already tried charging it, but the red LED keeps blinking whether it is charging (with the power switch turned on or off) or not charging (with the power switch turned on). Additionally, the LED on the Bluetooth switch, which has 3 options to connect up to 3 devices, no longer turns on. Does anyone can help me?
Bonjour, la molette se bloque, alimentée ou non. ⏎
j'ai démonté, et une rondelle métallique crantée à l'intérieur saute et se bloque.⏎
⏎
j'ai réussi à réparer, normalement :)⏎
Sans savoir si cette fameuse rondelle était collée, ce que je suppose, eh bien de la colle et ça fonctionne.
Had similar issues as others where its hard to click and drag things as the click would randomly disconnect. Very annoying for what's supposed to be a premium mouse. How much would it be to have it repaired or is it better to buy a new one? Definitely would not get the same one again!
I have the same problem. I had same problem with my earlier Logitech mouse too. I bought MX Anywhere3 due to high resolution for mouse operations. But these not lasting more than 2 years.


