Esta versión puede contener ediciones incorrectas. Cambie a la última instantánea verificada.
Qué necesitas
-
Este paso está sin traducir. Ayuda a traducirlo
-
Using the Philips screwdriver, unscrew the two housing cover screws indicated.
-
using the Philips screwdriver, unscrew the two mounting screws indicated, holding down the Coil Assembly.
-
Using the Philips screwdriver, remove the switch installment screw indicated.
-
-
Este paso está sin traducir. Ayuda a traducirlo
-
Lift the switch assembly up to loosen the actuating arm.
-
Pull switch button away from actuating arm. Then unclip the actuating arm from the switch assembly.
-
Locate the switch insulation underneath the switch assembly.
-
-
-
Este paso está sin traducir. Ayuda a traducirlo
-
Remove stud screw holding down the armature link (the piece on top the wires leading to the Coil Assembly).
-
Locate the Coil Assembly and the power wires leading to the Attached Power cord.
-
-
Este paso está sin traducir. Ayuda a traducirlo
-
Using the wire stripper, strip the ends of each wire approximately 1-2 cm to reveal enough wire to twist back together with new motor's wires.
-
Next, using the wire cutter, cut the {Positive & Negative} wires that are heading from the Coil Assembly to the Attached power cord. Cut approximately half way between the two ends of both wires.
-
After you cut the old Coil Assembly's wires, remove it completely, and replace it with new one.
-
-
Este paso está sin traducir. Ayuda a traducirlo
-
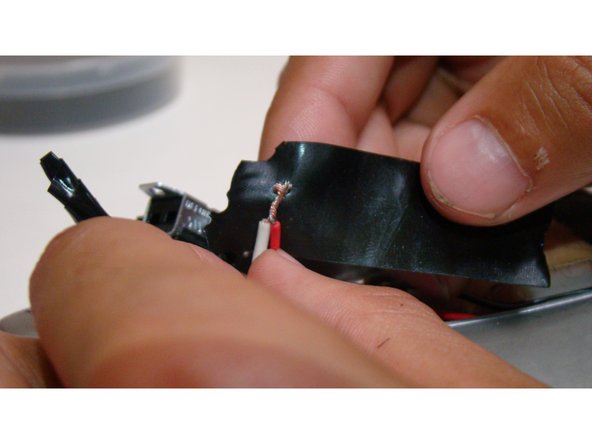
Twist the red wire that is coming from the Coil Assembly with the white one, and the black wire with the black one.
-
After you have twisted the wires together, use electrical tape to wrap the stripped wires. Leave some tape over the ends of the wires, and below the cutoff of the rubber around the wire as shown in the photo. Wrap the tape around the wires as tight as possible.
-


Cancelar: No complete esta guía.
Una persona más ha completado esta guía.
Equipo

Sam Houston State, Team 16-2, Nardone Fall 2015 Miembro de Sam Houston State, Team 16-2, Nardone Fall 2015
SHSU-NARDONE-F15S16G2
5 Miembros
1 Guía escrita