I just tore mine down this morning, it was fairly straight forward. Tools you'll need is a Phillips head (PH2) screwdriver, a plastic spudger, and possibly a drill with about an 1/8" bit.
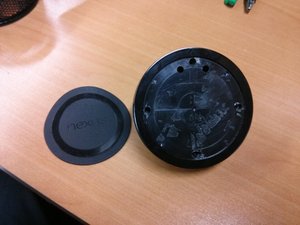
1. Remove the round rubber face from the charging orb
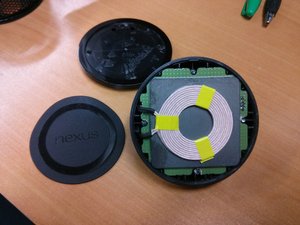
2 behind the rubber face is a thin sheet of plastic, you'll need to pierce it to access the 4 screws holding the device together. The screws are located at 12 o'clock, 3 o'clock, 6 o'clock and 9 o'clock, just inside the outer ring. You will need to unscrew these if possible, on my unit they were glued in and I was unable to unscrew them. Instead I used a drill with a 1/8" bit to drill them out. If you drill them out be careful as they are surrounded by a PCB, though I drilled into the board a bit and it still functions. Once you remove the screws use the spudger to pry the shiny black plastic face off the base. You will see the seem where the shiny and matter plastic meet on the unit. There are 4 plastic clips holding it down, once they are unclipped you can remove the shiny black face plate exposing the charging coil and main PCB.
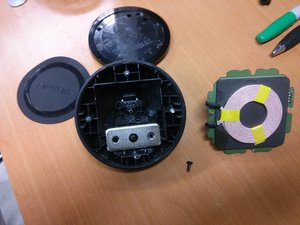
3 Next gently pull up on the main PCB and swing it to the right. There are wires connecting the main board to the micro usb port beneath, so be gentle. You will see a single screw holding down the board with the micro usb connector, unscrew it and you're done.
After the tear down I was able to plug in the unit and verify that it still charged. There can be about a max half inch gap between the coil and the back of the phone for it to charge.
Happy hacking.