Introducción
¿Te tropezaste con el cable de alimentación? Al menos no tienes que cambiar toda la placa lógica.
Qué necesitas
-
-
Utilice una moneda para girar el tornillo de bloqueo de la batería 90 grados en el sentido de las agujas del reloj.
-
Levante la batería de la computadora.
-
-
-
Tire las pestañas de liberación del teclado hacia usted y levante el teclado hasta que se libere.
-
Si el teclado no se libera, utilice un destornillador pequeño de punta plana para girar el tornillo de bloqueo del teclado 180 grados en cualquier dirección e intente nuevamente.
-
Da la vuelta al teclado, alejándolo de la pantalla, y apóyalo boca abajo sobre el área del panel táctil.
-
-
-
Respira hondo. Se avecinan tiempos difíciles, pero te prometemos que la minúscula se desprenderá.
-
Empuje los bordes delgados de la caja inferior que rodean el compartimiento de la batería, doblándolos más allá de las pestañas y luego levántelos para liberar esa esquina de la caja inferior.
-
-
-
-
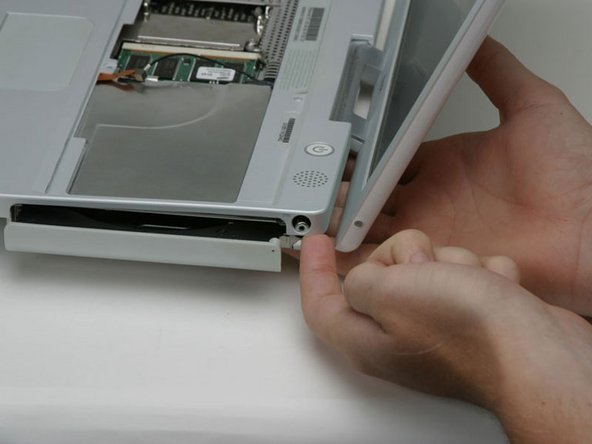
Una vez que el frente y los lados de la carcasa inferior estén libres, gire la computadora de modo que la parte posterior quede frente a usted y tire de la carcasa inferior hacia arriba y hacia usted hasta que las pestañas posteriores se liberen (puede ser útil mover la carcasa hacia arriba y hacia abajo).
-
-
-
Retire los siguientes 4 tornillos en la parte inferior de la computadora:
-
Dos Phillips de 3 mm del lado izquierdo de la computadora.
-
Un Phillips de 4,5 mm cerca del mecanismo del pestillo (este tornillo puede faltar en los iBooks de 800 MHz)
-
Un Phillips de 14,2 mm cerca de la esquina frontal derecha.
-
-
-
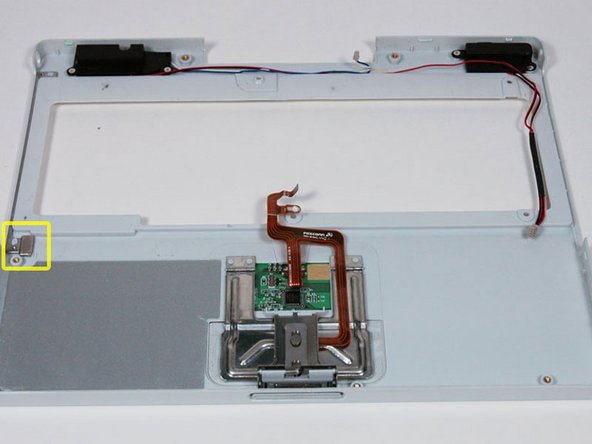
Retire los siguientes 14 tornillos (a algunos modelos puede que les falten un par de tornillos):
-
Un destornillador Phillips de 2,5 mm.
-
Seis Phillips de 3,5 mm.
-
Un destornillador Phillips de 4,5 mm cerca de la luz de suspensión, con un eje pequeño.
-
Dos Phillips de 4,5 mm con ejes más grandes.
-
Cuatro Phillips de 5 mm
-
Si se inserta un tornillo en el orificio izquierdo, no se podrá insertar el tornillo de 14,2 mm del paso 24 para sujetar la carcasa superior hacia abajo.
-
-
-
En la parte inferior de la computadora, desconecte el cable de entrada de CC de la placa lógica.
-
-
-
Desconecte el cable plano de la unidad óptica.
-
Si tiene un CD o cualquier otro objeto atascado en su unidad óptica, tenemos una guía de reparación de unidades ópticas.
-


Para volver a ensamblar el dispositivo, siga estas instrucciones en orden inverso.
Cancelar: No complete esta guía.
18 personas más completaron esta guía.
Un agradecimiento especial a estos traductores:
100%

¡ Angel nos está ayudando a reparar el mundo! ¿Quieres contribuir?
Empezar a traducir ›
Documentos Adjuntos

1Guía Comentario
What was the symptom(s) leading to the diagnosis that this board was in need of being replaced??