Saltar al contenido principal

Polaroid I-2 Back Cover Replacement

Qué necesitas

  1. Polaroid I-2 Back Cover Replacement, Safety information: paso 1, imagen 1 de 3 Polaroid I-2 Back Cover Replacement, Safety information: paso 1, imagen 2 de 3 Polaroid I-2 Back Cover Replacement, Safety information: paso 1, imagen 3 de 3
    • If you have any film left, take some photos and remove the cartridge! Disassembly will expose the film and damage it.

    • Before you begin:

    • Power down and unplug your camera.

    • Put on the lens cap to avoid scratching your lens during disassembly.

  2. Polaroid I-2 Back Cover Replacement, Open the film door: paso 2, imagen 1 de 2 Polaroid I-2 Back Cover Replacement, Open the film door: paso 2, imagen 2 de 2
    • In the following steps, "left" and "right" are written from the perspective of using the camera—or when the lens is facing away from you.

    • Use the latch on the left side of the camera to open the film door.

  3. Polaroid I-2 Back Cover Replacement, Insert a blocker: paso 3, imagen 1 de 3 Polaroid I-2 Back Cover Replacement, Insert a blocker: paso 3, imagen 2 de 3 Polaroid I-2 Back Cover Replacement, Insert a blocker: paso 3, imagen 3 de 3
    • Fold a piece of cloth or napkin (or the included bag) into a small square.

    • Insert the cloth into the film compartment far enough to block the film door from closing during disassembly.

  4. Polaroid I-2 Back Cover Replacement, Flip the camera over: paso 4, imagen 1 de 3 Polaroid I-2 Back Cover Replacement, Flip the camera over: paso 4, imagen 2 de 3 Polaroid I-2 Back Cover Replacement, Flip the camera over: paso 4, imagen 3 de 3
    • Flip the camera over, making sure the cloth stays lodged in the film compartment.

  5. Polaroid I-2 Back Cover Replacement, Unfasten the bottom cover: paso 5, imagen 1 de 1
    • Use a Phillips screwdriver to remove the four 3.9 mm-long screws securing the bottom cover.

  6. Polaroid I-2 Back Cover Replacement, Unclip the bottom cover: paso 6, imagen 1 de 3 Polaroid I-2 Back Cover Replacement, Unclip the bottom cover: paso 6, imagen 2 de 3 Polaroid I-2 Back Cover Replacement, Unclip the bottom cover: paso 6, imagen 3 de 3
    • Insert the tip of an opening pick under the top left corner of the bottom cover, near the slider button.

    • Tilt the pick up and push to position the pick between the bottom and front covers.

  7. Polaroid I-2 Back Cover Replacement: paso 7, imagen 1 de 3 Polaroid I-2 Back Cover Replacement: paso 7, imagen 2 de 3 Polaroid I-2 Back Cover Replacement: paso 7, imagen 3 de 3
    • Slide the opening pick toward the rear of the camera to release the clips along the left edge.

    • Leave the opening pick at the bottom left corner to prevent the clips from resecuring.

  8. Polaroid I-2 Back Cover Replacement: paso 8, imagen 1 de 3 Polaroid I-2 Back Cover Replacement: paso 8, imagen 2 de 3 Polaroid I-2 Back Cover Replacement: paso 8, imagen 3 de 3
    • Insert the tip of a second opening pick under the top right corner of the bottom cover.

    • Tilt the pick up and push to position the pick between the bottom and front covers.

  9. Polaroid I-2 Back Cover Replacement: paso 9, imagen 1 de 3 Polaroid I-2 Back Cover Replacement: paso 9, imagen 2 de 3 Polaroid I-2 Back Cover Replacement: paso 9, imagen 3 de 3
    • Slide the opening pick toward the rear of the camera to release the clips along the right edge.

  10. Polaroid I-2 Back Cover Replacement, Remove the bottom cover: paso 10, imagen 1 de 3 Polaroid I-2 Back Cover Replacement, Remove the bottom cover: paso 10, imagen 2 de 3 Polaroid I-2 Back Cover Replacement, Remove the bottom cover: paso 10, imagen 3 de 3
    • At this point, the bottom cover clips should be released. If not, slide an opening pick along the perimeter of the back cover to release any remaining clips.

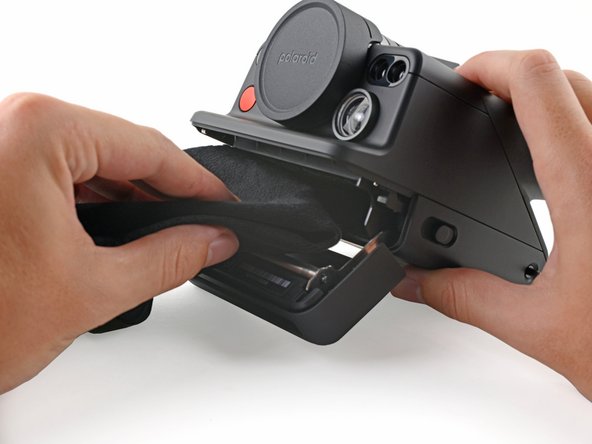
    • Tilt the back of the bottom cover upward and pull it away from the camera, making sure to thread the film door lever from its recess.

    • Remove the back cover.

    • During reassembly, insert the film door lever into its recess before aligning the bottom cover and pressing it into place to secure its clips.

  11. Polaroid I-2 Back Cover Replacement, Remove the blocker: paso 11, imagen 1 de 1
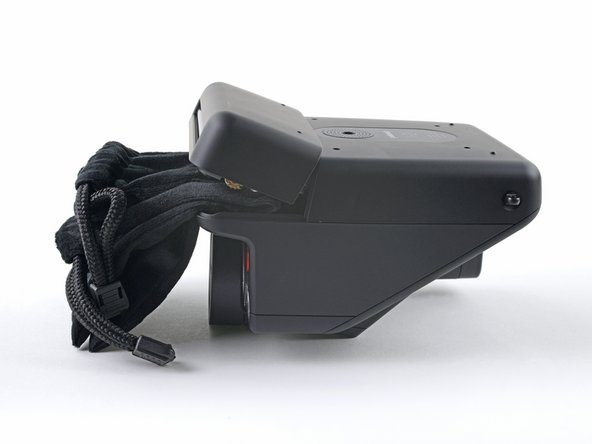
    • At this point, you can remove the blocker from the film compartment.

  12. Polaroid I-2 Back Cover Replacement, Unfasten the back cover: paso 12, imagen 1 de 1
    • Use a Phillips screwdriver to remove the two 3.9 mm-long screws securing the back cover.

  13. Polaroid I-2 Back Cover Replacement, Separate the alignment pegs: paso 13, imagen 1 de 3 Polaroid I-2 Back Cover Replacement, Separate the alignment pegs: paso 13, imagen 2 de 3 Polaroid I-2 Back Cover Replacement, Separate the alignment pegs: paso 13, imagen 3 de 3
    • There are two alignment pegs along the bottom edge of the back cover.

    • Insert a spudger between the frame and the alignment hole on the back cover.

    • Twist the spudger to lift the back cover off of the alignment peg.

    • Repeat for the second alignment peg.

  14. Polaroid I-2 Back Cover Replacement, Disassembly information: paso 14, imagen 1 de 3 Polaroid I-2 Back Cover Replacement, Disassembly information: paso 14, imagen 2 de 3 Polaroid I-2 Back Cover Replacement, Disassembly information: paso 14, imagen 3 de 3
    • There are eight large clips that secure the back cover. The next four steps show how to release them.

    • These clips are very strong and require significant force to release.

    • The procedure to release the clips is tricky and will require time and patience to perform correctly.

  15. Polaroid I-2 Back Cover Replacement, Unclip the back cover: paso 15, imagen 1 de 3 Polaroid I-2 Back Cover Replacement, Unclip the back cover: paso 15, imagen 2 de 3 Polaroid I-2 Back Cover Replacement, Unclip the back cover: paso 15, imagen 3 de 3
    • Releasing the clips requires getting a tool between the covered "thin" edge of the front cover and the clips themselves.

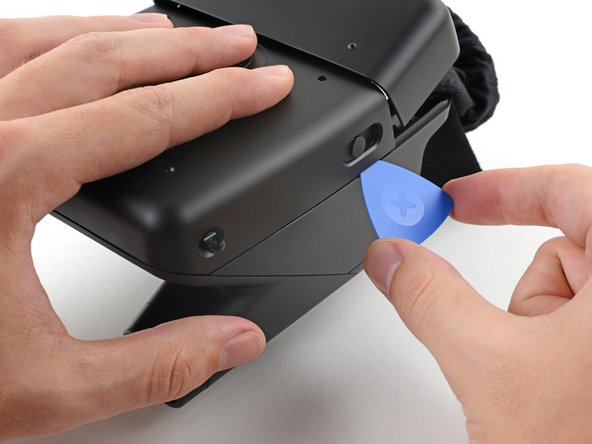
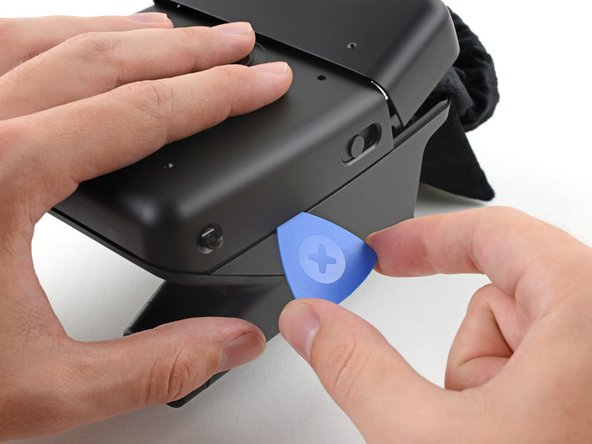
    • Angle an opening pick upward and insert it at the gap where the bottom right corner of the back cover meets the triangular tip of the front cover’s right edge.

    • Push the pick up to get it above the overhanging lip in the back cover.

    • You'll see the plastic warp a little. This is normal.

    • While pushing upward, slowly rotate the pick towards the left edge of the camera until it's under the front cover.

    • The pick can slip out easily, so this may take a few tries.

  16. Polaroid I-2 Back Cover Replacement: paso 16, imagen 1 de 3 Polaroid I-2 Back Cover Replacement: paso 16, imagen 2 de 3 Polaroid I-2 Back Cover Replacement: paso 16, imagen 3 de 3
    • While pushing the pick downward, slide it all the way up the right edge to release the clips.

    • Keep the pick as upright as possible while sliding to avoid hitting the clips.

    • The plastic in the lip of the back cover will warp. This is normal.

    • Leave the pick at the top corner before continuing to prevent the clips from resecuring.

  17. Polaroid I-2 Back Cover Replacement: paso 17, imagen 1 de 3 Polaroid I-2 Back Cover Replacement: paso 17, imagen 2 de 3 Polaroid I-2 Back Cover Replacement: paso 17, imagen 3 de 3
    • Angle a second opening pick upward and insert it at the gap where the bottom left corner of the back cover meets the triangular tip of the front cover’s left edge.

    • Push the pick up to get it above the overhanging lip in the back cover.

    • You'll see the plastic warp a little. This is normal.

    • While pushing upward, slowly rotate the pick towards the right edge of the camera until it's under the front cover.

    • The pick can slip out easily, so this may take a few tries.

  18. Polaroid I-2 Back Cover Replacement: paso 18, imagen 1 de 3 Polaroid I-2 Back Cover Replacement: paso 18, imagen 2 de 3 Polaroid I-2 Back Cover Replacement: paso 18, imagen 3 de 3
    • While pushing the pick downward, slide it all the way up the left edge to release the remaining clips.

    • Keep the pick as upright as possible while sliding to avoid hitting the clips.

    • The plastic in the lip of the back cover will warp. This is normal.

  19. Polaroid I-2 Back Cover Replacement, Reposition the back cover: paso 19, imagen 1 de 3 Polaroid I-2 Back Cover Replacement, Reposition the back cover: paso 19, imagen 2 de 3 Polaroid I-2 Back Cover Replacement, Reposition the back cover: paso 19, imagen 3 de 3
    • Don't try to pull the back cover off just yet, as it's still connected by a cable.

    • At this point, the back cover should feel loose. If any parts still feel connected, repeat the last four steps until all the clips release.

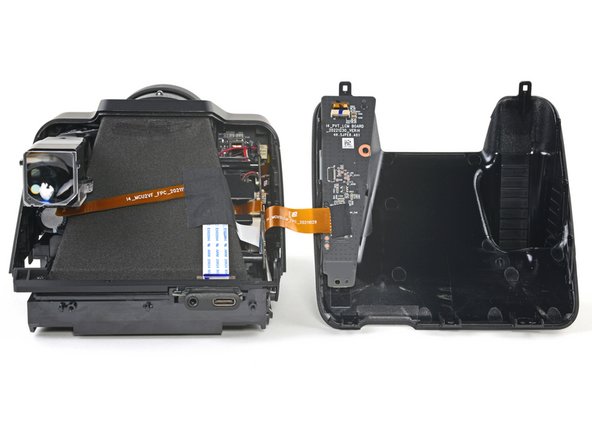
    • Pull the back cover off the camera and rotate it over the right edge to expose the flex cable.

    • During reassembly, make sure the the flex cable isn't caught between the covers before re-engaging the clips.

  20. Polaroid I-2 Back Cover Replacement, Remove the tape: paso 20, imagen 1 de 3 Polaroid I-2 Back Cover Replacement, Remove the tape: paso 20, imagen 2 de 3 Polaroid I-2 Back Cover Replacement, Remove the tape: paso 20, imagen 3 de 3
    • Use tweezers to peel off the tape covering the interconnect cable ZIF connector on the control board.

    • Set the tape aside. You'll reuse it during reassembly.

  21. Polaroid I-2 Back Cover Replacement, Disconnect the control board: paso 21, imagen 1 de 2 Polaroid I-2 Back Cover Replacement, Disconnect the control board: paso 21, imagen 2 de 2
    • Use the flat end of a spudger to lift up the locking flap on the control board ZIF connector.

  22. Polaroid I-2 Back Cover Replacement: paso 22, imagen 1 de 3 Polaroid I-2 Back Cover Replacement: paso 22, imagen 2 de 3 Polaroid I-2 Back Cover Replacement: paso 22, imagen 3 de 3
    • Use tweezers to pull the interconnect cable out of its slot in the control board.

    • Remove the back cover.

  23. Polaroid I-2 Back Cover Replacement, Disconnect the display: paso 23, imagen 1 de 2 Polaroid I-2 Back Cover Replacement, Disconnect the display: paso 23, imagen 2 de 2
    • Use the flat end of a spudger to lift up the locking flap on the display cable ZIF connector at the top of the control board.

  24. Polaroid I-2 Back Cover Replacement: paso 24, imagen 1 de 2 Polaroid I-2 Back Cover Replacement: paso 24, imagen 2 de 2
    • Use tweezers to pull the display cable out of its slot in the control board.

  25. Polaroid I-2 Back Cover Replacement, Unfasten the control board: paso 25, imagen 1 de 1
    • Use a Phillips screwdriver to remove the three 5.9 mm-long screws securing the control board.

  26. Polaroid I-2 Back Cover Replacement, Remove the control board: paso 26, imagen 1 de 2 Polaroid I-2 Back Cover Replacement, Remove the control board: paso 26, imagen 2 de 2
    • Lift the control board off its alignment pegs and remove it, making sure to thread the display cable through its slot.

    • During reassembly, make sure the control board is slotted into its pegs and the display cable is threaded through its slot before securing it to the back cover.

  27. Polaroid I-2 Back Cover Replacement, Remove the display assembly: paso 27, imagen 1 de 2 Polaroid I-2 Back Cover Replacement, Remove the display assembly: paso 27, imagen 2 de 2
    • Lift the display assembly out of its recess in the back cover and remove it.

  28. Polaroid I-2 Back Cover Replacement, Remove the flash button: paso 28, imagen 1 de 2 Polaroid I-2 Back Cover Replacement, Remove the flash button: paso 28, imagen 2 de 2
    • Pull the flash button off of its two alignment pegs and remove it.

    • During reassembly, check the front of the button to make sure it's oriented correctly before putting it back on its pegs. It will only fit one way.

  29. Polaroid I-2 Back Cover Replacement, Remove the display frame: paso 29, imagen 1 de 3 Polaroid I-2 Back Cover Replacement, Remove the display frame: paso 29, imagen 2 de 3 Polaroid I-2 Back Cover Replacement, Remove the display frame: paso 29, imagen 3 de 3
    • Use tweezers to grab the screw hole tab along the right edge of the metal display frame.

    • Pull away from the back cover to separate the display frame from its two alignment pegs.

  30. Polaroid I-2 Back Cover Replacement, Remove the display cover: paso 30, imagen 1 de 3 Polaroid I-2 Back Cover Replacement, Remove the display cover: paso 30, imagen 2 de 3 Polaroid I-2 Back Cover Replacement, Remove the display cover: paso 30, imagen 3 de 3
    • Insert the tip of a spudger between the top left corner of the display cover and the back cover.

    • Pry up to separate the display cover from its two alignment pegs.

    • Remove the display cover.

  31. Polaroid I-2 Back Cover Replacement, Only the back cover remains: paso 31, imagen 1 de 1
    • You're now left with the back cover by itself.

Conclusión

Compare your new replacement part to the original part—you may need to transfer remaining components or remove adhesive backings from the new part before you install it.

To reassemble your device, follow these instructions in reverse order.

Take your e-waste to an R2 or e-Stewards certified recycler.

Repair didn’t go as planned? Try some basic troubleshooting, or ask our Polaroid I-2 Answers community for help.

Alex Diaz-Kokaisl

Miembro Desde 01/16/22

124,056 Reputación

581 Guías creadas

Equipo

iFixit Miembro de iFixit

Staff

135 Miembros

17,182 Guías creadas

0 comentarios

Agregar Comentario

Ver Estadísticas:

Ultimas 24 horas: 1

Ultimos 7 días: 3

Ultimos 30 días: 19

Todo El Tiempo: 166