Esta traducción la ha hecho un programa y todavía no la ha revisado nadie. ¿Hablas este idioma? Échale un vistazo.
Introducción
La batería de la Nvidia Shield Tablet ha sido la causa de muchos fallos en el dispositivo. De hecho, la batería ha requerido una retirada del mercado por parte de Nvidia debido a problemas porque el dispositivo se sobrecalienta. Una retirada simplemente te enviará una tableta nueva a casa; sin embargo, si sigues nuestra guía, puedes sustituir tu batería estropeada o que se sobrecalienta directamente en casa.
Qué necesitas
-
-
-
En primer lugar, extrae el lápiz óptico de tu tableta.
 Pregunta a FixBot
-
-
Herramienta utilizada en este paso:Anti-Static Wrist Strap$7.95
-
Coloca la tableta de manera que los botones, la ranura microSD y el puerto del lápiz óptico queden hacia ti.
-
Abre la ranura microSD.
-
Con el extremo plano de la spudger, abre cuidadosamente la carcasa empezando desde la ranura microSD, deslizando lentamente la spudger a lo largo del borde interior de la carcasa.
-
-
-
-
Mientras retiras la carcasa, ten cuidado con las pequeñas pestañas a lo largo de los bordes.
-
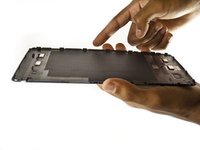
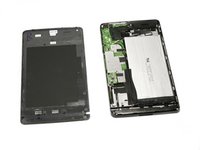
Por último, deja la carcasa vieja a un lado.
-
-
-
-
Herramienta utilizada en este paso:Anti-Static Wrist Strap$7.95
-
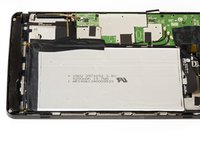
Asegúrate de girar la tablet para que la batería plateada grande quede más cerca de ti.
-
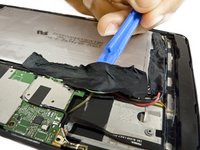
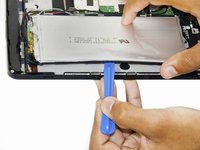
Con la herramienta de apertura de plástico grande, retira lentamente la cinta adhesiva que rodea la batería.
-
-
-
Introduce la herramienta de apertura grande debajo de la batería.
-
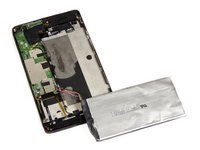
Continúa levantando lentamente la batería usando la herramienta de apertura alrededor del perímetro de esta hasta que la batería esté completamente separada de la tableta.
-
-
-
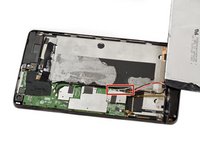
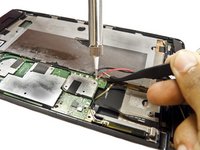
Desuelda los cuatro cables de la batería (rojo, negro, verde y blanco) de la placa madre.
-
La batería debería quedar libre del dispositivo.
-
-








Para volver a montar tu dispositivo, sigue estas instrucciones en orden inverso.
Cancelar: No complete esta guía.
30 personas más completaron esta guía.

Equipo

USF Tampa, Team 2-2, Blackwell Fall 2015 Miembro de USF Tampa, Team 2-2, Blackwell Fall 2015
USFT-BLACKWELL-F15S2G2
Miembros de 3
72 Guías creadas
21Guía Comentarios
Ok some info for you guys, I already swapped my battery with one from aliexpress.
You don't need to unsolder the loading pcb from the tablet's pcb (black, red, green and white) BECAUSE, you need that very same loading board or otherwise it will only boot up to shutdown immediately.
INSTEAD, remove the black fabric where those wires go into the battery, then unsolder the cell itself from the loading board.
Now check your battery if it came with a loading board, if it came with one, remove that one, you only need the pure cell.
Next step, solder 2 wires where the metal tabs of the battery cell were soldered formerly and connect those 2 wires to the metal tabs of your new cell. (watch out and match the polarity correctly!!!!!)
Before reassembling the tablet, connect your usb charger to the tablet and let it load for 30 sec to one minute.
This resets the IC on the loading board and you can boot up afterwards.
The loading board has a serial number IC onboard, that's why others don't work right out of the box.
Hey thanks so much for this info! I am about to purchase one of these from a friend with the intention to replace the battery. I'd really like to know if following your replacement instructions ends up giving your battery on the nvidia shield the label B01? The Y01 is the subject of the recall which causes so much conflict in these.
Addiontally I've been told that the tablets that were recalled will be force updated to brick to stop any future conflict. Does anyone have any update on this? I'm very much interested in knowing this info before investing in the tablet and the replacement battery. I have the skill, because this is what I do for a living.. but I'm really in need of more info!
Thanks again!
