Saltar al contenido principal

iPod Touch 4th Generation Logic Board Assembly Replacement

Aviso: Estás editando una guía de requisitos previos. Cualquier cambio que realices afectará a todas las 2 guías que incluyen este paso.

Inglés
Coreano
Paso 2
iPod Touch 4th Generation Logic Board Assembly Replacement: paso 0, imagen 1 de 3 iPod Touch 4th Generation Logic Board Assembly Replacement: paso 0, imagen 2 de 3 iPod Touch 4th Generation Logic Board Assembly Replacement: paso 0, imagen 3 de 3
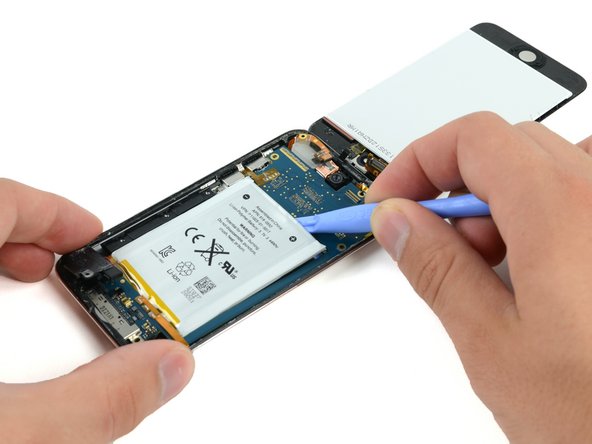
  • In the next few steps, you will loosen the adhesive from underneath the battery, the logic board, and the frame under the battery. Do this slowly, carefully, and evenly. Take care not to puncture the battery or bend the logic board.

  • Use a plastic opening tool to pry up the adhesive around the three exposed edges of the battery.

  • Do not try to pry the battery out, just start loosening the adhesive.

Insertar traducción aquí

Insertar traducción aquí

Insertar traducción aquí

Tus contribuciones son autorizadas bajo la licencia de código abierto de Creative Commons.