Traduciendo paso 4
Paso 4


-
Place the camera lens-side down and twist the screen so that it is perpendicular to the camera.
-
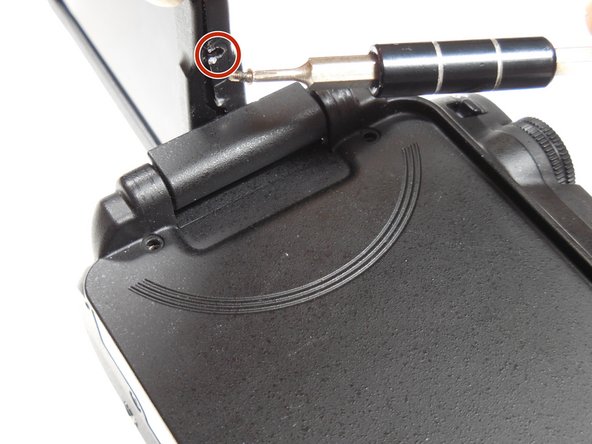
Remove the 4.3 mm screw on the side of the casing using the Phillips #00 screwdriver.
-
Twist the screen in the other direction and remove the other 4.3 mm screw.
| [* black] Place the camera lens-side down and twist the screen so that it is perpendicular to the camera. | |
| - | [* |
| - | [* |
| - | [* icon_caution] These screws are very brittle! |
| + | [* red] Remove the 4.3 mm screw on the side of the casing using the Phillips #00 screwdriver. |
| + | [* red] Twist the screen in the other direction and remove the other 4.3 mm screw. |
| + | [* icon_caution] These screws are very brittle! Be careful not to strip the screws. If you find that one has become stripped, follow this [guide|13213|guide|new_window=true]. |
Tus contribuciones son autorizadas bajo la licencia de código abierto de Creative Commons.