Traduciendo paso 2
Paso 2


-
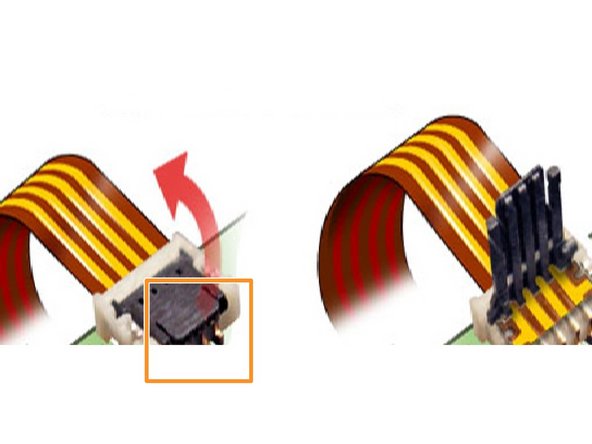
Locate the small ribbon cable that connects the touch screen to the motherboard. Do not pull on this cable.
-
Gently lift the hinged black cover on the connector.
-
After lifting the black cover, the ribbon cable will disconnect easily.
| - | [* red] Locate the small ribbon cable that connects the touch screen to the |
|---|---|
| - | [* |
| - | [* |
| + | [* red] Locate the small ribbon cable that connects the touch screen to the motherboard. Do not pull on this cable. |
| + | [* orange] Gently lift the hinged black cover on the connector. |
| + | [* icon_note] The hinges are near where the ribbon is inserted. |
| [* black] After lifting the black cover, the ribbon cable will disconnect easily. |
Tus contribuciones son autorizadas bajo la licencia de código abierto de Creative Commons.