Saltar al contenido principal

Logitech G29 Driving Force Red Dial Replacement

Inglés
Español
Paso 3
Logitech G29 Driving Force Red Dial Replacement: paso 0, imagen 1 de 2 Logitech G29 Driving Force Red Dial Replacement: paso 0, imagen 2 de 2
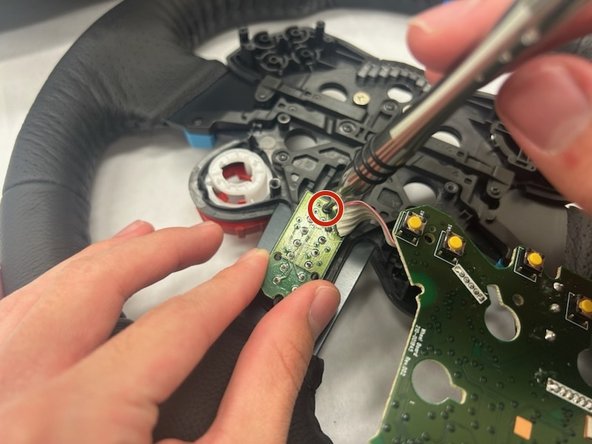
  • Take off the 7 4.32mm diameter 8mm long silver screws holding the PCB to the black housing on the wheel using bit Ph #0.

  • Move the PCB to the side to expose the back side of the red dial. Keep the remaining white cable connected to the secondary PCB.

  • Be careful not to lose the buttons and D-pad because once the PCB was removed they can easily be lost.

Insertar traducción aquí

Insertar traducción aquí

Insertar traducción aquí

Tus contribuciones son autorizadas bajo la licencia de código abierto de Creative Commons.