Saltar al contenido principal

Reemplazo de la batería del iPhone XS Max

Inglés
Español
Paso 10
iPhone XS Max Battery Replacement, Alternative method to unstick the battery from the case: paso 0, imagen 1 de 3 iPhone XS Max Battery Replacement, Alternative method to unstick the battery from the case: paso 0, imagen 2 de 3 iPhone XS Max Battery Replacement, Alternative method to unstick the battery from the case: paso 0, imagen 3 de 3
Alternative method to unstick the battery from the case
  • If any of the adhesive strips broke off and the battery remains stuck to the rear case, prepare an iOpener or use a hair dryer to heat the rear case directly behind the battery.

  • Heat the iPhone until the rear case is slightly too hot to comfortably touch. Don't overheat the iPhone, or you may accidentally ignite the battery.

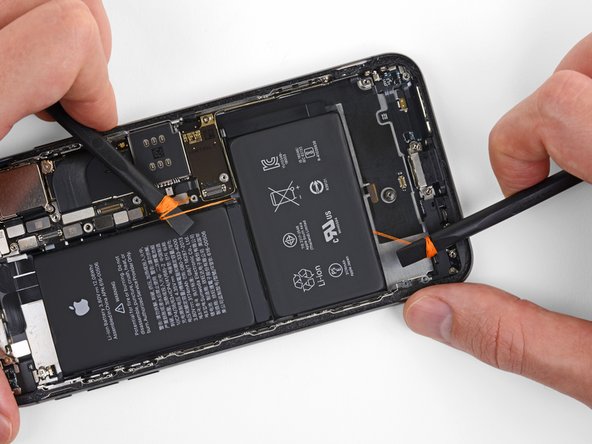
  • Flip the iPhone back over and thread a strong piece of string (such as dental floss or a length of thin guitar string) underneath the battery.

  • Wear gloves to protect your fingers, or wrap each end of the string around a tool.

  • Pull the string from side to side in a sawing motion to separate the adhesive. This can take some time since the adhesive is slow to deform, but with patience it will come free. Do not deform or damage the battery.

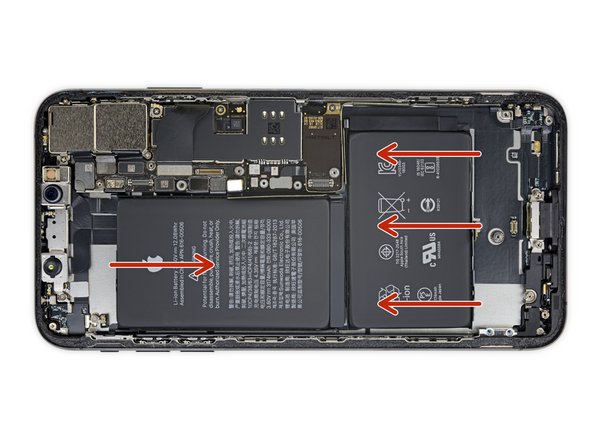
  • Start from the top or bottom edge of the battery, and pull toward the middle. Don't pull the string through the middle third of the battery, or you may damage the ribbon cables or the wireless charging coil directly underneath.

  • If you choose to use pry tools to lift the battery out of the iPhone, use extreme caution or you may damage the ribbon cables or the wireless charging coil directly underneath the battery.

Si alguna de las tiras adhesivas se rompió y la batería sigue pegada a la caja trasera, prepara un iOpener o usa un secador de pelo para calentar la carcasa trasera directamente detrás de la batería. Esto ayudará ablandar el adhesivo.

Calienta el iPhone hasta que la carcasa trasera es muy caliente para tocar cómodamente. No sobre calientes el iPhone, o puede que incendies accidentalmente la batería.

Voltea el teléfono y pasa un hilo (como hilo dental o una cuerda de guitarra) por debajo de la batería.

Usa guantes para proteger tus dedos o coloca los extremos del hilo alrededor de una herramienta.

Tira del hilo de lado a lado como si estuviera serruchando algo por el largo de la batería para separar el adhesivo. Esto puede llevar algo de tiempo ya que el adhesivo tarde en deformarse pero con paciencia se liberará . No deformes o dañes la batería.

Comienza desde el borde superior o inferior de la batería y tira hacia el centro. No tires del hilo a través del tercio medio de la batería, ya que podrías dañar los cables planos la bobina de carga inalámbrica directamente debajo.

Si eliges utilizar herramientas para palanquear para levantar la batería del teléfono, utiliza precaución extrema porque podrías dañar los cables planos o la bobina de carga inalámbrica directamente por debajo de la batería.

Tus contribuciones son autorizadas bajo la licencia de código abierto de Creative Commons.