Saltar al contenido principal

Reemplazo de la batería del iPhone XS Max

Inglés
Español
Paso 9
iPhone XS Max Battery Replacement: paso 0, imagen 1 de 3 iPhone XS Max Battery Replacement: paso 0, imagen 2 de 3 iPhone XS Max Battery Replacement: paso 0, imagen 3 de 3
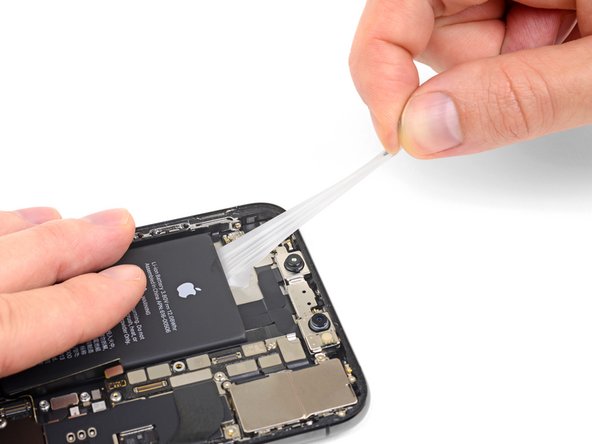
  • Pull and remove the final adhesive strip.

  • The strip may fling the battery when it separates from the iPhone, so hold your hand over the battery to secure it—but don't press down on the battery itself, or the added pressure may cause the adhesive strip to break off underneath the battery.

  • If you removed all four adhesive strips successfully, skip the next step.

  • If the adhesive breaks off underneath the battery and can't be retrieved, apply a few drops of high concentration (over 90%) isopropyl alcohol under the edge of the battery in the area of the broken adhesive strip(s).

  • Wait about one minute for the alcohol solution to weaken the adhesive. Use the flat end of a spudger to gently lift the battery.

  • Don't try to forcefully lever the battery out. If needed, apply a few more drops of alcohol to further weaken the adhesive. Never deform or puncture the battery with your pry tool.

  • Be careful not to damage the ribbon cables or the wireless charging coil directly underneath the battery.

  • For an alternative method to unstick the battery from the case, continue with the next step below.

Jala y remueve la última tira adhesiva.

La tira puede golpear la batería cuando se separa del iPhone, así que coloca la mano sobre la batería para asegurarla, pero no presiones la batería hacia abajo, ya que la presión adicional puede hacer que la tira adhesiva se rompa debajo de la batería. .

Si removiste las cuatro tiras de adhesivo con éxito, omite el próximo paso.

Si el adhesivo se rompe debajo de la batería y no puede ser recuperado, aplica unas gotas de alcohol isopropilico de alta concentración (mayor de 90%) debajo el borde de la batería en el area de las tiras adhesivas rotas.

Espera alrededor de un minuto para que el alcohol debilite el adhesivo. Usa el lado plano de un spudger para levantar gentilmente la batería.

No trates de levantar forzosamente la batería. Si es necesario aplica unas gotas mas de alcohol para debilitar mas el adhesivo. Nunca deformes o perfores la batería con tu herramienta.

Se cuidadoso de no dañar los cables planos o la bobina de carga inalámbrica que están debajo de la bateria.

Si cualquiera de las tiras adhesivas se rompió por debajo de la batería y no puede removerse, continúa con el próximo paso abajo.

Tus contribuciones son autorizadas bajo la licencia de código abierto de Creative Commons.