Aviso: Estás editando una guía de requisitos previos. Cualquier cambio que realices afectará a todas las 9 guías que incluyen este paso.
Traduciendo paso 6
Paso 6
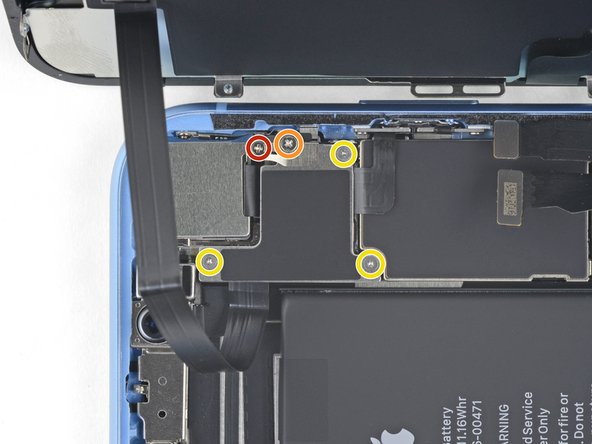


Unscrew the logic board connector cover
-
Remove the five screws securing the logic board connector bracket to the rear case:
-
One 1.3 mm Phillips #000 screw
-
One 1.5 mm Phillips #000 screw
-
Three 1.2 mm Y000 screws
-
Remove the bracket.
Tus contribuciones son autorizadas bajo la licencia de código abierto de Creative Commons.