Esta versión puede contener ediciones incorrectas. Cambiar a la última instantánea verificada.
Qué necesitas
-
-
Apaga el iPhone antes de empezar el desmontaje.
-
La tapa trasera de tu teléfono puede tener dos tornillos Phillips del nº 1000 o tornillos "Pentalobe" de 5 puntas de Apple. Comprueba qué tornillos tienes y asegúrate de que también tienes el destornillador correcto para poder extraerlos.
-
Retira los dos tornillos Pentalobe o Phillips #000 de 3,6 mm situados junto al conector del dock.
-
-
-
Retira el único tornillo Phillips de 1,5 mm que sujeta el conector de la batería a la placa lógica (si existe).
-
-
-
Tira hacia arriba de la pestaña de plástico transparente expuesta para despegar la batería del adhesivo que la sujeta al iPhone.
-
Si queda algo de solución alcohólica en el teléfono, límpiala con cuidado o deja que se seque al aire antes de instalar la nueva batería.
-
Extrae la batería.
-
Antes de reensamblarla, limpia los puntos de contacto entre metales con un desengrasante como el Windex. La grasa de tus dedos puede causar problemas de interferencias inalámbricas.
-
Realiza un reinicio completo después del reensamblaje. Esto puede evitar varios problemas y simplificar la resolución de problemas.
-
-
-
Este paso está sin traducir. Ayuda a traducirlo
-
Remove the two 1.8 mm Phillips screws securing the dock connector cable cover to the logic board.
-
Remove the metal dock connector cable cover.
-
-
Este paso está sin traducir. Ayuda a traducirlo
-
Use the edge of a plastic opening tool to pry the dock cable up from its socket on the logic board.
-
-
Este paso está sin traducir. Ayuda a traducirlo
-
Peel the dock connector cable off the adhesive securing it to the logic board and the side of the speaker enclosure.
-
-
Este paso está sin traducir. Ayuda a traducirlo
-
Remove the 1.6 mm Phillips screw securing the pressure contact to the logic board near the vibrator.
-
Remove the pressure contact.
-
-
Este paso está sin traducir. Ayuda a traducirlo
-
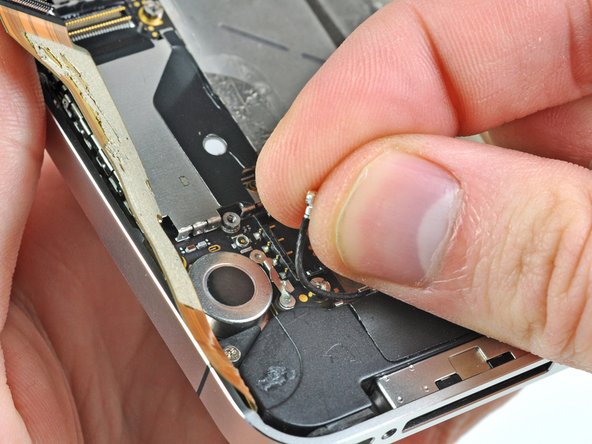
Use the edge of a plastic opening tool to pry the Wi-Fi antenna cable up from its socket on the logic board.
-
De-route the Wi-Fi antenna cable out from under the metal fingers attached to the logic board.
-
-
Este paso está sin traducir. Ayuda a traducirlo
-
Remove the two 2.4 mm Phillips screws securing the speaker enclosure assembly to the outer case.
-
-
Este paso está sin traducir. Ayuda a traducirlo
-
Remove the small black spacer that was under the Phillips screw near the vibrator.
-
-
Este paso está sin traducir. Ayuda a traducirlo
-
Use a plastic opening tool to lift the speaker enclosure assembly out of the case, being sure not to damage the EMI fingers on the attached Wi-Fi antenna.
-
Remove the speaker enclosure assembly.
-
-
Este paso está sin traducir. Ayuda a traducirlo
-
Remove the two 1.6 mm Phillips screws securing the cellular antenna to the speaker enclosure.
-
-
Este paso está sin traducir. Ayuda a traducirlo
-
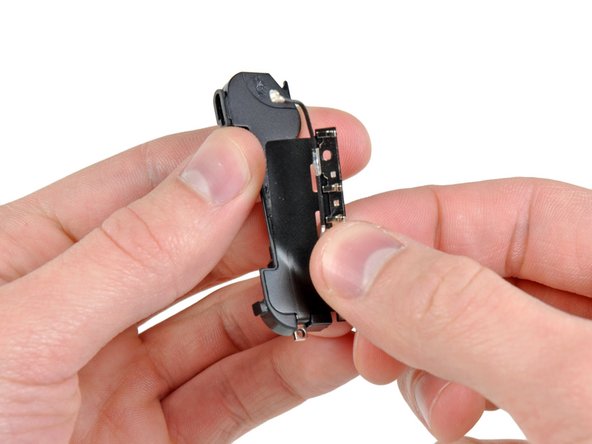
Starting near the cellular antenna cable, use the edge of a plastic opening tool to peel the antenna off the speaker enclosure.
-
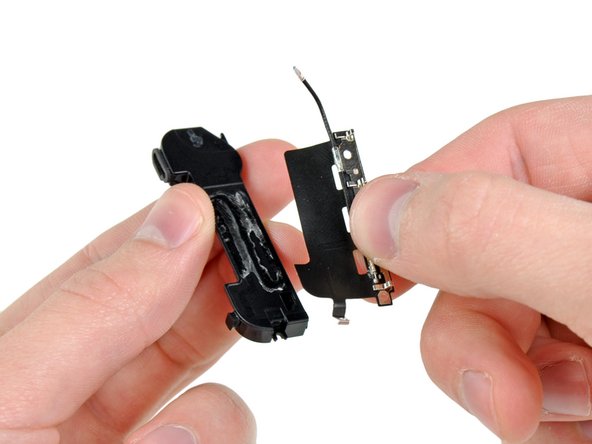
Continue peeling the cellular antenna off the speaker enclosure, being careful not to rip the gold bracket attached to one of its edges.
-
Remove the cellular antenna.
-


Cancelar: No complete esta guía.
20 personas más completaron esta guía.
