Esta versión puede contener ediciones incorrectas. Cambiar a la última instantánea verificada.
Qué necesitas
-
-
Llena una olla o cacerola con suficiente agua para sumergir completamente el iOpener.
-
Calienta el agua hasta que hierva. Apaga el fuego.
-
Coloca un iOpener en el agua caliente durante 2-3 minutos. Asegúrate de que el iOpener esté completamente sumergido en el agua.
-
Utiliza unas pinzas para extraer el iOpener calentado del agua caliente.
-
Seca bien el iOpener con una toalla.
-
Tu iOpener está listo para ser utilizado. Si necesita recalentar el iOpener, calienta el agua hasta que hierva, apaga el fuego y coloca el iOpener en el agua durante 2-3 minutos.
-
-
-
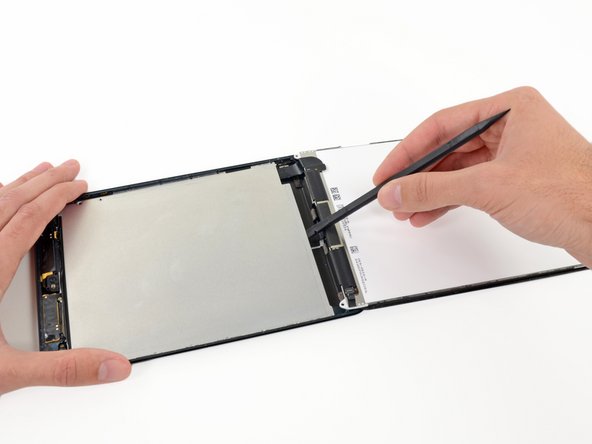
Si el vidrio de tu pantalla está agrietado, mantén la rotura contenida y evita daños corporales durante la reparación pegando el vidrio con cinta adhesiva.
-
Coloca tiras superpuestas de cinta transparente de embalaje sobre la pantalla del iPad hasta cubrir toda la cara.
-
Haz tu mejor esfuerzo para seguir el resto de la guía como se describe. Sin embargo, una vez que se rompe el vidrio, es probable que continúe agrietándose a medida que trabajas, y es posible que necesites utilizar una herramienta de palanca de metal para sacar el cristal.
-
-
-
Coloca con cuidado una ventosa hasta la mitad del lado calentado.
-
Asegúrate de que la ventosa esté completamente plana en la pantalla para obtener un sello hermético.
-
Mientras sostienes el iPad hacia abajo con una mano, jala hacia arriba la ventosa para separar ligeramente el vidrio del panel frontal de la caja trasera.
-
-
-
Toma la primera púa que insertaste y deslízala hacia arriba en dirección a la esquina superior del iPad.
-
Si puedes ver la punta de la púa de apertura a través del vidrio frontal, no te asustes, simplemente tira de la púa un poco. Lo más probable es que todo esté bien, pero trata de evitar esto ya que puede depositar adhesivo en la parte frontal de la pantalla LCD que es difícil de limpiar.
-
-
-
Desliza la púa inferior izquierda a la esquina inferior izquierda para cortar el adhesivo en esa esquina.
-
Deja la púa en la esquina. No te entrometas más y no retires la púa del iPad.
-
Antenas
-
Cavidad del botón de inicio
-
Cable digitalizador
-
Los siguientes pasos le indicarán dónde debes hacer palanca para evitar daños en estos componentes. Sólo aplica calor y haz palanca donde se te indique.
-
-
-
-
La carcasa de la cámara frontal puede pegarse al panel frontal; despega la carcasa y colócala de nuevo sobre la cámara para protegerla.
-
Mueve la carcasa de la cámara hacia arriba en un borde para liberarla del adhesivo y retírala del panel frontal.
-
Vuelve a colocar la carcasa de la cámara frontal delante en su hueco en la carcasa trasera.
-
-
-
Usa pinzas para despegar y remover la pieza rectangular de cinta de pieza de espuma que cubre los tornillos del LCD.
-
Remueve la cubierta triangular de cinta que cubre los tornillos del LCD.
-
-
-
Remueve los siguientes tornillos que aseguran la placa de protección del LCD a la carcasa trasera del iPad:
-
Dos Phillips #00 de 2.6 mm
-
Trece Phillips #00 de 1.7 mm
-
Uno adicional Phillips #00 de 1.7 mm en algunos dispositivos.
-
-
-
Remueve los tres tornillos Phillips #00 de 1.3 mm que aseguran la protección del conector a la tarjeta lógica.
-
-
-
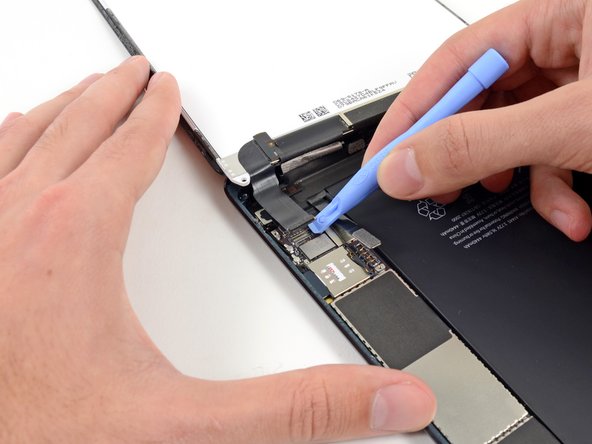
Usa una herramienta de apertura de plástico para hacer palanca en el conector del LCD de su socket en la tarjeta lógica.
-
-
-
Para minimizar la fuerza en el socket, intenta hacer palanca debajo del borde pequeño en el conector, en vez de en el borde largo el cual es mostrado en estas imágenes.
-
Gentilmente haz palanca en el conector digitalizador de su socket en la tarjeta lógica.
-
-
Este paso está sin traducir. Ayuda a traducirlo
-
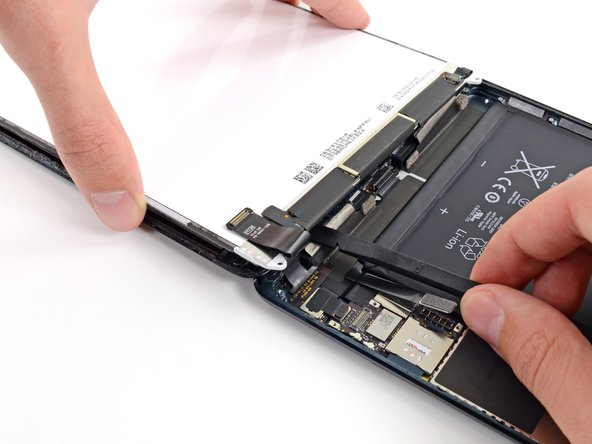
Use a pair of tweezers to peel up and remove the small piece of tape covering the front-facing camera cable connector.
-
-
Este paso está sin traducir. Ayuda a traducirlo
-
The front-facing camera cable connector is secured with pieces of tape that wrap up around the sides of the cable and are fastened to two small metal plates.
-
In the next two steps, you will be prying the two metal plates up and out from the center of the cable.
-
-
Este paso está sin traducir. Ayuda a traducirlo
-
Use a plastic opening tool to gently pry the lower metal plate up from the front-facing camera cable connector.
-
Being careful not to break the plate or the tape attached to it, pry it up and fold it away from the front-facing camera cable connector.
-
-
Este paso está sin traducir. Ayuda a traducirlo
-
Gently pry the second metal plate up from the front-facing camera cable connector.
-
Again, carefully pry the plate up and away from the front-facing camera cable connector.
-
-
Este paso está sin traducir. Ayuda a traducirlo
-
Use a plastic opening tool to pry the front-facing camera cable's connector up from its socket on the logic board.
-
-
Este paso está sin traducir. Ayuda a traducirlo
-
Use a pair of tweezers to peel up the top of the rectangular piece of tape covering the bend in the front-facing camera cable.
-
Bend the tape up out of the way of the front-facing camera cable.
-
-
Este paso está sin traducir. Ayuda a traducirlo
-
Gently fold the front-facing camera cable upwards (roughly at a 90-degree angle), exposing the bottom side of it.
-
-
Este paso está sin traducir. Ayuda a traducirlo
-
While holding the front-facing camera cable up, use the tip of a spudger to separate the piece of tape adhered to the bottom side of the corner of the cable.
-
-
Este paso está sin traducir. Ayuda a traducirlo
-
Use the tip of a spudger to gently pry the front-facing camera forward, separating it from the adhesive securing to the rear case.
-
-
Este paso está sin traducir. Ayuda a traducirlo
-
Carefully remove the front-facing camera from the iPad, threading its cable through the slot cut near the bottom of its socket in the rear case.
-
-
Este paso está sin traducir. Ayuda a traducirlo
-
Use tweezers to gently peel back and remove the black tape covering the gold patch on the headphone jack cable.
-
-
Este paso está sin traducir. Ayuda a traducirlo
-
Use tweezers to peel and remove the long thin black tape covering the top of the headphone jack cable.
-
-
Este paso está sin traducir. Ayuda a traducirlo
-
Use the tip of a spudger to gently lift the tab on the top left antenna ribbon cable's ZIF connector.
-
-
Este paso está sin traducir. Ayuda a traducirlo
-
Use tweezers to pull the top left antenna ribbon cable straight out from its ZIF socket.
-
Gently bend the cable up and out of the way of the headphone jack cable.
-
-
Este paso está sin traducir. Ayuda a traducirlo
-
Use the tip of a spudger to lift the tab on the microphone data cable ZIF connector.
-
-
Este paso está sin traducir. Ayuda a traducirlo
-
Slowly work the flat end of a metal spudger underneath the microphone cable, separating the adhesive securing it to the headphone cable.
-
-
Este paso está sin traducir. Ayuda a traducirlo
-
Use tweezers to pull the microphone cable straight out from its ZIF socket.
-
Gently bend the cable up and out of the way of the headphone jack cable.
-
-
Este paso está sin traducir. Ayuda a traducirlo
-
Peel up and remove the small piece of tape covering the headphone jack cable connector.
-
-
Este paso está sin traducir. Ayuda a traducirlo
-
Use a plastic opening tool to gently pry the lower metal plate up from the headphone cable connector.
-
Being careful not to break the plate or the tape attached to it, pry it up and fold it away from the headphone cable connector.
-
-
Este paso está sin traducir. Ayuda a traducirlo
-
Use a plastic opening tool to gently pry the second (upper) metal plate up from the headphone cable connector.
-
Again, carefully pry the plate up and away from the headphone cable connector.
-
-
Este paso está sin traducir. Ayuda a traducirlo
-
Use a plastic opening tool to pry the headphone cable's connector up from the logic board.
-
-
Este paso está sin traducir. Ayuda a traducirlo
-
Remove two 1.8 mm #00 Phillips screws from the screw tab on the top left antenna.
-
-
Este paso está sin traducir. Ayuda a traducirlo
-
Slide the flat end of a spudger beneath the length of the headphone jack cable, separating the adhesive securing the cable to the rear case.
-
-
Este paso está sin traducir. Ayuda a traducirlo
-
Lift the headphone jack cable up and fold it out of the way.
-
-
Este paso está sin traducir. Ayuda a traducirlo
-
Use the flat end of a spudger to pry the headphone jack cable up from the adhesive securing it to the rear case.
-
-
Este paso está sin traducir. Ayuda a traducirlo
-
Remove the single 4.4 mm Phillips screw securing the headphone jack to the rear case.
-
-
Este paso está sin traducir. Ayuda a traducirlo
-
Use a pair of tweezers to firmly grasp the headphone jack cable as shown.
-
Pull the headphone jack straight out of its recess in the rear case.
-
Remove the headphone jack cable assembly from the iPad.
-


Cancelar: No complete esta guía.
3 personas más completaron esta guía.
