Esta versión puede contener ediciones incorrectas. Cambie a la última instantánea verificada.
Qué necesitas
-
-
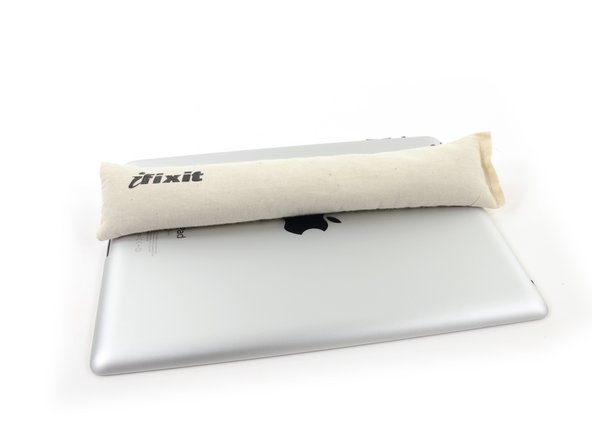
Llena una olla o cacerola con suficiente agua para sumergir completamente el iOpener.
-
Calienta el agua hasta que hierva. Apaga el fuego.
-
Coloca un iOpener en el agua caliente durante 2-3 minutos. Asegúrate de que el iOpener esté completamente sumergido en el agua.
-
Utiliza unas pinzas para extraer el iOpener calentado del agua caliente.
-
Seca bien el iOpener con una toalla.
-
Tu iOpener está listo para ser utilizado. Si necesita recalentar el iOpener, calienta el agua hasta que hierva, apaga el fuego y coloca el iOpener en el agua durante 2-3 minutos.
-
-
-
Si tu cristal de pantalla está agrietado, mantén una mayor rotura contenida y evita daños corporales durante su reparación pegando el vidrio.
-
Coloca tiras superpuestas de cinta de embalaje transparente sobre la pantalla del iPad hasta que toda la cara está cubierta.
-
Haz lo que puedas para seguir el resto de la guía según lo descrito. Sin embargo, una vez que el vidrio se rompe, es probable que continúe agrietándose mientras trabajas, y puede que tengas que usar una herramienta metálica para sacar el vidrio.
-
-
-
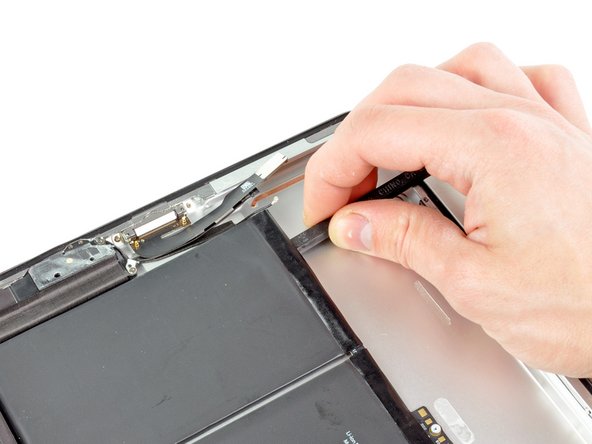
Hay una pequeña brecha en el anillo adhesivo del iPad en la esquina superior derecha del iPad, aproximadamente 2,0 pulgadas (~ 5 cm) desde la parte superior del iPad. Vas a explotar esta debilidad.
-
Alinea la herramienta con el botón de silencio. Inserta la punta de una herramienta de apertura de plástico en el hueco entre el cristal frontal y el bisel de plástico. Basta con insertar la punta de la herramienta de apertura, lo suficiente como para ensanchar la grieta.
-
-
-
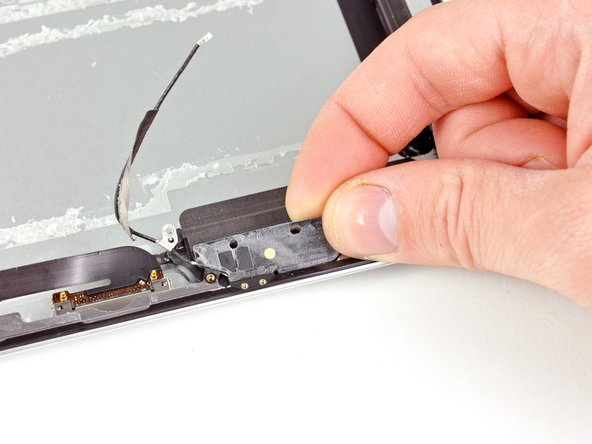
Una vez que haya pasado la antena Wi-FI (aproximadamente 75 mm desde el borde derecho, o justo al lado del botón de inicio) vuelva a insertar la selección de apertura a su profundidad máxima.
-
Desliza la palanca hacia la derecha, liberando el adhesivo que sujeta la antena Wi-Fi al cristal frontal.
-
La antena está conectada a la parte inferior del iPad a través de tornillos y un cable. Este paso separa la antena del panel frontal, asegurando que al retirar el panel, la antena no se dañará.
-
-
-
-
Desliza la púa de apertura a lo largo del borde superior del iPad, tirando ligeramente hacia fuera para rodear el soporte frontal de la cámara.
-
El adhesivo a lo largo de esta sección es muy grueso, y puede requerirse una cantidad justa de fuerza. Trabaja con cuidado y lentamente, asegurándose de no resbalar y dañarse a sí mismo o a tu iPad.
-
-
-
Desliza la púa de apertura a lo largo del borde izquierdo del iPad, liberando el adhesivo a medida que avanza. El adhesivo es delgado debido al digitalizador a lo largo de todo el lado izquierdo. Asegúrate de que la púa no esté más de 10 mm dentro para evitar dañar el digitalizador.
-
-
-
Sosteniendo el iPad por las esquinas superior e inferior derecha, gira el cristal delantero lejos del iPad.
-
Durante el montaje, utiliza un paño de microfibra y aire comprimido para limpiar el polvo o las huellas dactilares de la pantalla LCD antes de volver a instalar el cristal.
-
-
-
Retira los cuatro tornillos Phillips #0 de 2,0 mm que sujetan la pantalla LCD a la carcasa trasera.
-
-
-
Los cables planos del panel frontal están conectados debajo de la pantalla LCD. Para acceder a ellos, tendrás que girar temporalmente la pantalla LCD y apartarla.
-
Levanta la pantalla LCD por el borde largo más cercano a los botones de volumen y sácala con cuidado de la carcasa trasera, como si pasaras la página de un libro.
-
Coloca la pantalla LCD boca abajo en el panel frontal
-
-
-
Utiliza el borde de una herramienta de apertura de plástico para levantar con cuidado las solapas de sujeción de las dos tomas ZIF del cable plano digitalizador.
-
-
-
Levanta la pantalla LCD por el borde largo más alejado del cable digitalizador y gírala suavemente hacia la carcasa trasera, como si estuvieras cerrando un libro.
-
Mientras mantienes levantada la pantalla LCD, desliza suavemente el panel frontal alejándolo del iPad. Ten cuidado de no enganchar el cable digitalizador en la carcasa trasera o en la pantalla LCD.
-
Vuelve a colocar la pantalla LCD en la carcasa para guardarla.
-
-
-
Levanta la pantalla LCD por el borde largo más cercano a los botones de volumen y sácala con cuidado de la carcasa trasera, como si pasaras la página de un libro.
-
Coloca la pantalla LCD boca abajo sobre una superficie limpia. Puedes apoyarla sobre un paño suave para evitar arañazos.
-
-
Este paso está sin traducir. Ayuda a traducirlo
-
Carefully lay the LCD next to the rear panel.
-
Use a plastic opening tool to lift the display data cable lock upwards.
-
Pull the display data cable out of its socket.
-
-
Este paso está sin traducir. Ayuda a traducirlo
-
Remove the LCD assembly from the rear panel assembly.
-
-
Este paso está sin traducir. Ayuda a traducirlo
-
Use a plastic opening tool to help remove the piece of tape covering the end of the dock connector cable.
-
Use the edge of a plastic opening tool to carefully pry the dock connector cable's connector up from its socket on the logic board.
-
Peel the dock connector ribbon cable off the rear panel.
-
-
Este paso está sin traducir. Ayuda a traducirlo
-
Pry the speaker cable connector straight up from its socket on the logic board.
-
-
Este paso está sin traducir. Ayuda a traducirlo
-
Remove the two 2.1 mm Phillips screws securing the logic board bracket to the rear case near the digitizer cable socket.
-
Remove the logic board bracket from the rear case.
-
-
Este paso está sin traducir. Ayuda a traducirlo
-
Use the edge of a plastic opening tool to flip up the retainer securing the control board cable connector to its socket on the logic board.
-
Pull the connector away from its socket on the logic board.
-
-
Este paso está sin traducir. Ayuda a traducirlo
-
Remove the four 2.6 mm Phillips screws securing the logic and communications boards to the rear panel.
-
-
Este paso está sin traducir. Ayuda a traducirlo
-
Use the edge of a plastic opening tool to gently pry the logic board up from the adhesive securing it to the rear case.
-
-
Este paso está sin traducir. Ayuda a traducirlo
-
Slightly lift the top of the logic board and disconnect the two antennas on the left.
-
Rotate the logic board towards the center of the iPad and disconnect the last antenna at the top of the logic board.
-
Disconnect the Wi-Fi antenna at the bottom of the logic board.
-
-
Este paso está sin traducir. Ayuda a traducirlo
-
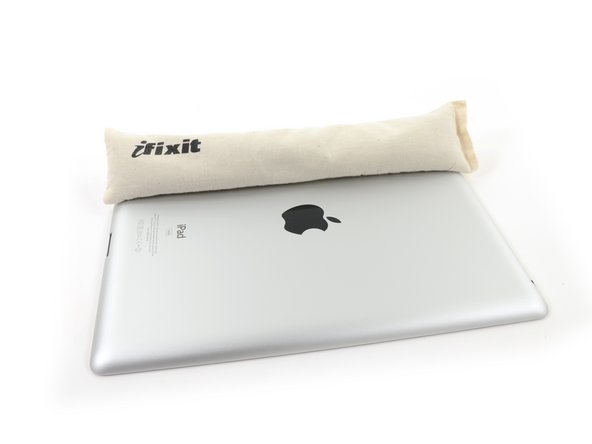
Reheat the iOpener in the microwave for one minute.
-
Place the heated iOpener on the back of the iPad just right of center (the side opposite the rear facing camera). Let it sit there for 90 seconds to soften the battery adhesive.
-
Move the iOpener to the center of the back of the iPad and let the iOpener sit for another 90 seconds.
-
Move the iOpener to the left edge (the side with the rear facing camera) of the back of the iPad and let the iOpener sit for another 90 seconds.
-
-
Este paso está sin traducir. Ayuda a traducirlo
-
Starting with the battery cell closest to the dock connector, run a plastic opening tool underneath the edge of the battery closest to the logic board void to make enough room to insert the flat end of a spudger
-
Run the flat end of a spudger along the two long sides of each battery cell to completely separate them from the adhesive securing them to the rear case.
-
If the adhesive is very difficult to separate, reheat the rear panel and try again.
-
-
Este paso está sin traducir. Ayuda a traducirlo
-
Before prying up the middle battery cell, use the edge of a plastic opening tool to lift the battery connector board away from the rear panel.
-
-
Este paso está sin traducir. Ayuda a traducirlo
-
Next use your spudger to separate the adhesive along the long sides of the middle battery cell.
-
Repeat the process for the final battery cell, reheating the case if necessary.
-
-
Este paso está sin traducir. Ayuda a traducirlo
-
Carefully lift the battery out of the rear panel and remove it from the iPad 2.
-
-
Este paso está sin traducir. Ayuda a traducirlo
-
Carefully peel up the dock connector and speaker cables to reveal the Wi-Fi antenna cable.
-
Peel the Wi-Fi antenna cable off the rear panel.
-
-
Este paso está sin traducir. Ayuda a traducirlo
-
Remove the following four screws:
-
Two 2.0 mm Phillips screws
-
Two 1.7 mm Phillips screws
-
-
Este paso está sin traducir. Ayuda a traducirlo
-
Peel the Wi-Fi antenna off the speaker enclosure and remove it from the iPad 2.
-
-
Este paso está sin traducir. Ayuda a traducirlo
-
Peel the dock connector cable off the speaker cable.
-
-
Este paso está sin traducir. Ayuda a traducirlo
-
Use the edge of a plastic opening tool to peel up the edge of the large strip of tape securing the speaker assembly to the rear panel.
-
Use your fingers to peel the strip of tape off the speaker assembly.
-
-
Este paso está sin traducir. Ayuda a traducirlo
-
Remove the following two screws:
-
One 3 mm Phillips screw
-
One 2.1 mm Phillips screw
-
-
Este paso está sin traducir. Ayuda a traducirlo
-
Use the edge of a plastic opening tool to help push the speaker assembly out from under the right side of the rear panel.
-
Remove the speaker assembly from the iPad 2.
-


Cancelar: No complete esta guía.
3 personas más completaron esta guía.
