Saltar al contenido principal

Toro Stump Grinder SGR-13 22615HD 2017 Drive Belt Replacement

Qué necesitas

  1. Toro Stump Grinder SGR-13 22615HD 2017 Drive Belt Replacement, Turn off the power: paso 1, imagen 1 de 2 Toro Stump Grinder SGR-13 22615HD 2017 Drive Belt Replacement, Turn off the power: paso 1, imagen 2 de 2
    • Before you begin, ensure the machine is powered down and cool to the touch.

    • Turn the ignition switch to the off position.

  2. Toro Stump Grinder SGR-13 22615HD 2017 Drive Belt Replacement, Close the fuel valve: paso 2, imagen 1 de 2 Toro Stump Grinder SGR-13 22615HD 2017 Drive Belt Replacement, Close the fuel valve: paso 2, imagen 2 de 2
    • Flip the fuel cutoff valve switch into the off position.

  3. Toro Stump Grinder SGR-13 22615HD 2017 Drive Belt Replacement, Disconnect the spark plug: paso 3, imagen 1 de 2 Toro Stump Grinder SGR-13 22615HD 2017 Drive Belt Replacement, Disconnect the spark plug: paso 3, imagen 2 de 2
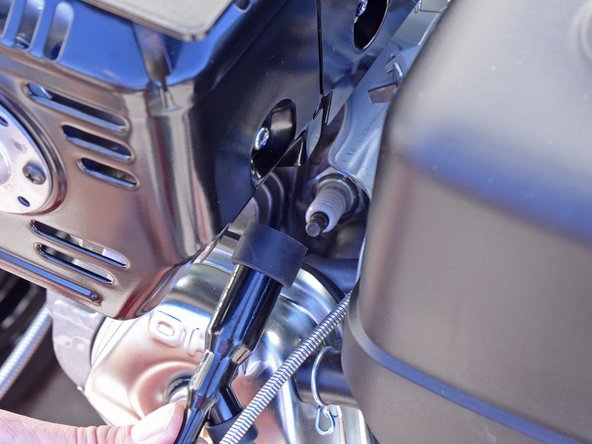
    • Grab the plastic housing at the end of the spark plug wire.

    • Pull firmly to disconnect the wire from the spark plug.

  4. Toro Stump Grinder SGR-13 22615HD 2017 Drive Belt Replacement, Tilt the cutter wheel up: paso 4, imagen 1 de 1
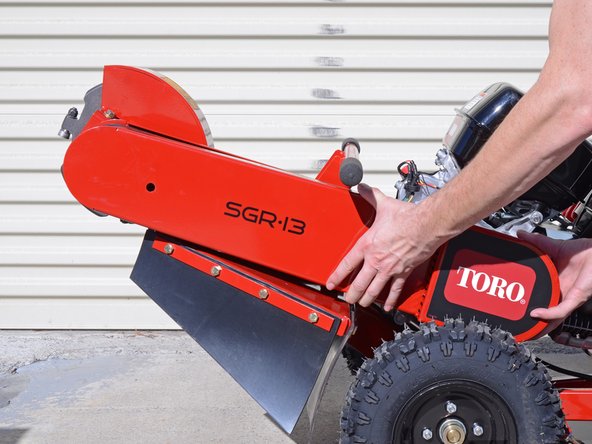
    • Tilt the machine so that it is resting on the handle with the cutter wheel raised.

  5. Toro Stump Grinder SGR-13 22615HD 2017 Drive Belt Replacement, Remove the belt guard: paso 5, imagen 1 de 2 Toro Stump Grinder SGR-13 22615HD 2017 Drive Belt Replacement, Remove the belt guard: paso 5, imagen 2 de 2
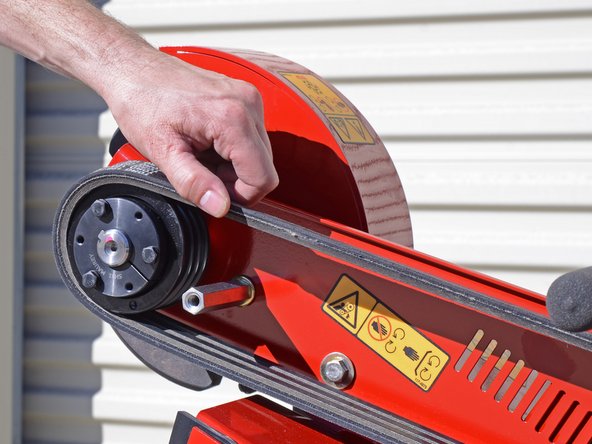
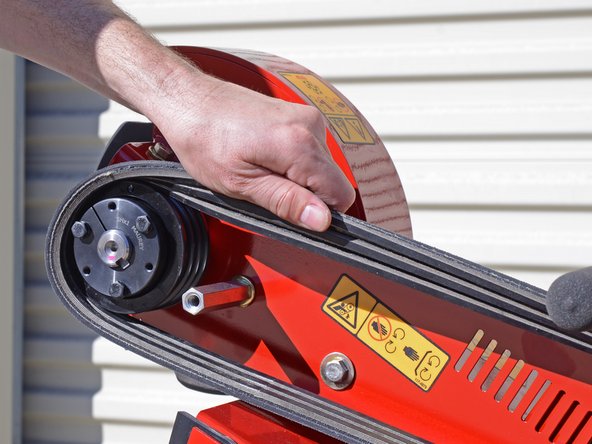
    • Use a 14 mm socket to remove the fasteners securing the belt guard:

    • One 10 mm bolt

    • One 10 mm nut

  6. Toro Stump Grinder SGR-13 22615HD 2017 Drive Belt Replacement: paso 6, imagen 1 de 3 Toro Stump Grinder SGR-13 22615HD 2017 Drive Belt Replacement: paso 6, imagen 2 de 3 Toro Stump Grinder SGR-13 22615HD 2017 Drive Belt Replacement: paso 6, imagen 3 de 3
    • Remove the belt guard.

  7. Toro Stump Grinder SGR-13 22615HD 2017 Drive Belt Replacement, Remove the drive belt: paso 7, imagen 1 de 3 Toro Stump Grinder SGR-13 22615HD 2017 Drive Belt Replacement, Remove the drive belt: paso 7, imagen 2 de 3 Toro Stump Grinder SGR-13 22615HD 2017 Drive Belt Replacement, Remove the drive belt: paso 7, imagen 3 de 3
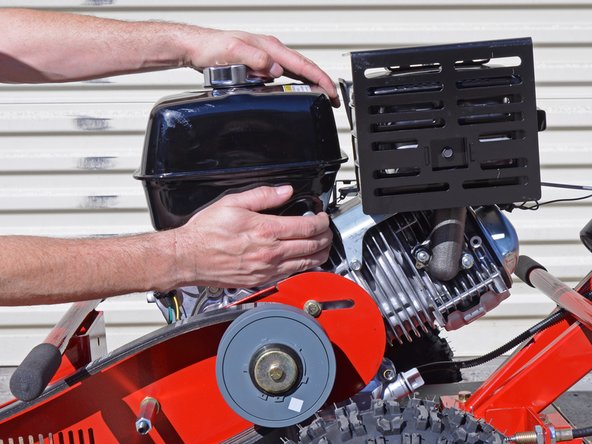
    • Use a 9/16 inch socket to loosen the four nuts securing the bottom of the motor enough to allow the motor to slide freely. Do not remove the nuts.

    • Use a 1/2 inch wrench in combination with the socket wrench to hold the bolts in place.

  8. Toro Stump Grinder SGR-13 22615HD 2017 Drive Belt Replacement: paso 8, imagen 1 de 1
    • Use a 1/2 inch wrench to loosen the two bolts behind the centrifugal clutch enough to allow the motor to slide freely. Do not remove the bolts.

  9. Toro Stump Grinder SGR-13 22615HD 2017 Drive Belt Replacement: paso 9, imagen 1 de 2 Toro Stump Grinder SGR-13 22615HD 2017 Drive Belt Replacement: paso 9, imagen 2 de 2
    • Wrap a piece of tape around the upper half of the tensioner bolt to mark the location of the second nut.

    • Use a 9/16 inch wrench to loosen the nut on the lower half of the tensioner bolt until the motor can slide forward as much as possible.

    • During reassembly, reference the tape to position the outer nut into the same location as before to ensure proper belt tension.

  10. Toro Stump Grinder SGR-13 22615HD 2017 Drive Belt Replacement: paso 10, imagen 1 de 2 Toro Stump Grinder SGR-13 22615HD 2017 Drive Belt Replacement: paso 10, imagen 2 de 2
    • Slide the engine towards the cutter blade to loosen the drive belt.

  11. Toro Stump Grinder SGR-13 22615HD 2017 Drive Belt Replacement: paso 11, imagen 1 de 3 Toro Stump Grinder SGR-13 22615HD 2017 Drive Belt Replacement: paso 11, imagen 2 de 3 Toro Stump Grinder SGR-13 22615HD 2017 Drive Belt Replacement: paso 11, imagen 3 de 3
    • Lift the drive belt up and away from the machine while rolling it towards the cutter head to gradually roll it off of the pulley.

  12. Toro Stump Grinder SGR-13 22615HD 2017 Drive Belt Replacement: paso 12, imagen 1 de 1
    • Remove the drive belt.

Conclusión

To reassemble your device, follow these instructions in reverse order.

3 personas más completaron esta guía.

Sam Omiotek

Miembro Desde 02/25/19

73,429 Reputación

288 Guías creadas

0 comentarios

Agregar Comentario

Ver Estadísticas:

Ultimas 24 horas: 1

Ultimos 7 días: 17

Ultimos 30 días: 55

Todo El Tiempo: 1,548