Introducción
This guide demonstrates how to remove the heat sink sticker in your Steam Deck OLED.
Qué necesitas
-
-
Power down your Steam Deck and unplug any cables.
-
-
Herramienta utilizada en este paso:FixMat$36.95
-
Use a T6 Torx driver to remove the eight 5.8 mm‑long screws securing the back cover.
-
-
-
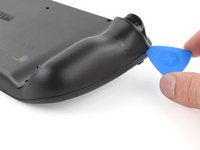
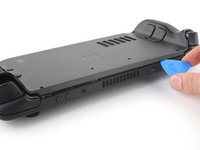
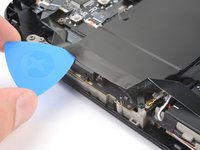
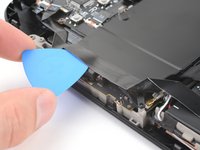
Insert an opening pick at an upward angle between the back cover and the front shell near one of the triggers.
-
Slide your pick along the edge of the handle to release the clips securing it to the front shell.
-
-
-
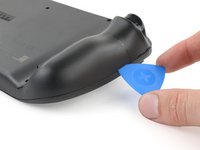
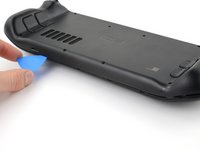
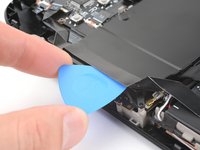
Reinsert your pick and slide it along the top and bottom edges until the back cover feels loose.
-
-
-
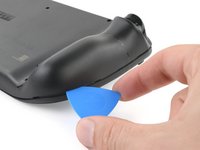
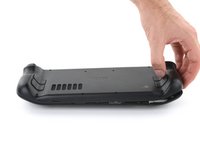
Grip the unclipped handle and pull it away from the front shell to release the remaining clips.
-
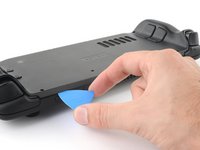
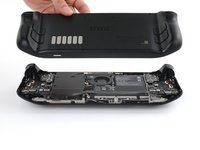
Remove the back cover.
-
-
-
-
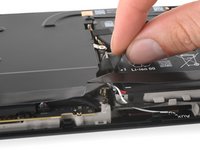
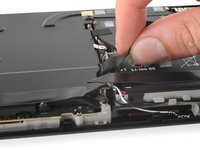
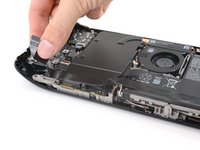
Grip the battery cable pull tab, located to the left of the battery.
-
Firmly pull the battery cable straight away from the motherboard shield (toward the battery) to disconnect it.
-
-
Herramienta utilizada en este paso:Tweezers$4.99
-
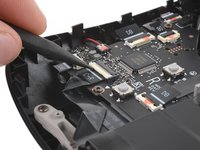
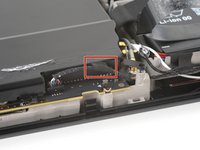
Use a spudger to flip up the small white locking flap on the right button board interconnect cable ZIF connector.
-
Use tweezers or your fingers to grip the cable's pull tab and slide it straight out of its socket to disconnect it.
-
-
-
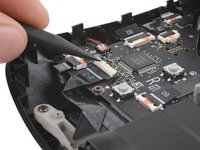
Insert an opening pick between the interconnect cable and the motherboard shield.
-
Slide your pick along the shield to separate the cable.
-
-
-
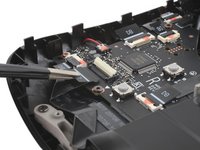
Tape the cable in place away from the motherboard shield.
-
-
-
Use your T6 Torx driver to remove the two 3.8 mm‑long screws securing the top left and bottom left corners of the motherboard shield.
-
-
-
If the speaker cable is taped to the bottom edge of the motherboard shield, gently peel it off.
-
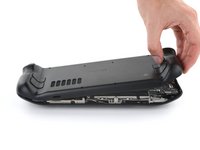
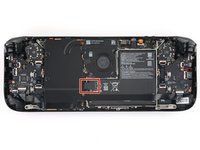
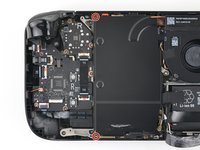
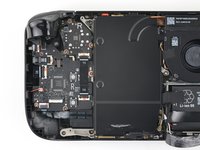
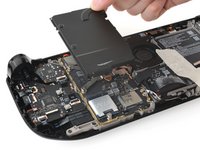
Remove the motherboard shield.
-
-
-
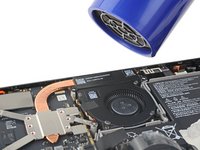
Use an iOpener or hair dryer to soften the adhesive on the black sticker connecting the heat sink to the fan.
-
-
-
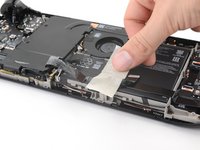
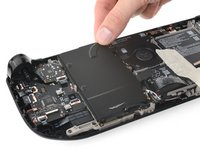
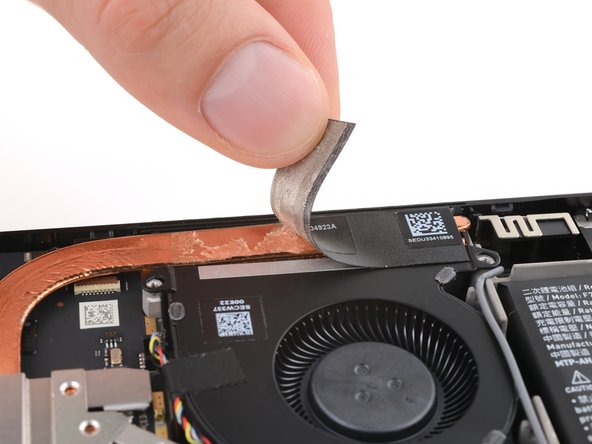
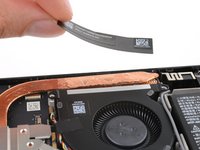
Slide the tip of an opening pick under one edge of the heat sink sticker.
-
Peel the sticker up until you can grab it with your fingers.
-
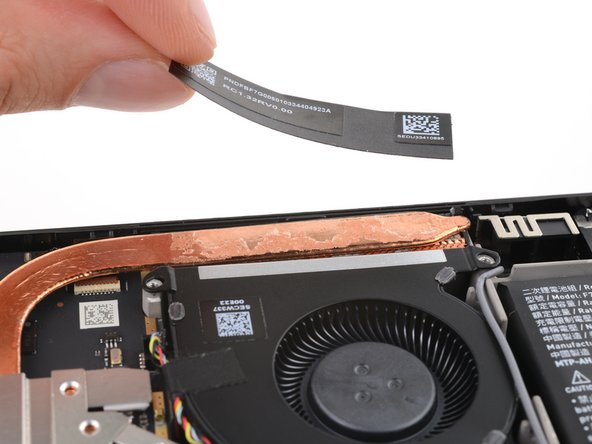
Gently remove the sticker from the heat sink and fan.
-


To reassemble your device, follow these instructions in reverse order.
To reassemble your device, follow these instructions in reverse order.

Equipo
