Introducción
Use this guide to replace a malfunctioning or defective sensor array on your Samsung Galaxy Watch Active.
Qué necesitas
-
-
Turn off the Galaxy Watch Active by pushing and holding the bottom button for approximately 3 seconds. You should feel a short vibration.
-
When the "Power off" symbol appears tap the center of the screen to make it shut down. You should feel a longer vibration for confirmation.
-
-
-
Use a Tri-point Y00 screwdriver to remove the four 4 mm-long screws on the back of the watch.
-
-
-
Use an opening tool and place it between the plastic back cover and the metal housing near the buttons.
-
Push the tip of the opening tool into the gap to separate the back cover from the housing.
-
-
-
-
Carefully lift the back cover approximately 2 cm to access the sensor array connector near the two buttons.
-
Use a spudger to disconnect the sensor array from the motherboard.
-
-
-
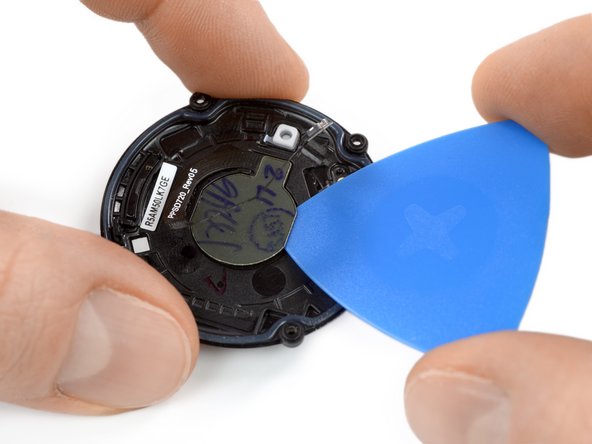
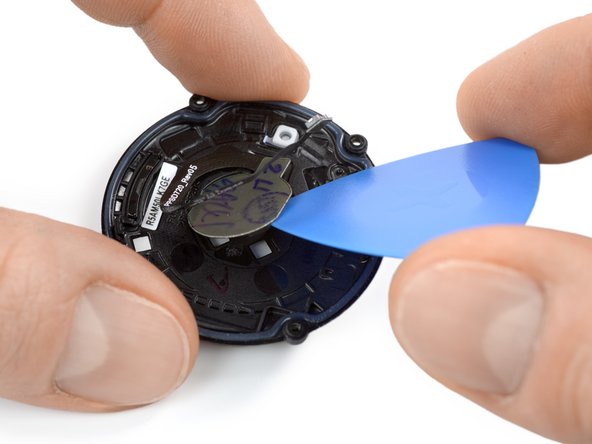
Use an opening pick and slide it underneath the sensor array which is slightly glued in place.
-
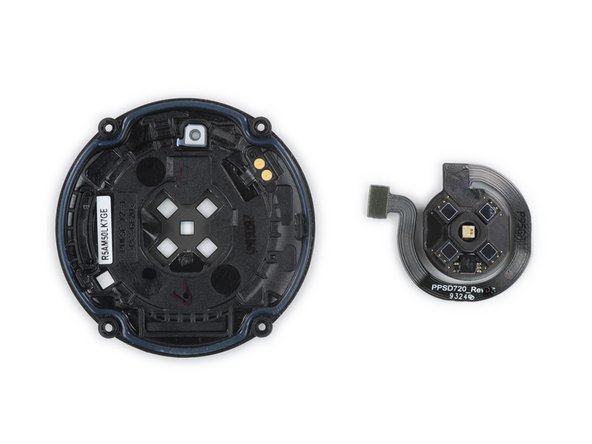
Carefully twist the opening pick to separate the sensor array from the back cover.
-
To reassemble your device, follow these instructions in reverse order.
Take your e-waste to an R2 or e-Stewards certified recycler.
Repair didn’t go as planned? Try some basic troubleshooting, or ask our Answers community for help.
To reassemble your device, follow these instructions in reverse order.
Take your e-waste to an R2 or e-Stewards certified recycler.
Repair didn’t go as planned? Try some basic troubleshooting, or ask our Answers community for help.
Cancelar: No complete esta guía.
Una persona más ha completado esta guía.


