Saltar al contenido principal
Únete a la Comunidad de Reparación - Crear Cuenta

Rocketfish RF-WHTIB-A Receiver Wireless Audio Module Chip Replacement

Qué necesitas

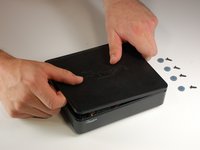
    1. Rocketfish RF-WHTIB-A Receiver Wireless Audio Module Chip Replacement, How to Open the Rocketfish RF-WHTIB-A Receiver: paso 1, imagen 1 de 1
      • Remove the 4 rubber tabs on the bottom side of the receiver.

      Pregunta a FixBot

      Agregar Comentario

    2. Rocketfish RF-WHTIB-A Receiver Wireless Audio Module Chip Replacement: paso 2, imagen 1 de 1
      • Unscrew the four 12 mm screws on the bottom side of the receiver.

      • Use a Phillips #1 screwdriver for this step.

      Pregunta a FixBot

      Agregar Comentario

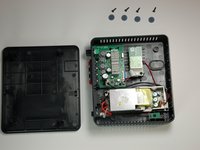
    3. Rocketfish RF-WHTIB-A Receiver Wireless Audio Module Chip Replacement: paso 3, imagen 1 de 2 Rocketfish RF-WHTIB-A Receiver Wireless Audio Module Chip Replacement: paso 3, imagen 2 de 2
      • Remove top casing from the receiver.

      • The receiver top casing is difficult to remove. Internal clasps may have to be broken in order to remove the top casing (this will not effect the device's function)

      Pregunta a FixBot

      Agregar Comentario

    1. Rocketfish RF-WHTIB-A Receiver Wireless Audio Module Chip Replacement, Receiver Wireless Audio Module Chip: paso 4, imagen 1 de 1
      • Unscrew the 10 mm screw holding the wireless audio module.

      Pregunta a FixBot

      Agregar Comentario

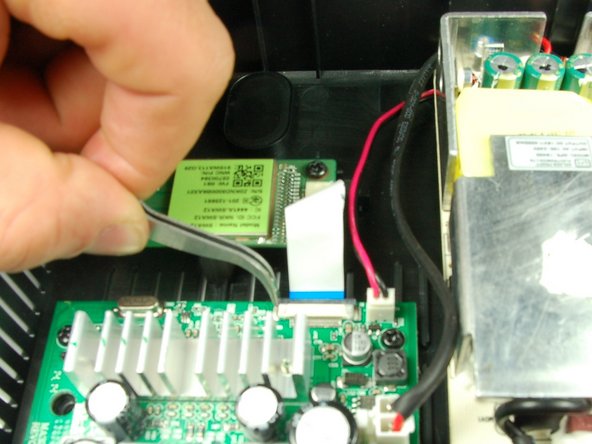
    2. Rocketfish RF-WHTIB-A Receiver Wireless Audio Module Chip Replacement: paso 5, imagen 1 de 2 Rocketfish RF-WHTIB-A Receiver Wireless Audio Module Chip Replacement: paso 5, imagen 2 de 2
      Herramienta utilizada en este paso:
      Tweezers
      $4.99
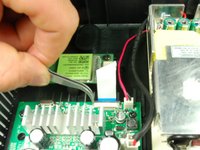
      • Slide the black retaining flap securing the ribbon cable away from the white bar.

      • There should be only a small space between the white bar and black retaining flap.

      • You may want to use tweezers for this step.

      Pregunta a FixBot

      Agregar Comentario

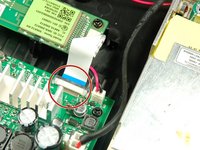
    3. Rocketfish RF-WHTIB-A Receiver Wireless Audio Module Chip Replacement: paso 6, imagen 1 de 1
      • Using your fingers, slide the ribbon cable out from the under the black retaining flap to completely disconnect it from the device.

      Pregunta a FixBot

      Agregar Comentario

Conclusión

To install the new wireless audio module chip, follow these instructions in reverse order.

Cancelar: No complete esta guía.

Una persona más ha completado esta guía.

Equipo

Baylor, Team 4-2, Williams Spring 2015 Miembro de Baylor, Team 4-2, Williams Spring 2015

BU-WILLIAMS-S15S4G2

Miembros de 3

18 Guías creadas

1Guía Comentario

This is a very long time later, but where do you get the receiver chip??? Rocket fish doesn't support the product anymore

Michael Jay - Contestar Compartir

Agregar Comentario

Ver Estadísticas:

Ultimas 24 horas: 1

Ultimos 7 días: 8

Ultimos 30 días: 31

Todo El Tiempo: 2,571