Introducción
Utiliza esta guía para reemplazar el altavoz izquierdo.
Cuando esté funcionando con normalidad, durante la mayor parte de la guía estará a la derecha, ya que tu portátil estará boca abajo.
Qué necesitas
-
-
Quita los 10 tornillos que aseguran la parte inferior de la carcasa a la parte superior:
-
Dos tornillos Pentalobe P5 de 2.3 mm
-
Ocho tornillos Pentalobe P5 de 3.0 mm
-
-
-
-
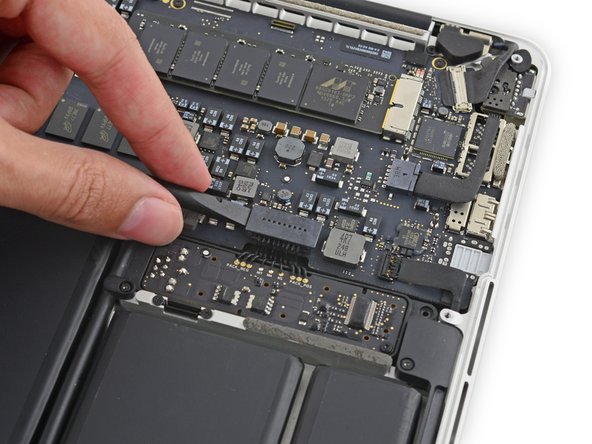
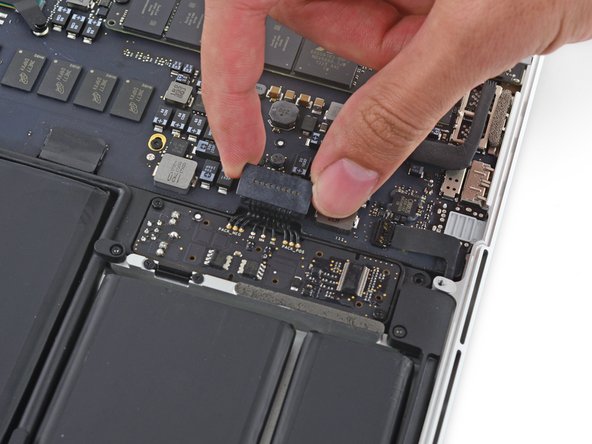
Con cuidado coloca la punta del spudger bajo el cable del altavoz izquierdo cerca del conector y levántalo de su enchufe en la placa lógica.
-
Para volver a armar tu dispositivo, sigue estas instrucciones en orden inverso.
Para volver a armar tu dispositivo, sigue estas instrucciones en orden inverso.
Cancelar: No complete esta guía.
55 personas más completaron esta guía.
Un agradecimiento especial a estos traductores:
100%
Estos traductores nos están ayudando a reparar el mundo! ¿Quieres contribuir?
Empezar a traducir ›
4 comentarios
Does anyone know the RMS/wattage of the speaker?
Excellent clear instructions. On my MacBook the cover screws were marked on the threads with white for the long ones and blue for the short. Since I couldn’t source a replacement speaker I repaired the existing one using contact glue as described by Earl Maliki on YouTube…it works; no more rattles. The sound is now lo-fi for the left speaker but good enough for speech and I never listen to music without a Bluetooth speaker. Total cost: 24 Swiss francs for a screwdriver set with a P5 pentalobe head. Much better than the 167 fr and 2 weeks in the shop I was quoted locally for repair.
Hi there,
thank you for the detailed instruction. Used it to replace rattling speakers in a “customer” laptop (I work in the Repaircafé in Bern, so not a commercial operation).
Cheers, J.
Very easy to follow instructions, the screw ID's were the biggest help, since Apple loves to rummage in their toolbox for a different one for each hole. Had a bit of trouble re-installing the speaker due to speaker cable being 'new', but with a bit of patience I got it to lie flat.


