Introducción
Si el sonido de tu altavoz no es claro o no está funcionando, utiliza esta guía para cambiarlo.
Qué necesitas
-
-
Desatornilla los cuatro tornillos de 4.2 milímetros con un destornillador Y00.
Did you use iFixit tools? I just checked and I believe Y00 is correct. Y0 slips too easily. My test was with the Y bits from the Pro Tech Toolkit.
I too had to use an Y0 screwdriver (from Ifixit 64 bit driver kit....). Y00 just don't grip, may be some batches of the watch used different screws??
One screw just doesn't want to move, any suggestions/tips how to remove it?
Problem solved: after 2 times of careful WD40 application and blunting the Y00 a bit it came of with a lot of patience.
I also had a problem with one of the screws and flipping to Y0 worked for that one.
Yo use Y 0.6 y anduvo perfecto!!
Yo use Y 0.6 y anduvo perfecto!!!
-
-
-
Introduce el spudger metálico entre la tapa trasera del reloj y el marco, realiza esto por toda la tapa trasera.
-
Haz fuerza para hacer palanca y separar la tapa trasera del marco del reloj.
Il est plus facile et moins domageable pour le joint de commencer par ouvrir le cache de connexion situé à coté de l’axe du bracelet long. On peut alors glisser la broche sans détériorer le joint, qui est plus éloigné du bord à cet endroit.
I’m pretty sure the seal is equally far away from the edge on all sides.
This was the hardest part. I did use thin flat head screw to dismantle it. Using the metal spudger felt like impossible due to its thickness.
Did using the screwdriver damage the case in any way? I’d recommend being careful using a tool with smaller surface area as that will apply more pressure at the point of entry. As the guide states, a Jimmy may also be used instead of the spudger.
Not sure if it's a gasket or some sort of sealant paste/gel. Just took my case off, and the gasket seems intact (fused to back cover of the watch. Quick search for waterproof sealant yielded lots of possibilities - don't know which one to choose. Can anyone with experience provide advice?
most things I have seen online say use an RTV like permatex black sealant. pretty available at like autozone or o'reilly or walmart.
Ma questa guarnizione impermeabile si puo sostituire ? Come controllare se si è danneggiata? Come evitare che entri acqua dopo averlo aperto ?
Il est préférable d'utiliser, si possible, un outil adapté pour l'ouverture des boîtes de montre.
Avec précaution, le joint n'est pas trop abîmé. Il est distendu. Possibilité de le couper et de le réajuster correctement.
I have used a the Jimmy and I didn't need to do any force at all
Que puedo usar para poner en la tapa y cambias el sellado ya que se me arruinó.
Quiero que vuelva a ser hermético.
Gracias
-
-
-
Desconecta los tres conectores de la placa madre utilizando tus uñas.
-
-
-
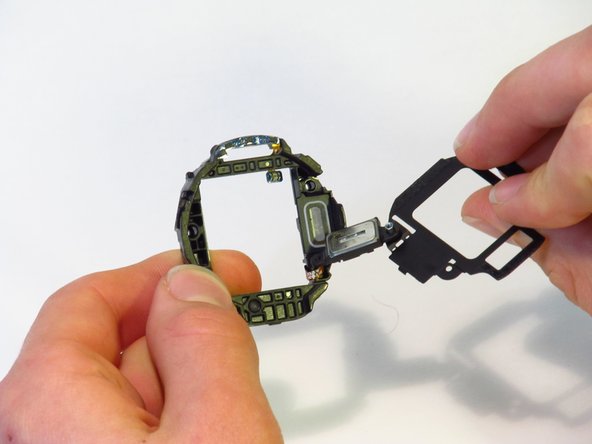
Separa la placa madre y la pantalla frontal utilizando un spudger.
Oui tuto bien clair. Opération réussi !
Bien qu’adroit de mes mains, et après avoir découvert la “bête à coeur ouvert”, je ne sais pas si je me serais lancé... C’est tout l’interêt de ce Tuto qui invite à le faire (car pas trop de détails), et qui suivit pas à pas permet de s’en sortir. Bravo
Merci Dan.S
Better replace the 2 bolts from next step first.
The guide has you remove the screws second because it makes it possible to remove the whole assembly without snapping any cables.
Ok... Woher bekomme ich die Displayeinheit ???🤷🏻♂️
-
-
-
-
Utilizando un destornillador JIS #00, desatornilla los dos tornillos de 4.5mm.
-
-
-
Desconecta el cable plano de la batería del conector.
-
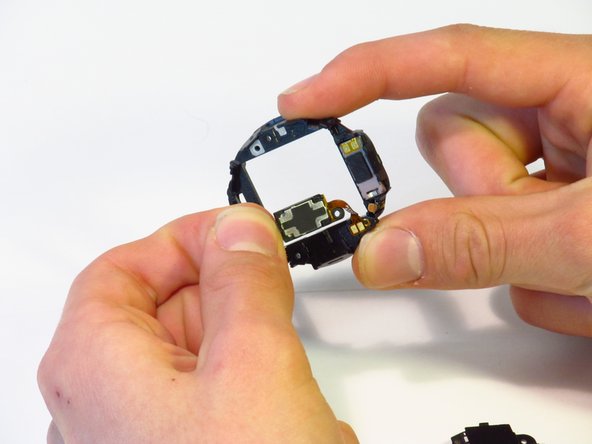
Separa el chasis de la placa base.
Hi the ribbon has come away from the mother board. How do I stick it back on? What type of adhesive do I use?
I broke my ribbon :( ordering a new one. How do I stick it on?
I also broke the ribbon for the motherboard. What adhesive should I use to reattach it
I'd like to know too please
Be very careful with a ribbon that cannot come off on the opposite side of the red box on the motherboard when preforming this step. I found this and managed to avoid it.
You should first detach/separate the buttons ribbon cable from the side of the plastic casing so you don't tear/break it accidentally. (orange box, the cable is soldered onto the motherboard cannot detach it from there)
-
-
-
Separa la batería de la placa madre.
I just used this guide to do a replacement, the watch works perfect now. Pay attention to whats in your hand vs whats on the guide a couple of the steps are not as straightforward just take your time. Overall good guide though.
Replaced the battery successfully with this guide. Take your time to carefully see whats on the watch compared to the guide.
I removed the battery ribbon cable in step 7 by using a really small flat screwdriver to lift the cable from the housing. It's attached with adhesive tape.
Perfect. I just remove the two bolts form step 6. Battery was a little difficult to remove due to a tape that attached it on board.
Works very well.
-
-
-
Cuando estes re-ensamblando, coloca la batería en el ensamble de plástico primero. No la pegues al adhesivo primero. De esta manera, es fácil de posicionar el cable de la batería.
-
Cuando asegures el cable de la batería, asegura que el agujero que atraviesa la clavija es circular. El agujero en el cable de tu bateria de remplazo podría ser malformado. Puede que quieras agrandar el agujero antes de asegurar el cable.
-
Para agrandar el agujero, utiliza la herramienta par la SIM del Pro Tech Toolkit, un clip pequeño o una herramienta con punta fina. La herramienta igual puede ser usada para presionar gentilmente el cable de la bateria en la posición correcta. Has esto cuidadosamente para evitar daños
-
Siga las pasos 8-1 en orden inverso para el re-ensamble
Notez que la montre ne redémarre pas tant que le boitier n’est pas fermé.
-


Para volver a ensamblar tu dispositivo, sigue estas instrucciones en orden inverso.
Para volver a ensamblar tu dispositivo, sigue estas instrucciones en orden inverso.
Cancelar: No complete esta guía.
Una persona más ha completado esta guía.
Un agradecimiento especial a estos traductores:
100%


Estos traductores nos están ayudando a reparar el mundo! ¿Quieres contribuir?
Empezar a traducir ›
Equipo

Cal Poly, Team S15-G2, White Fall 2018 Miembro de Cal Poly, Team S15-G2, White Fall 2018
CPSU-WHITE-F18S15G2
4 Miembros
34 Guías creadas
3 comentarios
For step 3, you should be able to also remove the rubber rectangle at the base of the back plate exposing that connector area… stick the spudger in there and lift off the back plate. I assume there may be a reason why you didn’t use this method.. but I just did and it opened the back part enough where I could separate the rest by hand.
Still, excellent tear down… it made my speaker repair that much easier!
i successfully accomplished the task, but did manage to damage the soft button while prying the mainboard from the frame. Be careful to pry on the upper layer of MB rather than deeper down towards the display face. i am now searching a way to replace this small button/ribbon, so my repaired watch will work properly again.